


None
Most users ever online was 301 on Thu 21 Oct 2021 - 11:24
by redboat219 Tue 27 Sep 2022 - 11:43
» Land Rover Defender D90 photos and details only (picture intensive!)
by babyboy Fri 25 Jun 2021 - 16:39
» [Offroad Bashing and Rally] Offroad Bashing and Rally at Tampines Track 12 Jan 2020 - 0900hrs
by boolean21 Sat 11 Jan 2020 - 10:15
» [Scale Trail] Woodgrove Ave - Sunday 20 Oct 2019 0900hrs
by boolean21 Sat 19 Oct 2019 - 16:31
» vHOBBY RC videos
by CraftRC Fri 21 Jun 2019 - 21:32
» Suzuki Samurai 3D Printted project
by CraftRC Sat 4 May 2019 - 18:39
» WTS : Redcat Gen 7 Pro
by staypuft Mon 7 Jan 2019 - 11:31
» Hello all! Dan here
by csd8888 Fri 5 Oct 2018 - 8:27
» [Offroad Trails] Offroading at Tampines Quarry 16 Sep 2018 - 0900hrs
by boolean21 Sat 15 Sep 2018 - 18:41
» [Scale Trail] Woodgrove Ave - Sunday 12 Aug 2018 0900hrs
by boolean21 Sat 11 Aug 2018 - 22:51
» [Trail and Bash!] Woodgrove Ave - Sunday 22 Jul 2018 0900hrs
by boolean21 Sat 21 Jul 2018 - 19:39
» [Scale Trail] Woodgrove Ave - Sunday 01 Jul 2018 0900hrs
by boolean21 Sat 30 Jun 2018 - 20:39
» wts hobbywing esc + motor
by kelvintan_hc Thu 28 Jun 2018 - 15:36
» Axial roll cage crash
by CraftRC Fri 1 Jun 2018 - 20:16
» Jeep cherokee XJ crawling
by CraftRC Sat 26 May 2018 - 21:54
» Jeep cherokee XJ crawling
by CraftRC Sat 26 May 2018 - 21:54
» Extreme Rock Crawler Axial Wraith
by CraftRC Tue 8 May 2018 - 17:35
» [Scale Trail] Woodgrove Ave - Sunday 06 May 2018 0900hrs
by boolean21 Sat 5 May 2018 - 17:14
» Cab Land Rover Defender
by CraftRC Fri 4 May 2018 - 17:41
» Cab Land Rover Defender
by CraftRC Fri 4 May 2018 - 17:41
| boolean21 | ||||
| RTECH | ||||
| gionata78 | ||||
| laneboysrc | ||||
| oceanic | ||||
| Marpek | ||||
| babyboy | ||||
| ShaiAX55 | ||||
| Wrigleys | ||||
| Holdencars |

The Building of Trail Finder 2 - Zax13's TF2
SG Crawlers Forum :: RC Talk - Trail Trucks and Crawlers :: RC Trail Rigs and Rock Crawlers Discussion
Page 1 of 2 • 1, 2 ![]()

The Building of Trail Finder 2 - Zax13's TF2
![]() by Zax13 Tue 18 Dec 2012 - 20:12
by Zax13 Tue 18 Dec 2012 - 20:12
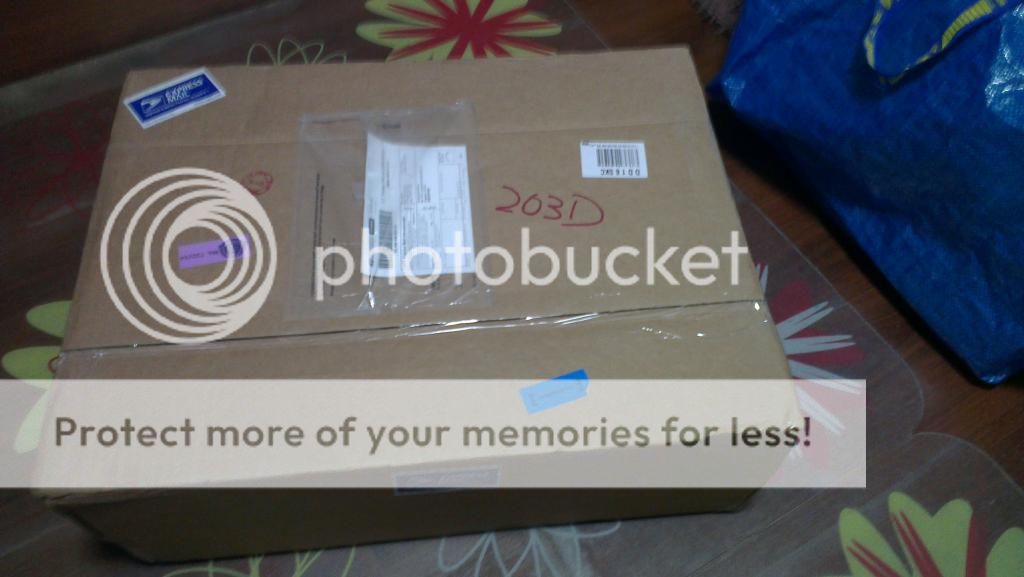
Lets open it up.... Nice packaging by the way....
The RC4WD Trailfinder 2.........
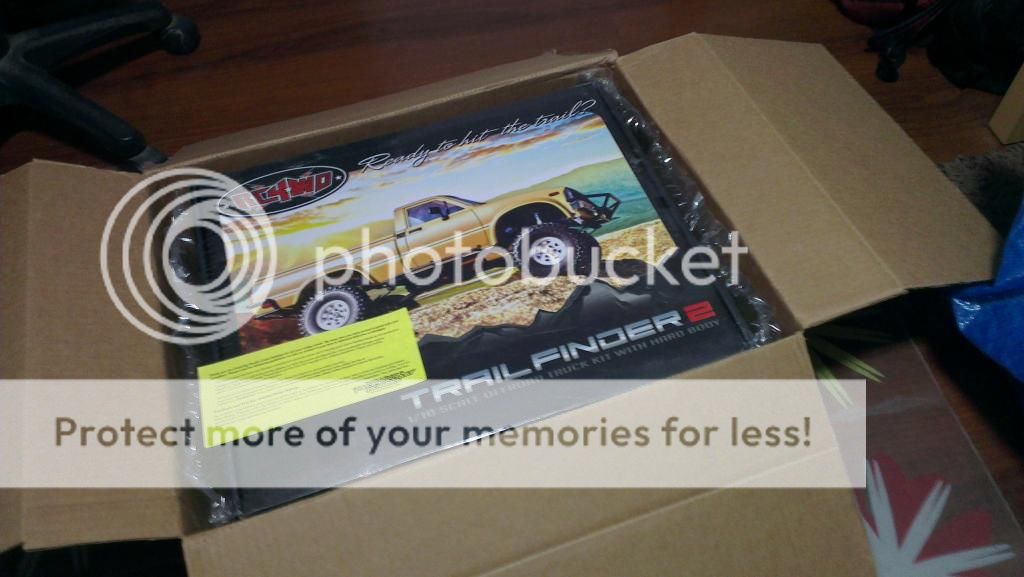
Lets see whats inside the box...
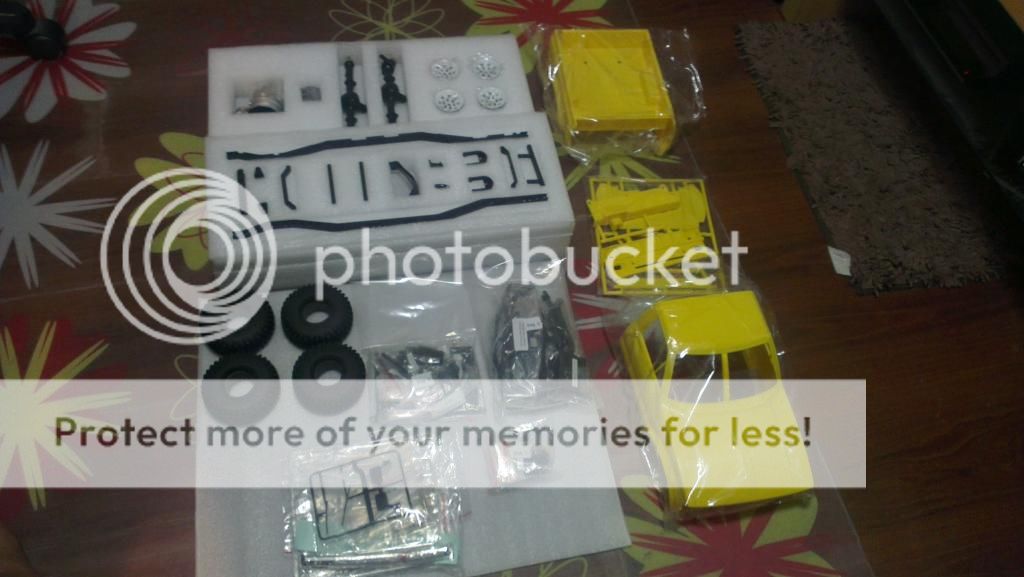
I must admit the packaging of this kit is well thought off. Very well laid out and protected...
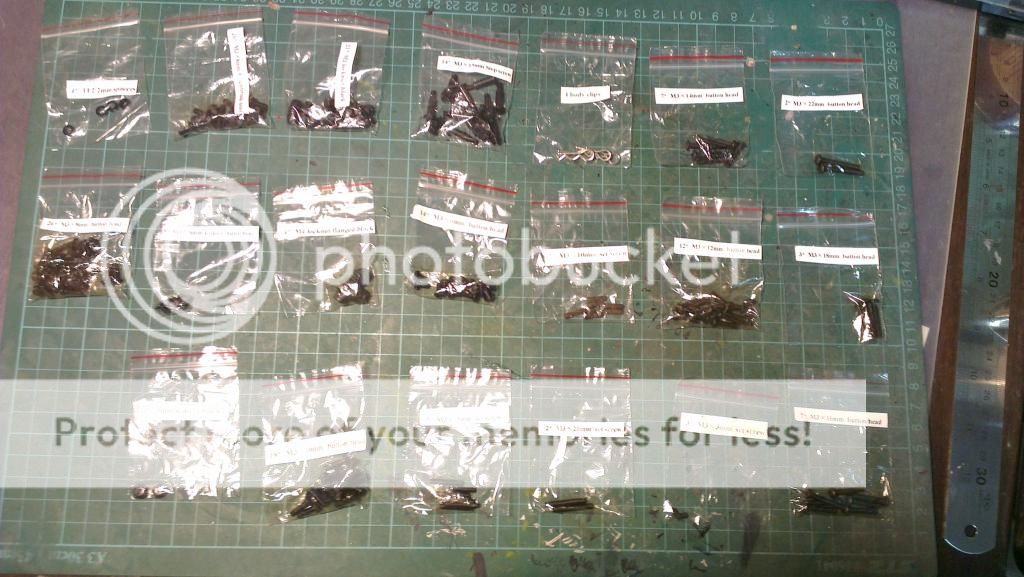
Here are the bags and bags of screws/fasteners to built this marvelous kit.... I was surprise that this is the first time that a kit came with bags which are properly labeled....
I must praise RC4WD for doing this. Doesn't really need a rocket scientist or a champion builder to identify individual parts.... Way to go RC4WD!!!
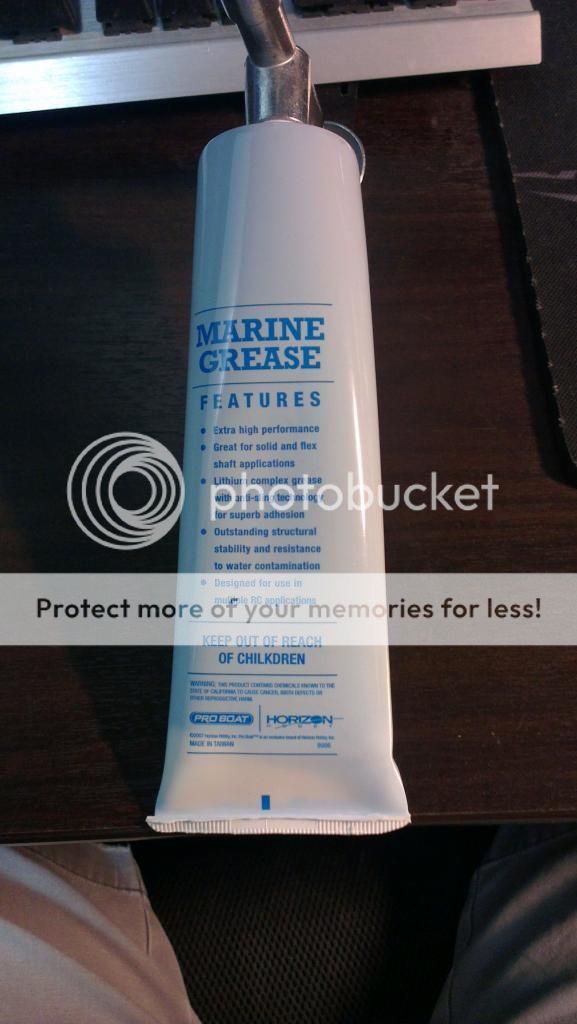
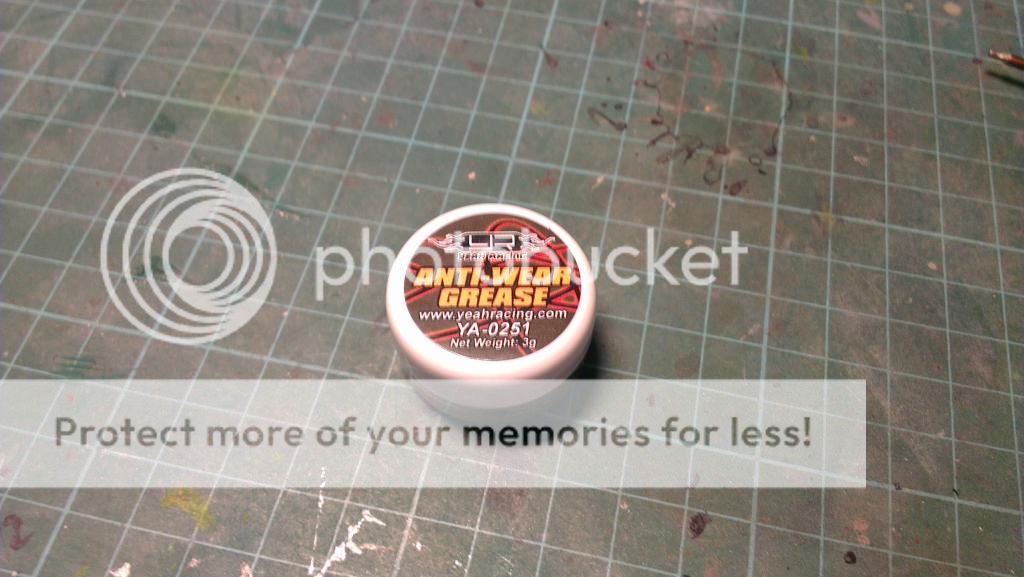
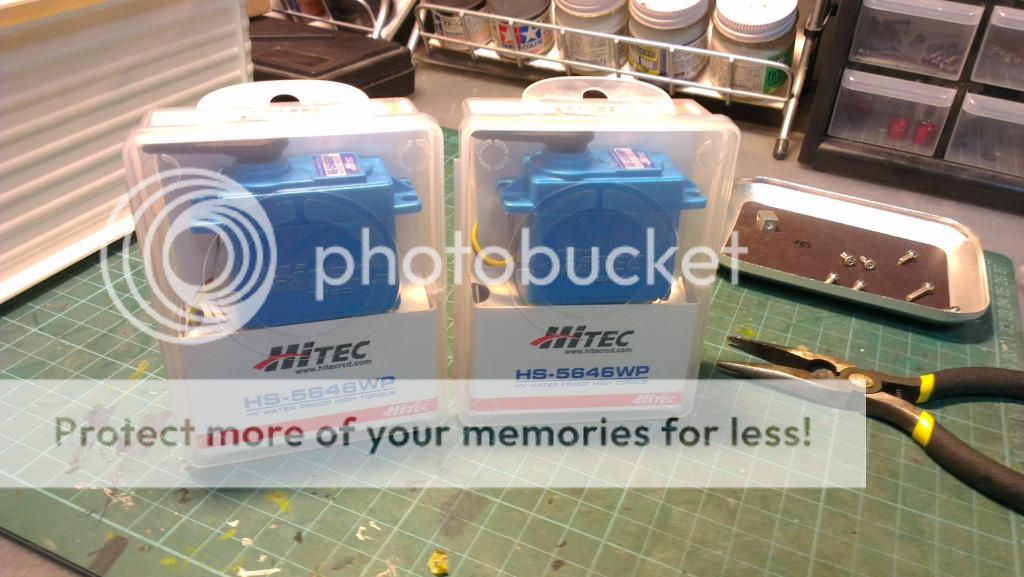
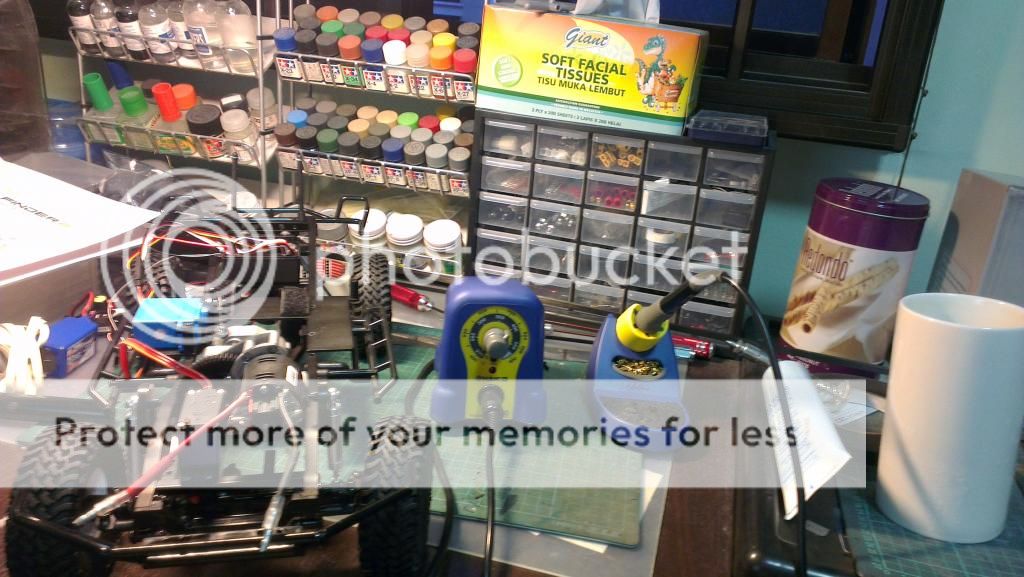
Before starting to built the kit there are some items that I got.
1. Marine Grease
2. Antiwear Grease
3. 2 x servo (prefered waterproof)
4. Speed Controller
5. Motor.....(Just need 1)
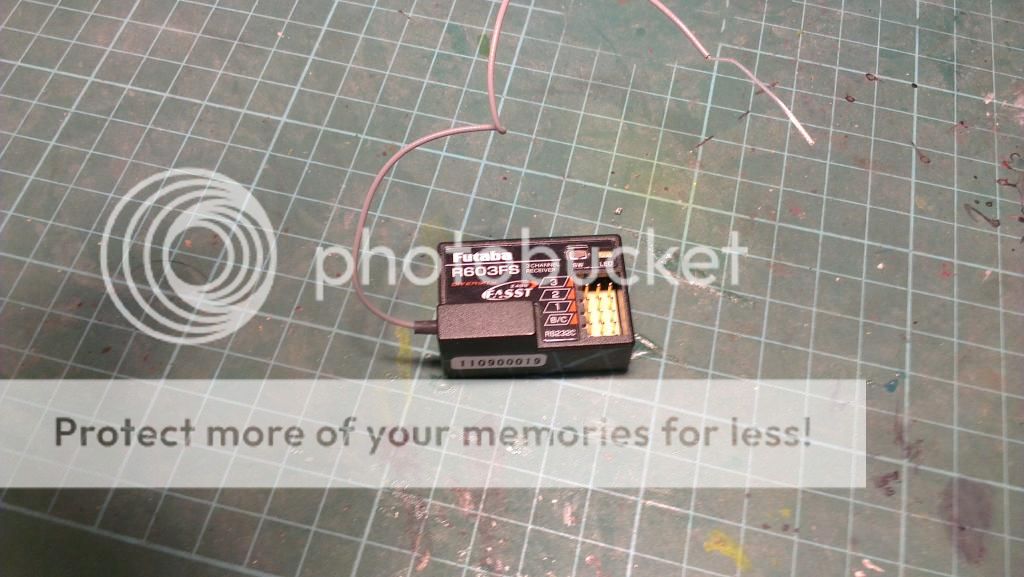
6. Receiver....(Not the one im using for this rig)
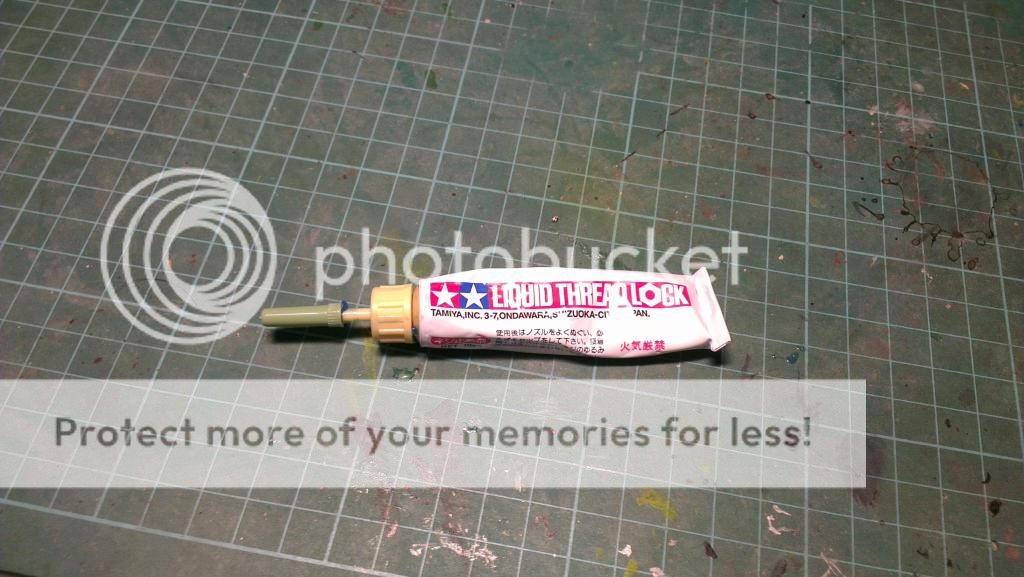
7. And not forgetting....... Threadlocker.....
Last edited by Zax13 on Tue 18 Dec 2012 - 20:17; edited 2 times in total

Zax13- Crawler
- Posts : 345
Join date : 2011-12-22
Location : Sengkang
Re: The Building of Trail Finder 2 - Zax13's TF2
![]() by Zax13 Tue 18 Dec 2012 - 20:13
by Zax13 Tue 18 Dec 2012 - 20:13
All screws are not threadlock just as I expected...
Inside luckily there is grease... So no point greasing some more...
There you go the finish product...
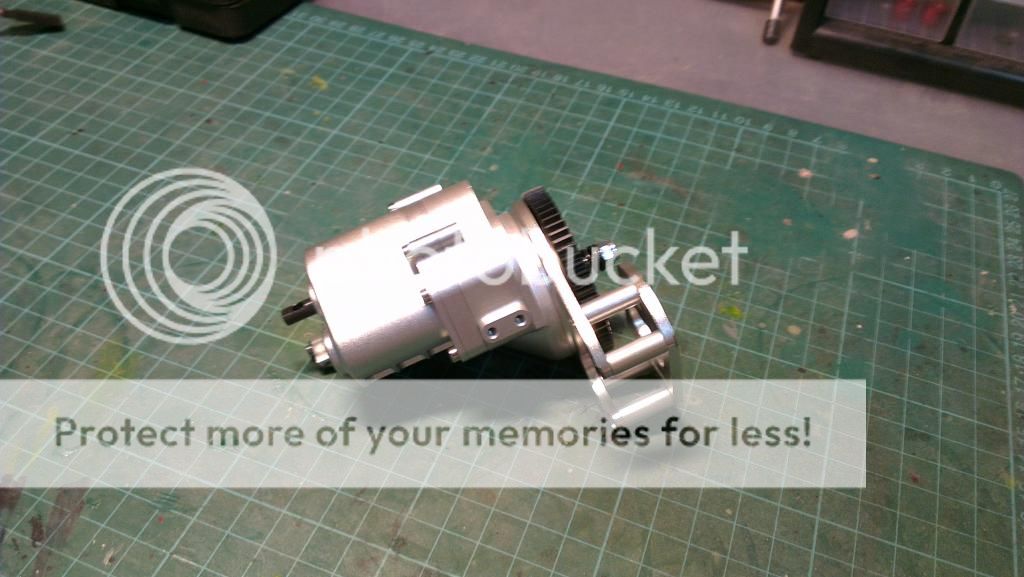
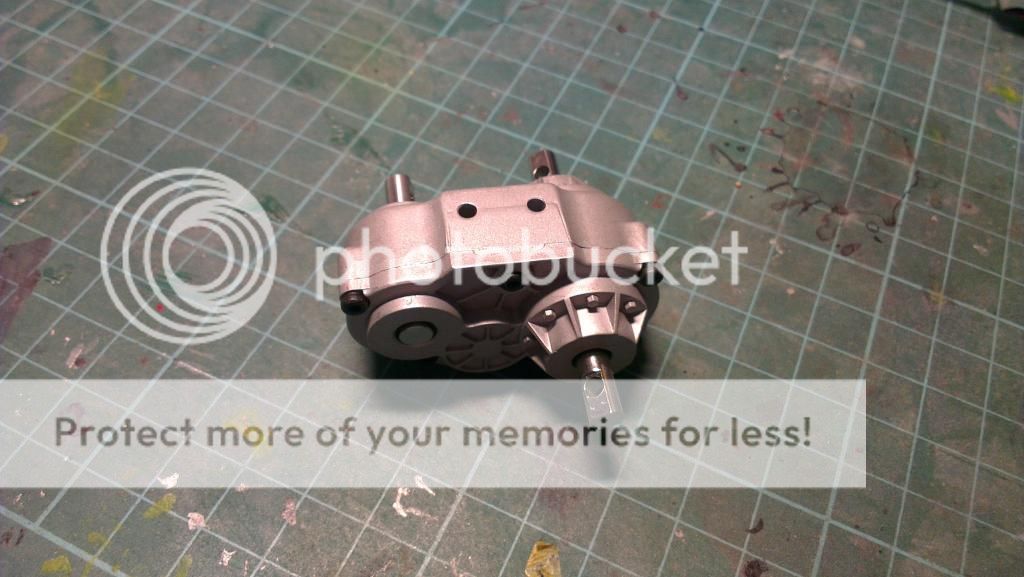
Next... Is the hammer transfer case which also comes pre-assembled.
Goes the same for the screws... No thread locker what so ever...
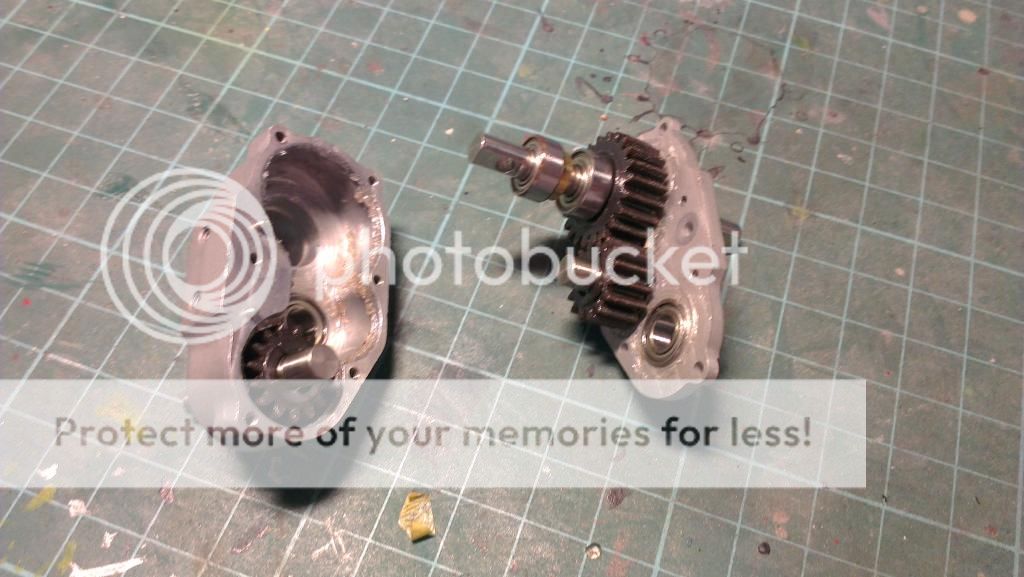
But luckily there is grease in there yet I think I will put in some more anti wear grease since I have opened it up.
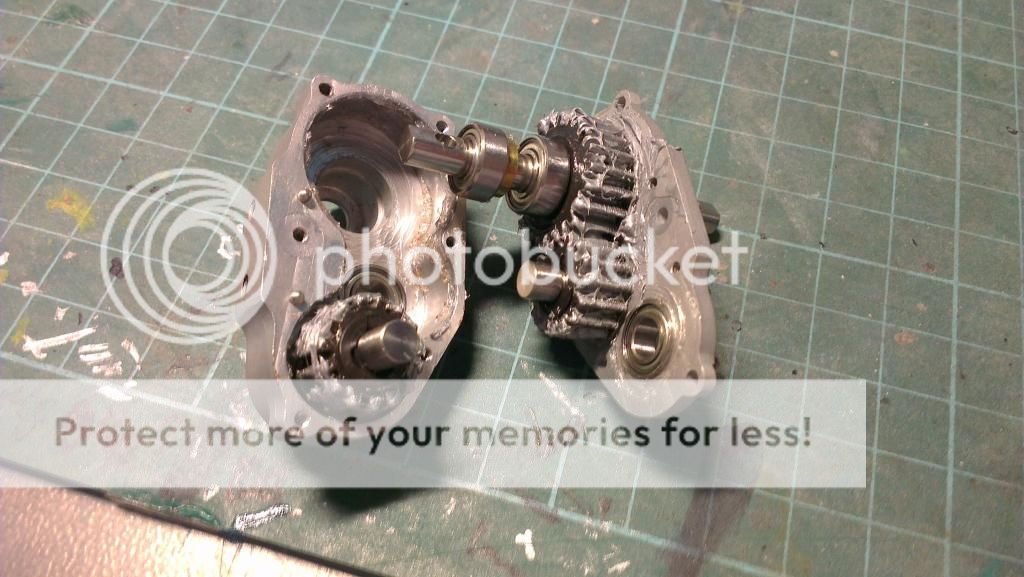
I did not bother to put in marine grease in there as I don't think it is necessary...
Put everything together and done...
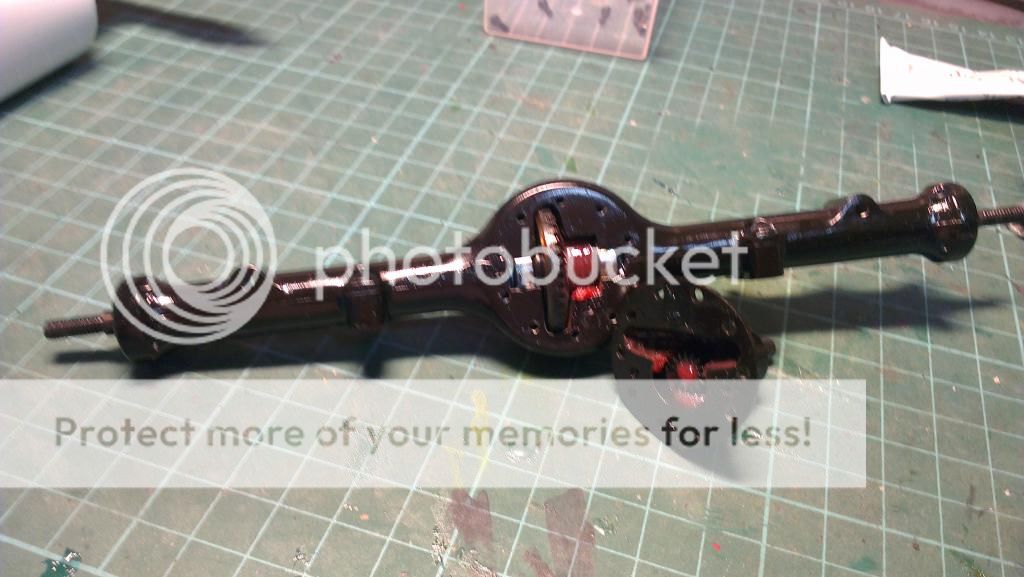
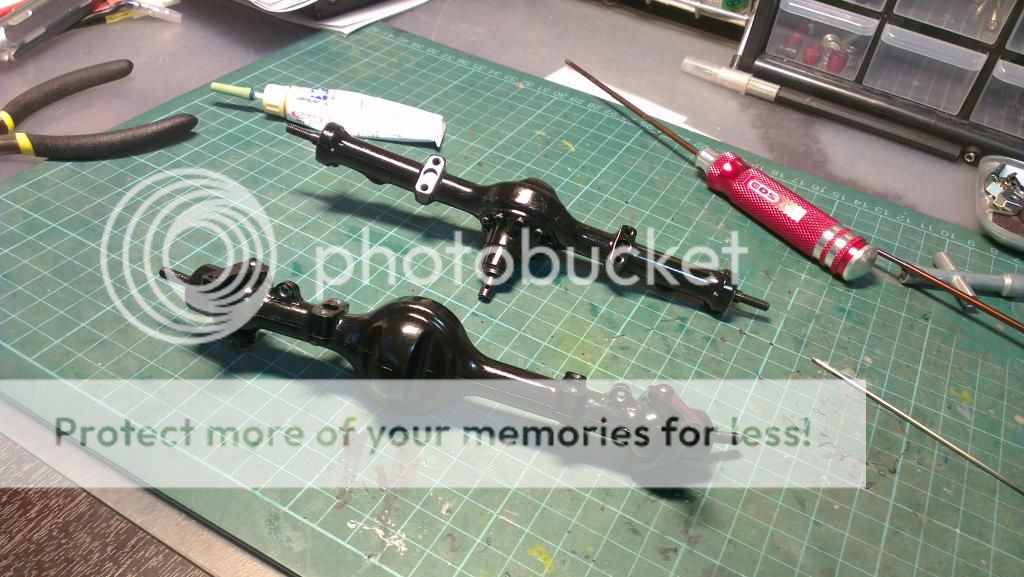
Next will be the axles front & rear.
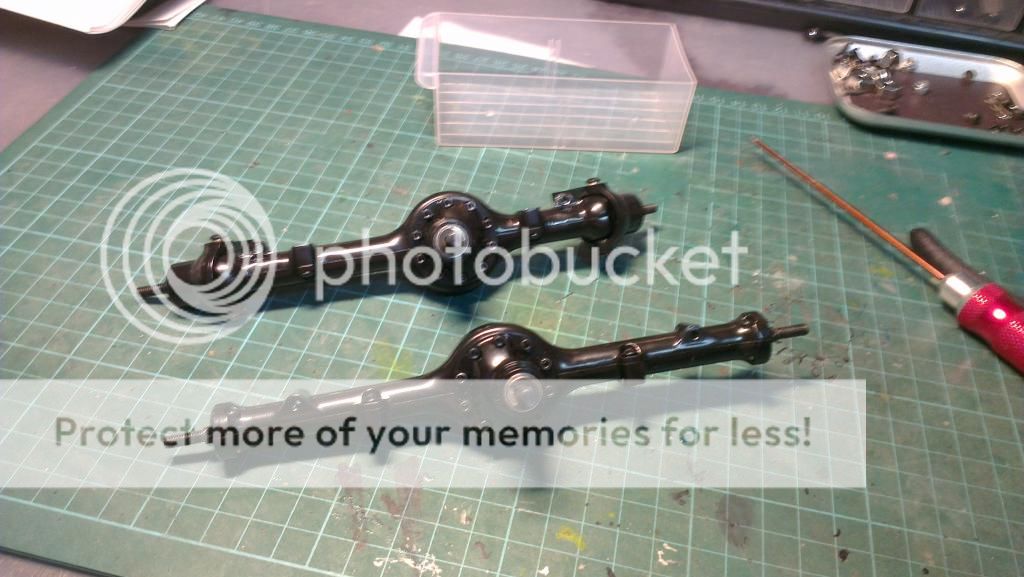
Got to work opening up the rear axle to check if there is grease.... Yup, plenty.
Majority of the axle screws are M2 size so don't force to tighten any of them risking breaking the head.
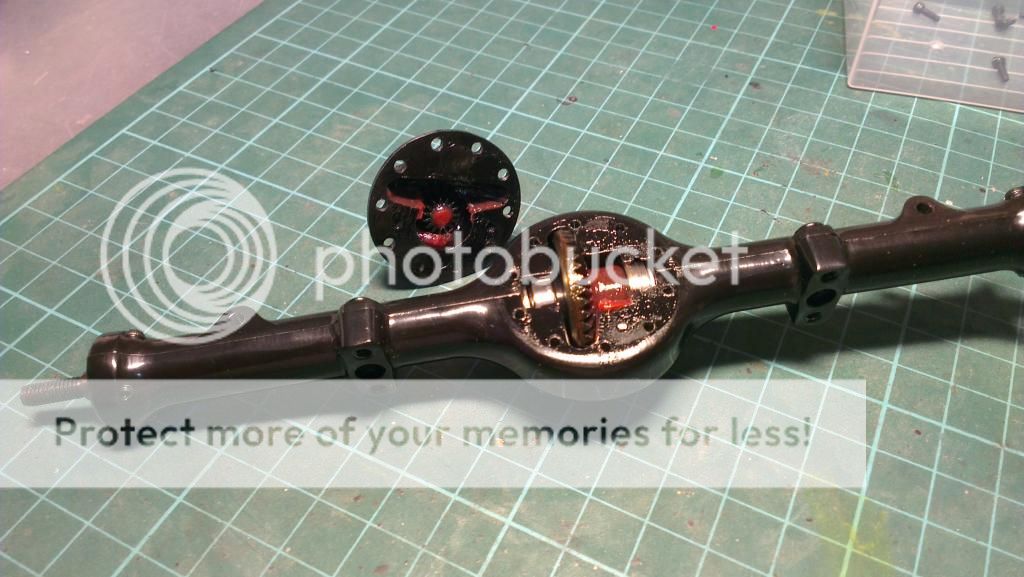
But none on shaft side... But its ok, since we are gonna stuff some marine grease in there.
What it look like after stuffing marine grease in there. I did not stuff any in the deferential gear as I don't think it is necessary.
Before securing the cover i put a coat of marine grease to the mating surface as to create some sort of a seal from water seeping in.
Don't forget to put thread locker before installing any screws.
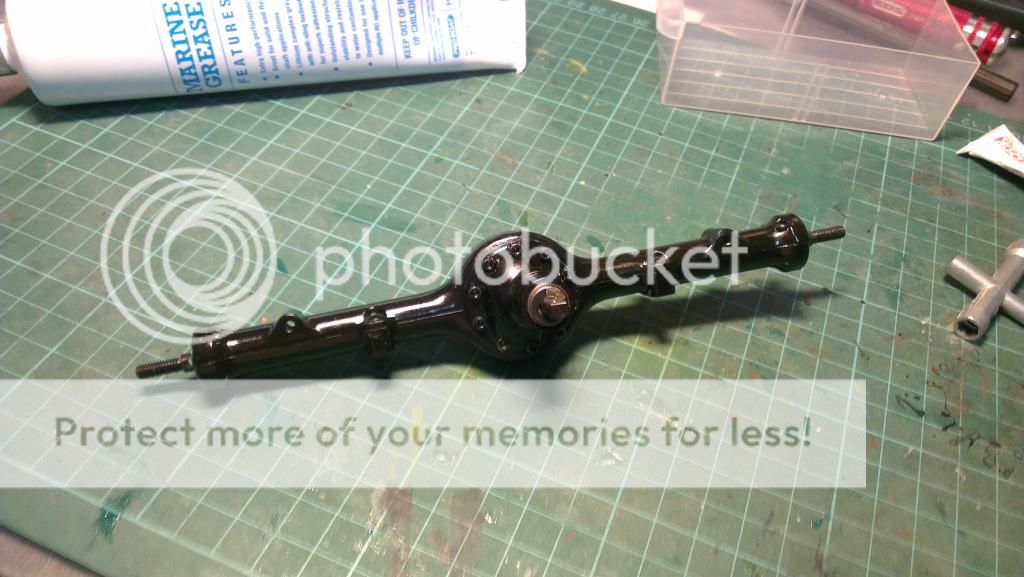
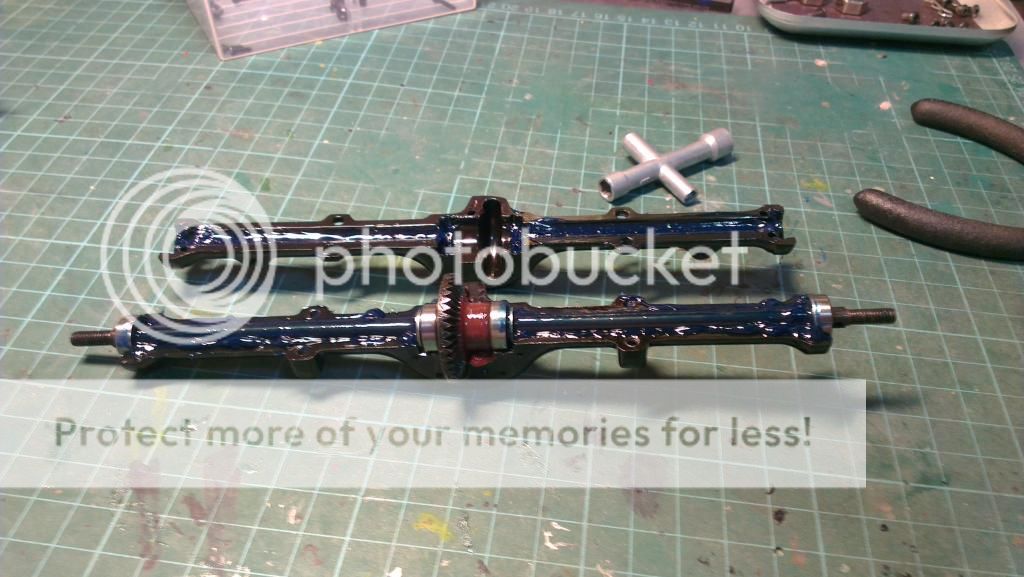
I proceed to work on the front axle and completed both fwd & rear axle.
Last edited by Zax13 on Thu 20 Dec 2012 - 6:55; edited 3 times in total
Zax13- Crawler
- Posts : 345
Join date : 2011-12-22
Location : Sengkang
Re: The Building of Trail Finder 2 - Zax13's TF2
![]() by Zax13 Tue 18 Dec 2012 - 20:13
by Zax13 Tue 18 Dec 2012 - 20:13
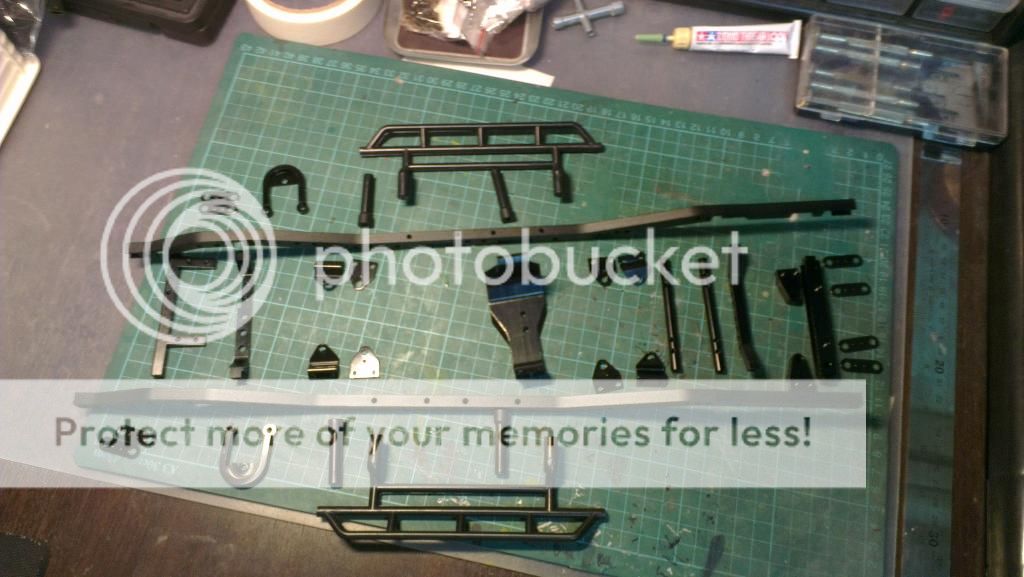
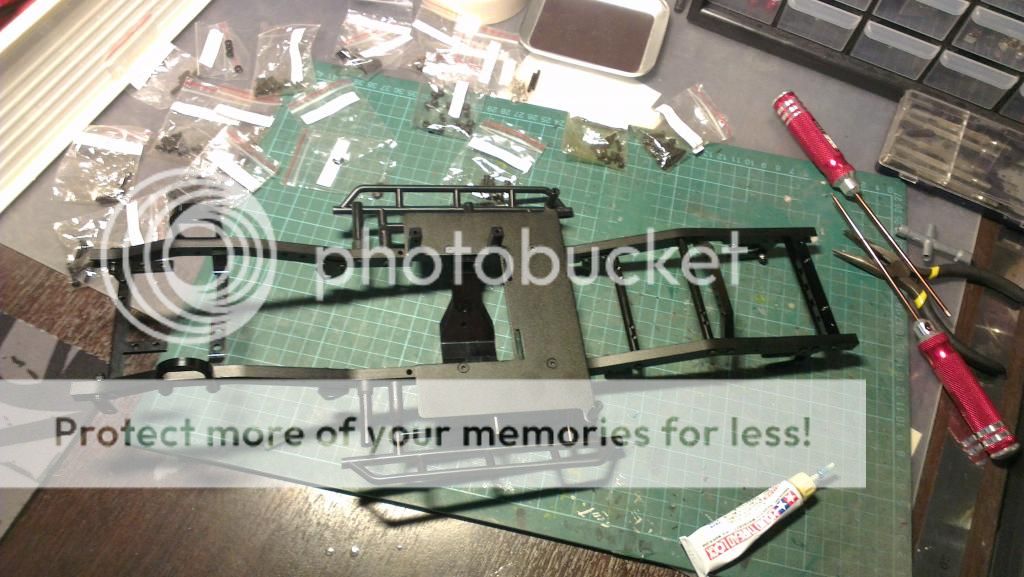
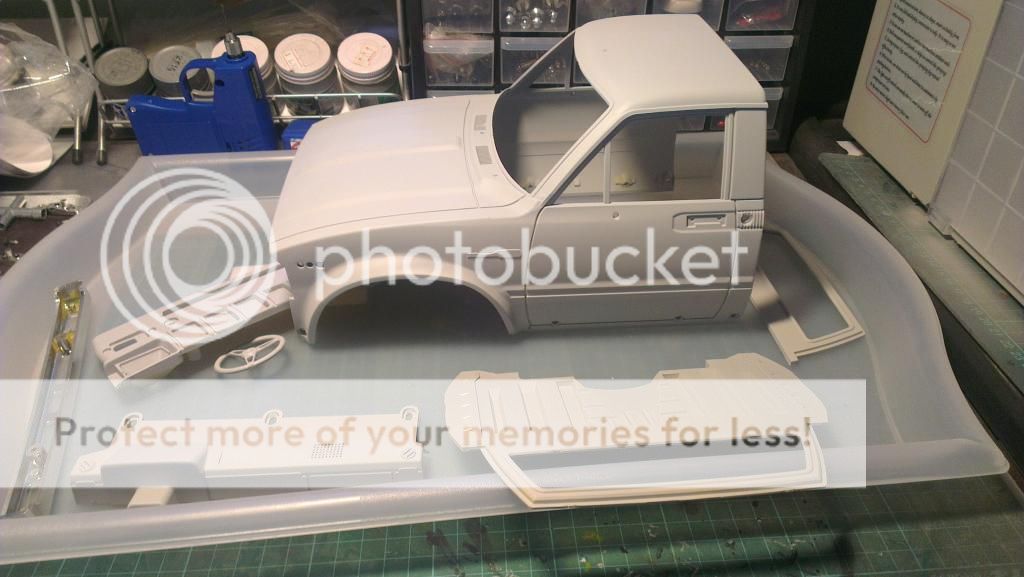
The instruction booklet is very clear and there is no trouble assembling everything.
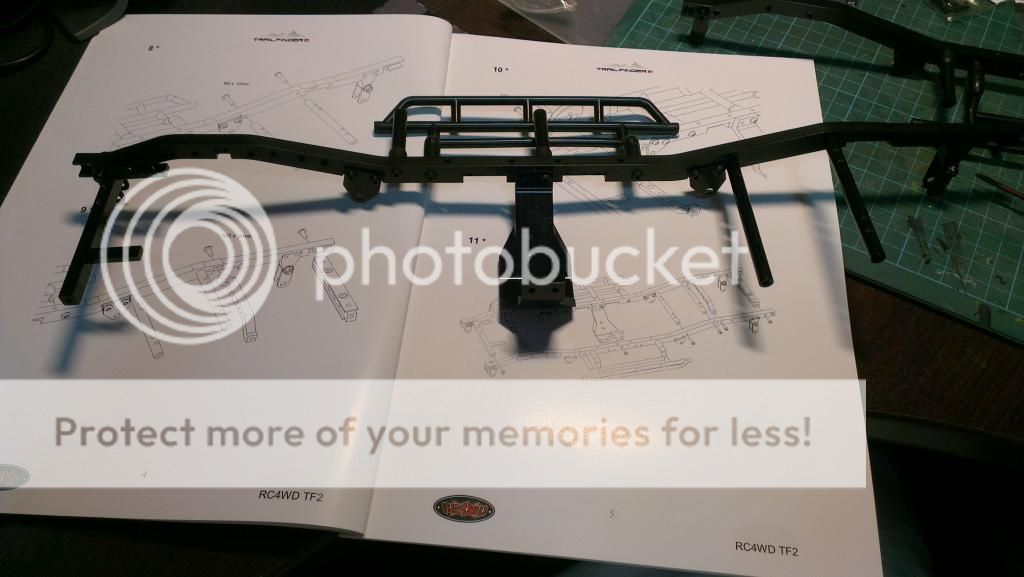
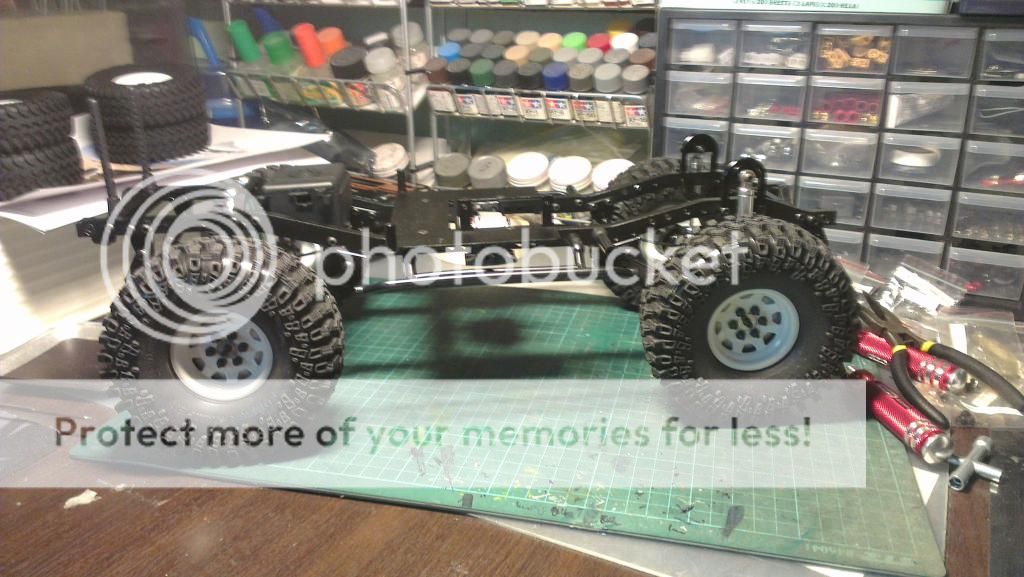
Here you go the completely assembled. Im getting excited already from looking the assembled frame. The built quality of individual parts is good and they fit quite nicely.
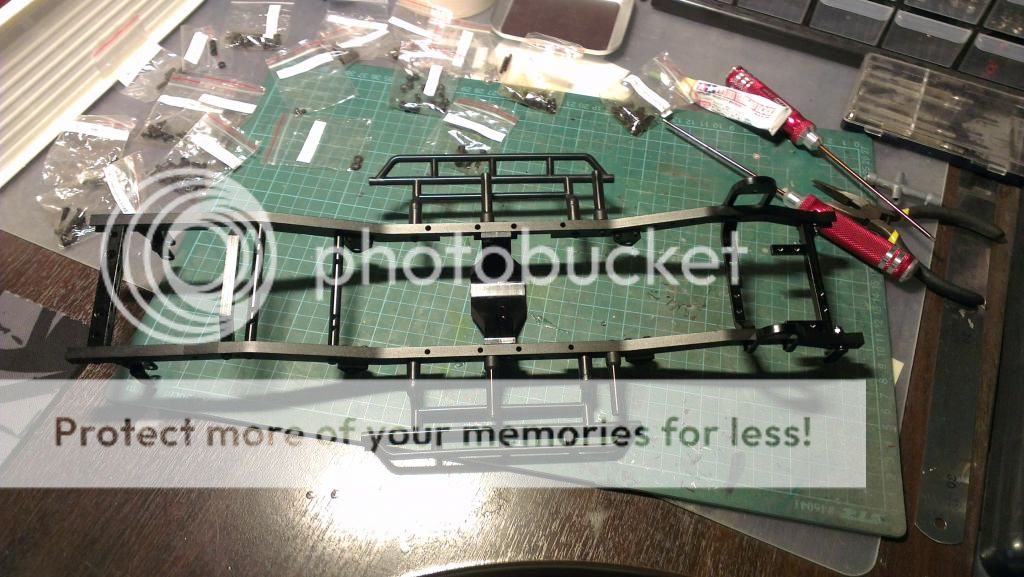
The radio/battery tray should be able to fit a standard size lipo battery and still have room to install any size esc.
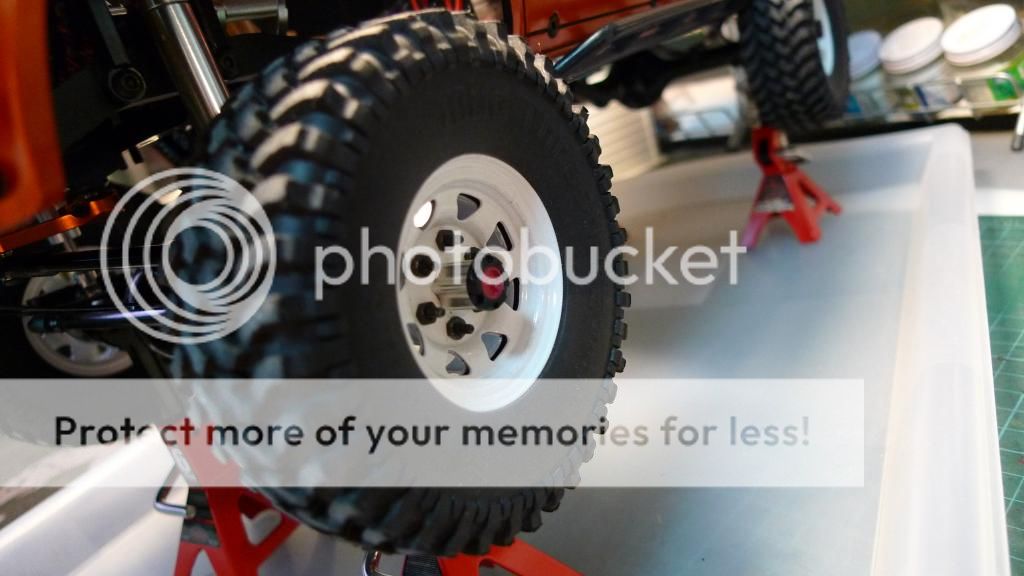
Assembled the wheel and find that for scale trailing is really ok but practically for serious trailing find its a bit to small.
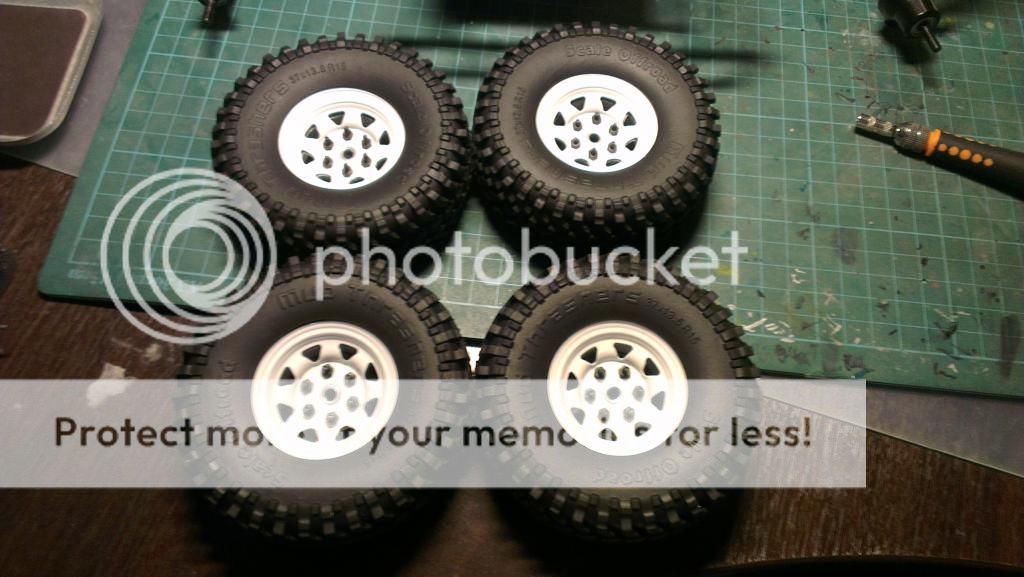
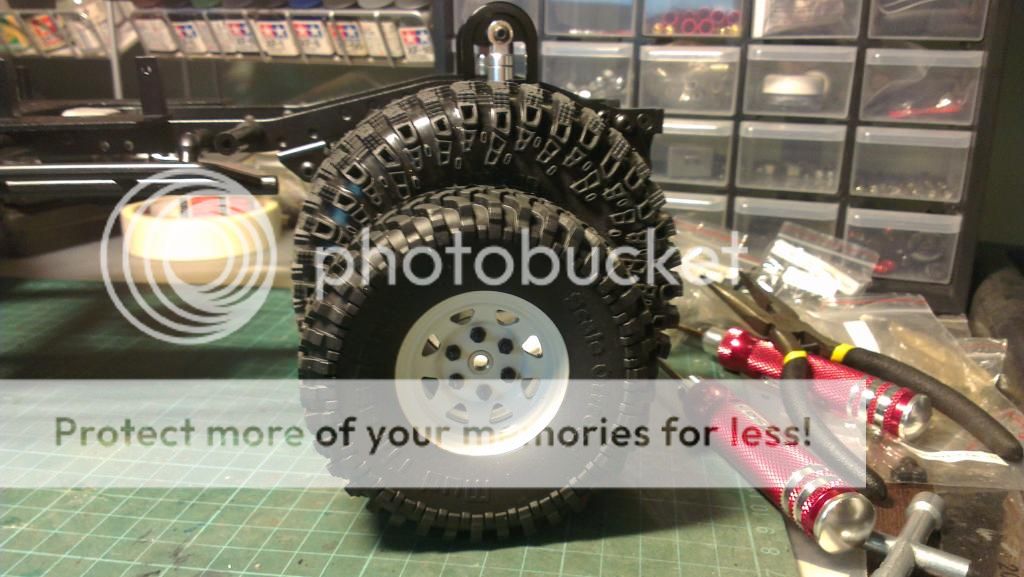
Comparison between the 1.55" mud thrashers beside a 1.9" interco irok side by side.
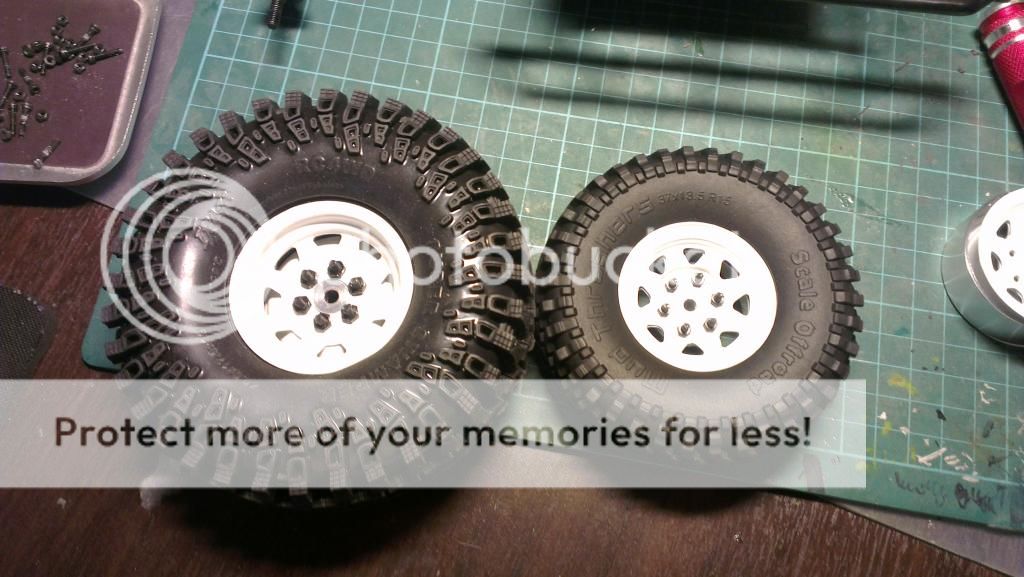
Lets see how the 1.9" tires look on the TF2..... NICE!
Too bad if wanna fit this set with the TF2, I need to bump up a lot of things to prevent the wheel from rubbing when trailing
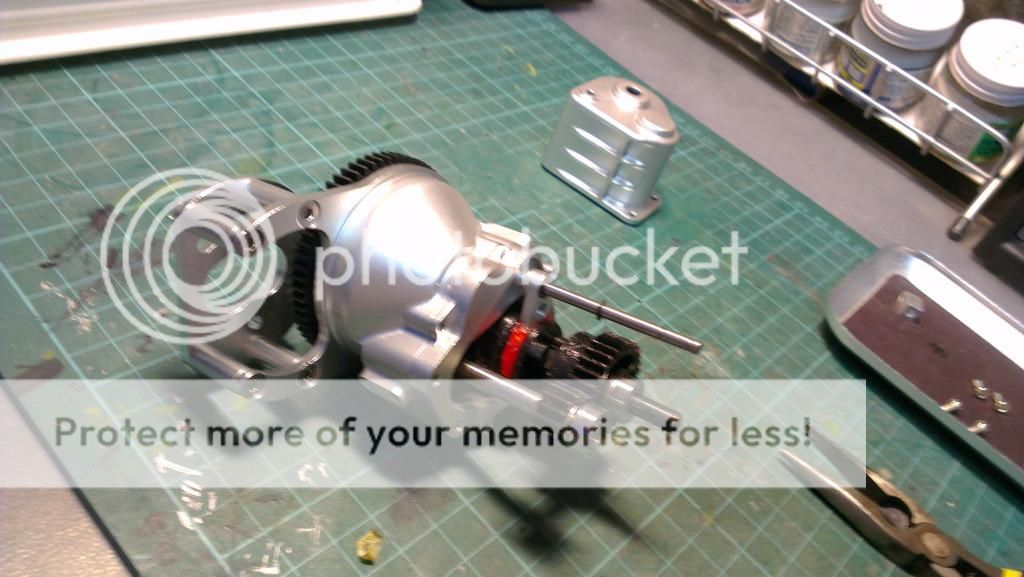
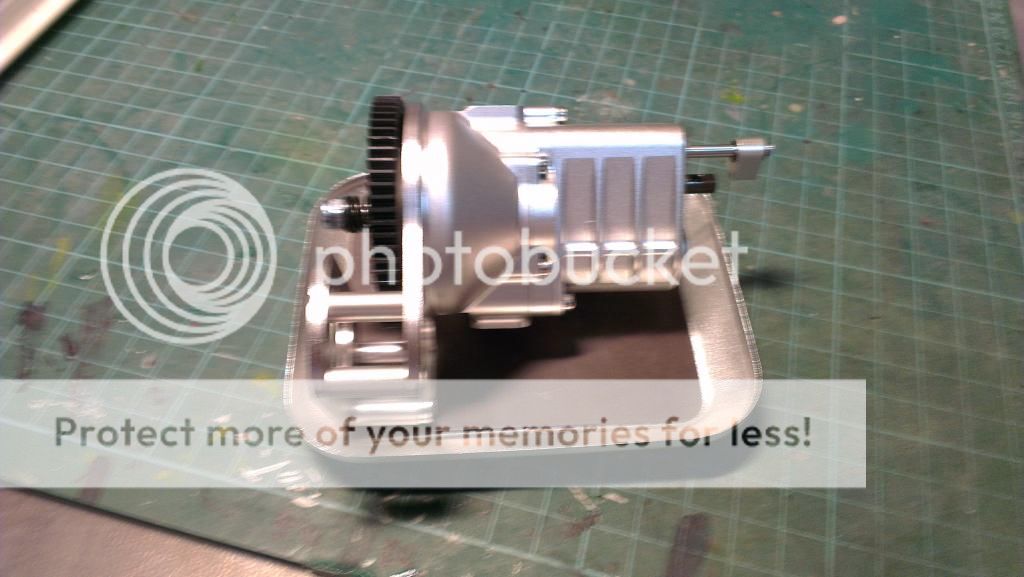
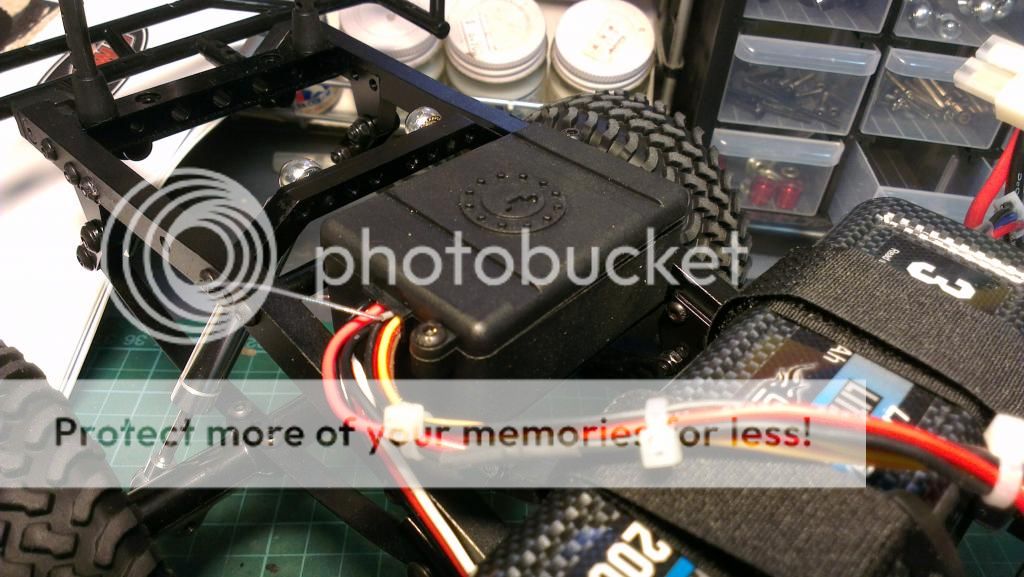
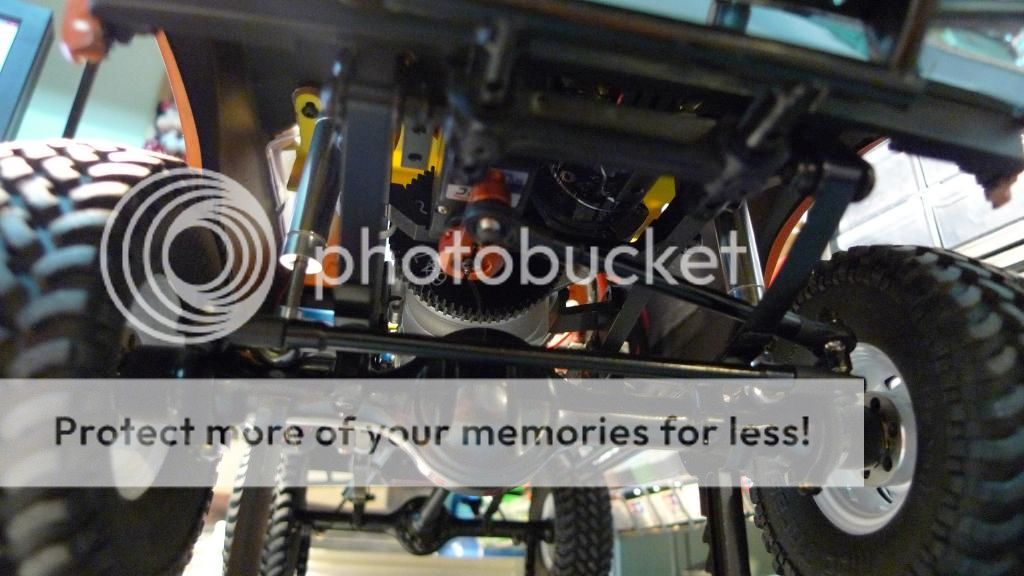
So I continue putting the receiver box, gear & transmission case.
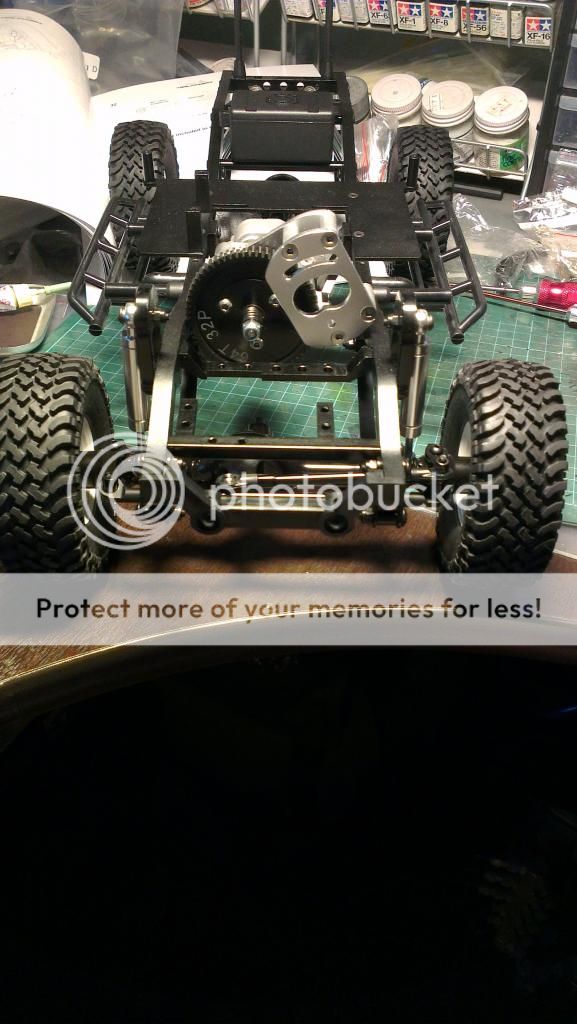
Electronics is the next thing installed starting with the steering servo. Change the the servo arms to a metal one to reduce flexing.
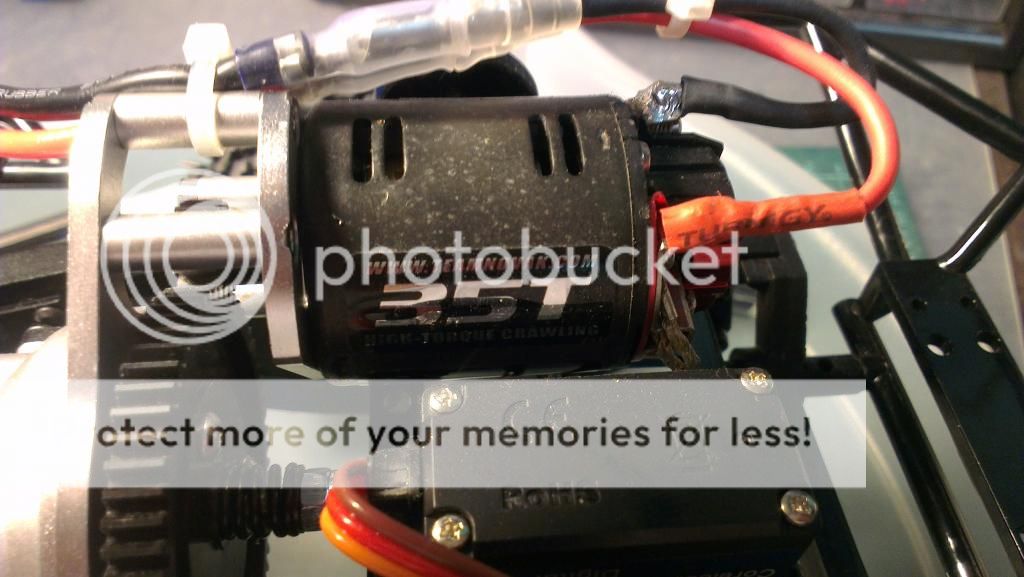
Mounting the gear change servo and the motor as well.
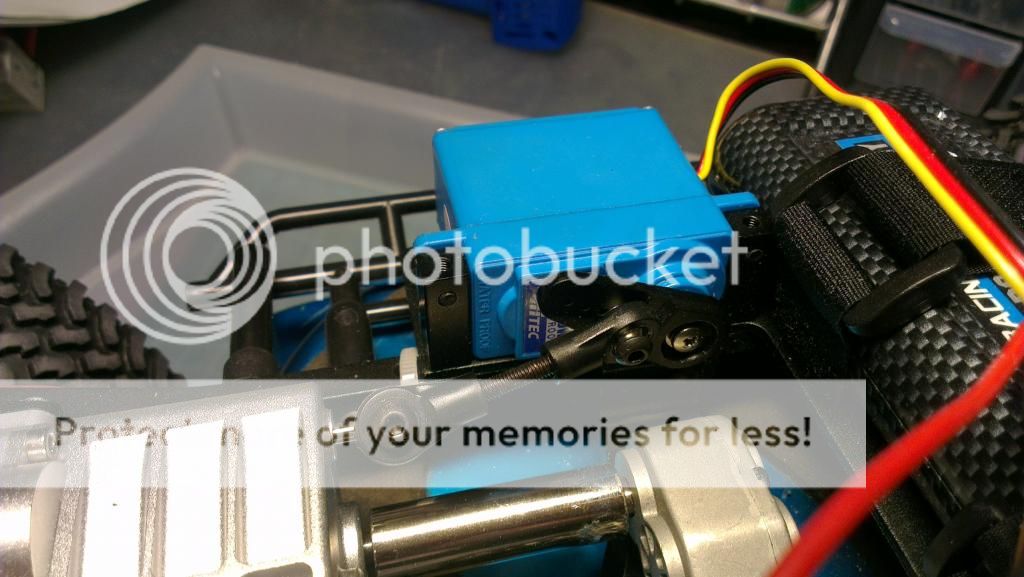
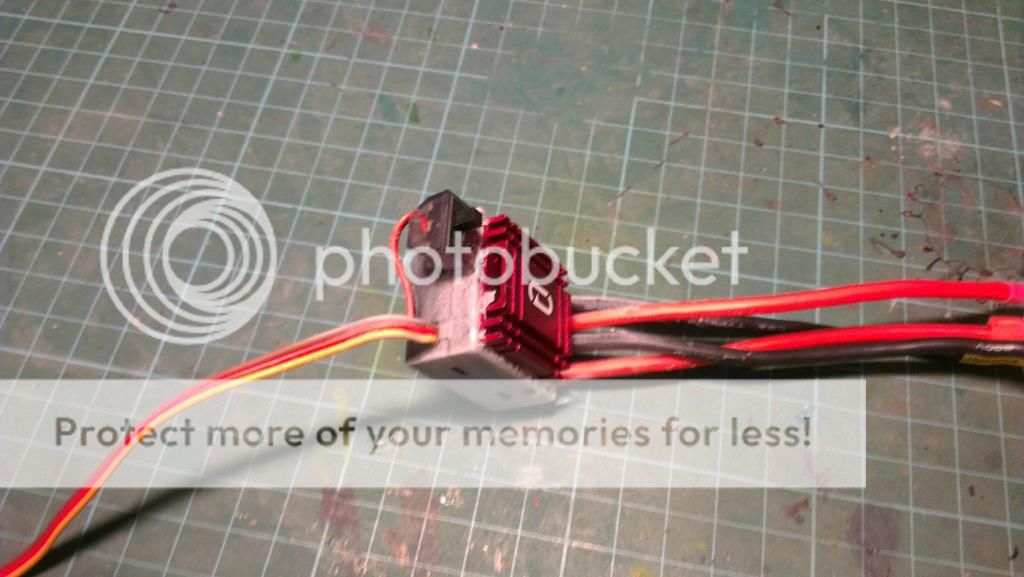
Soldering all the wires required for the electronics.
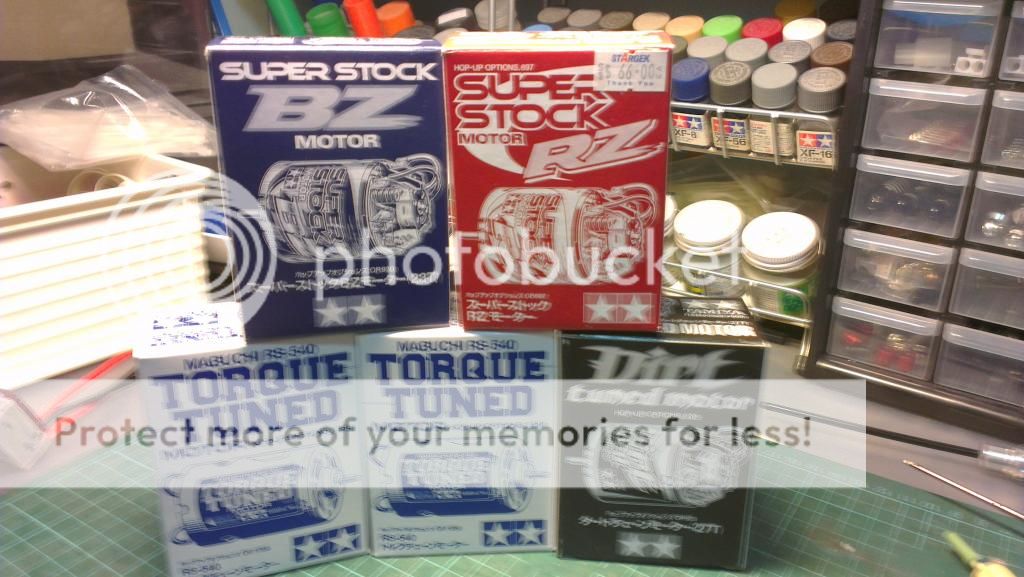
BTW for this build im using a 35T novak motor.
Receiver box accomodates a receiver and FEETECH Direct Power Supply Connector with BEC #FE-DPC-1. Im using a fitech servo but due to its high power requirement of 7.4v-8.4v I need to connect through this device to send a direct voltage to the steering servo while maintaining a voltage of 5v to the receiver.
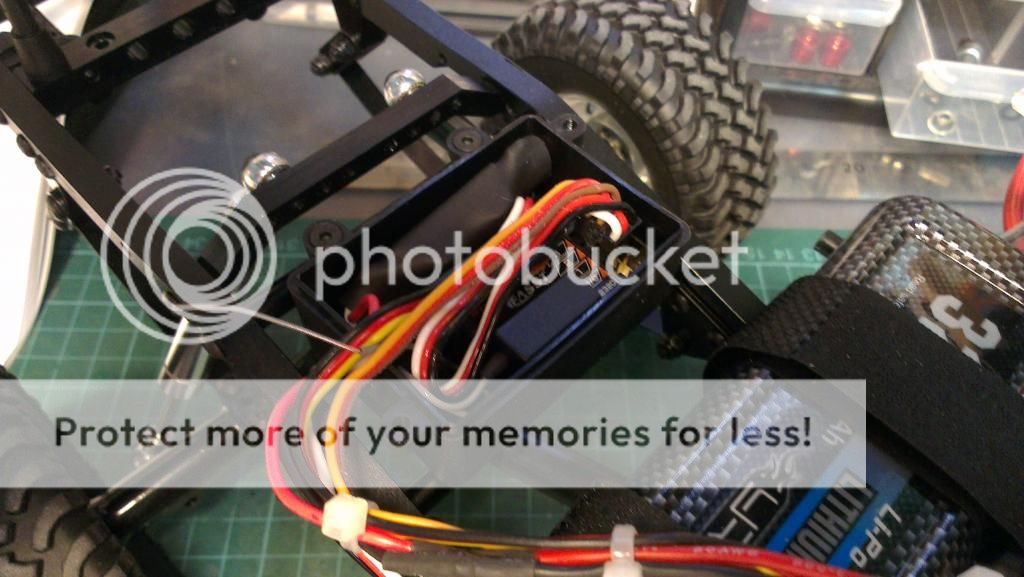
Looks neat after the box is closed up.
The esc is just mounted using double sided tape but might need a stronger alternative if im gonna submerge this fella underwater. Notice that the esc have coated with plasti dip... Might need another coat though.
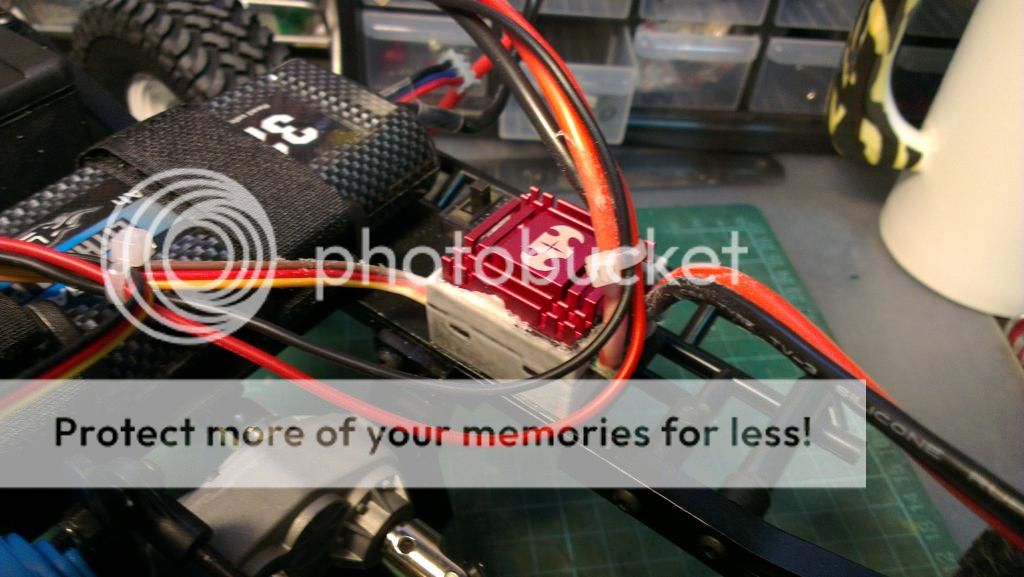
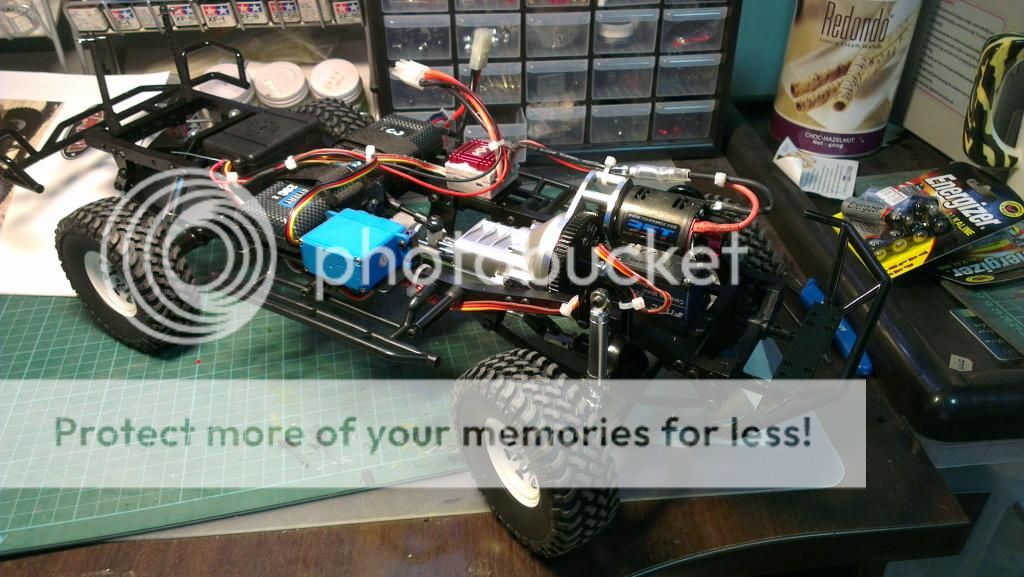
Everything connected and with a few adjustments everything looks very sound I must say... Looking very nice this built.
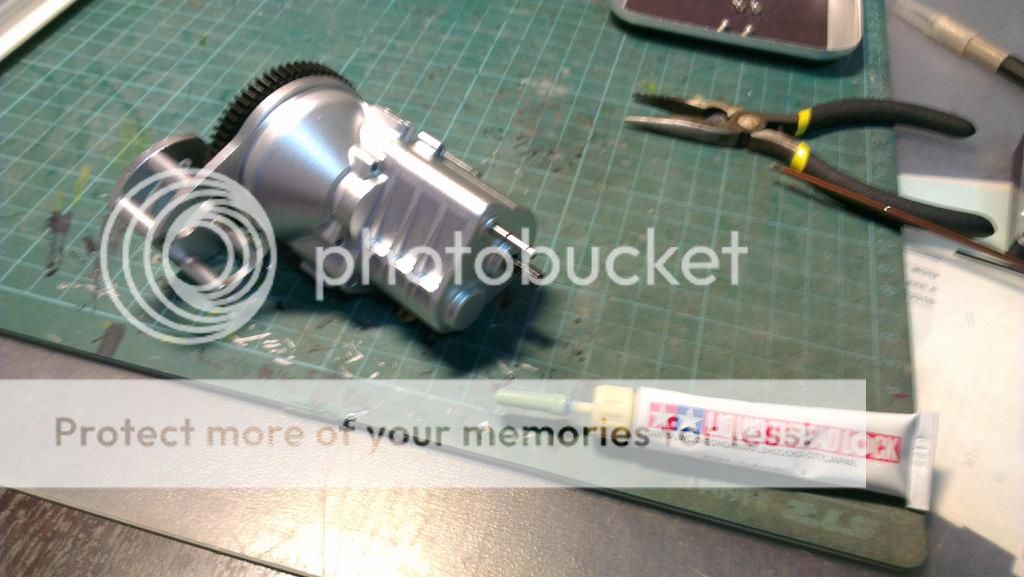
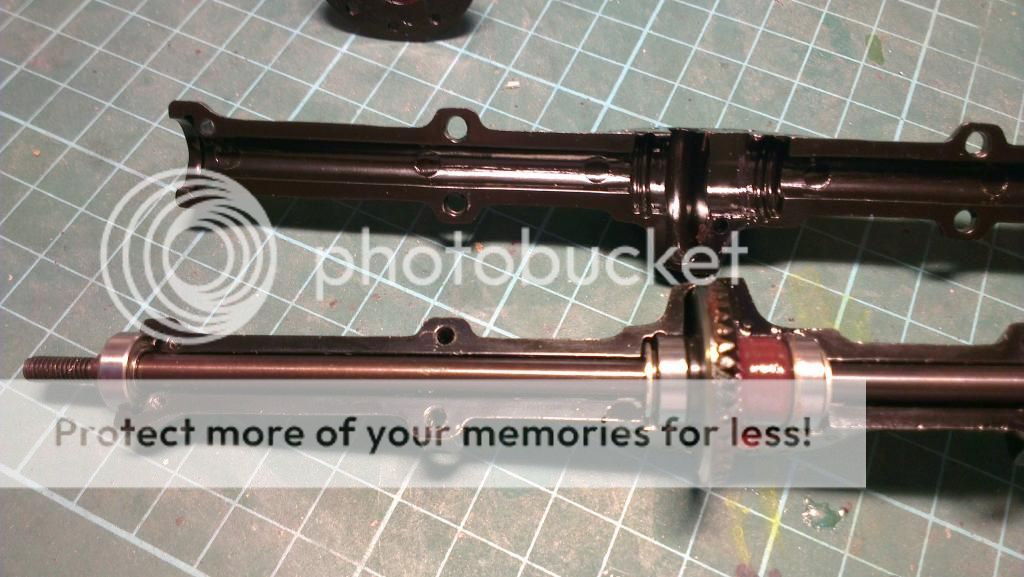
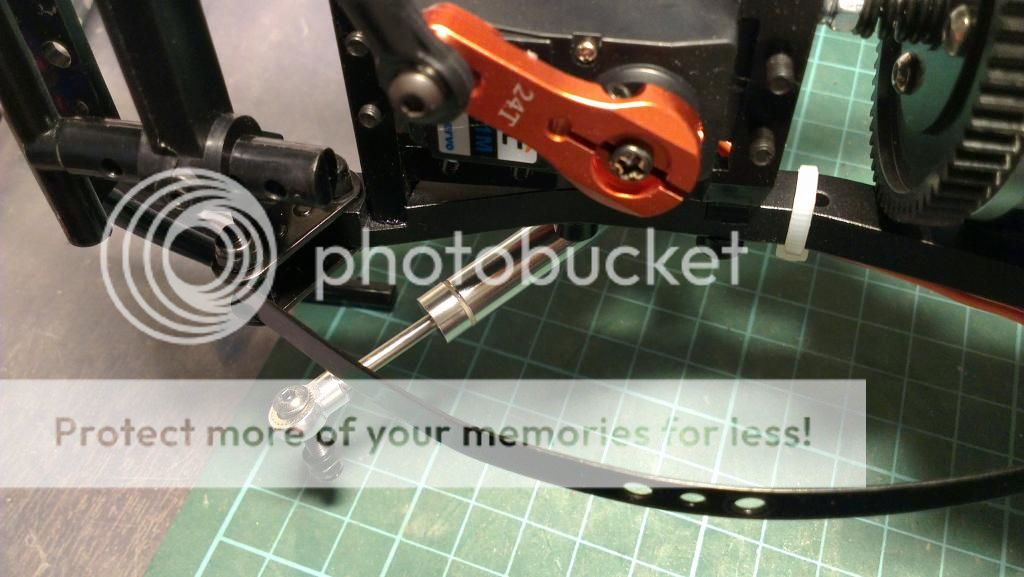
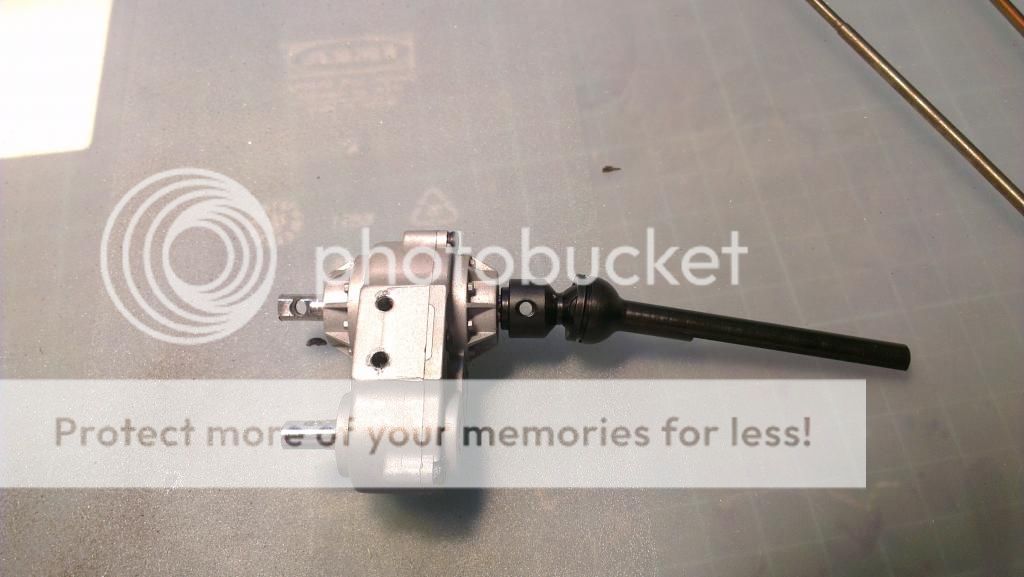
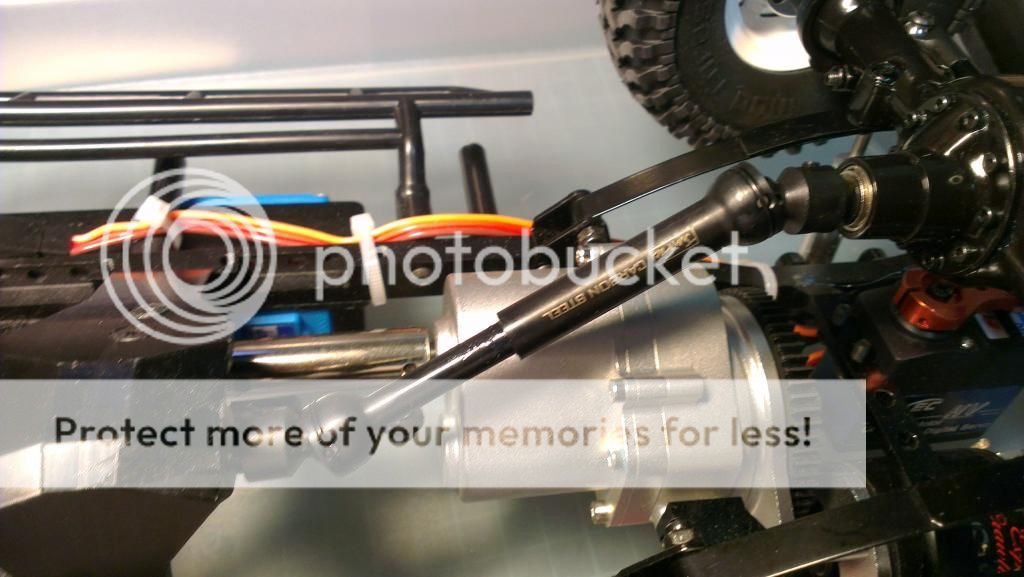
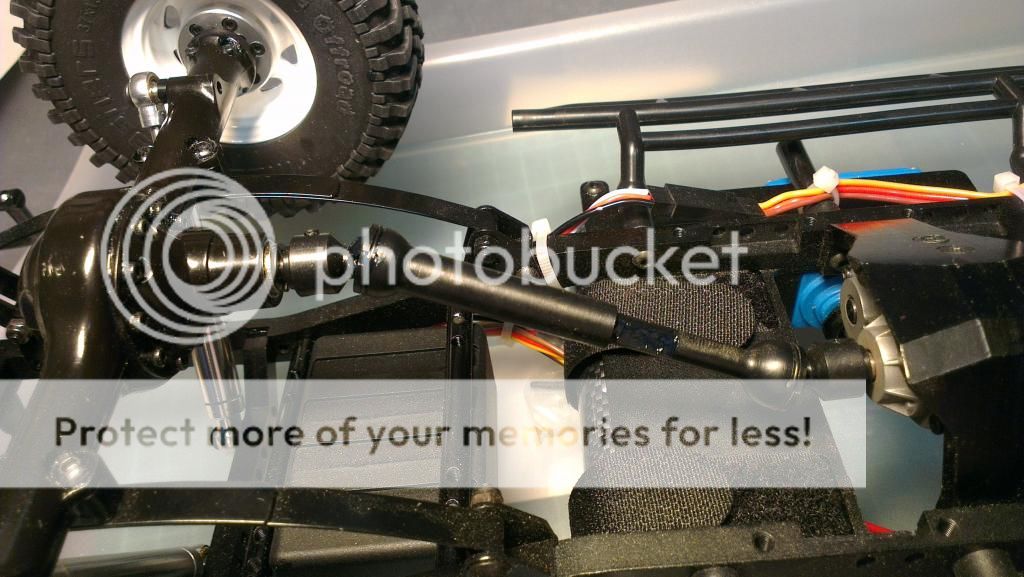
A package came just in time while I was doing this built... Junfac shafts....
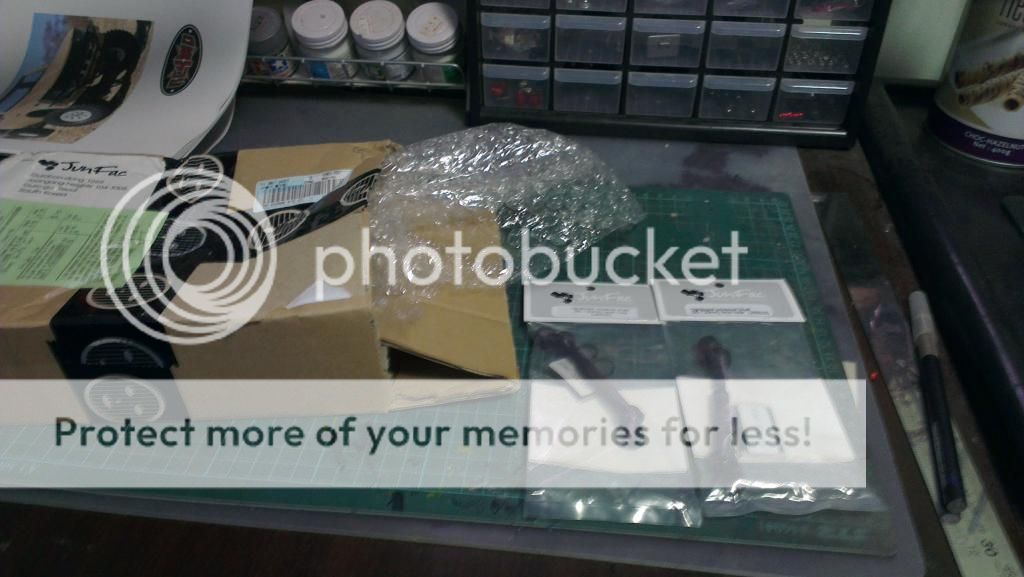
Did some measurements before fixing the shaft but find that the shaft on the transfer case is too long and require to be trim in order for the set screw to be fitted nicely. So I took out my trustee power tool and start grinding away...

Both the fwd and aft output shaft have to be grinded... Finally all done and the shaft is align with the case output hole. Yah, another thing is don't forget to stuff marine grease between the 2 sliding half of each shafts.
Last edited by Zax13 on Wed 26 Dec 2012 - 19:02; edited 11 times in total
Zax13- Crawler
- Posts : 345
Join date : 2011-12-22
Location : Sengkang
Re: The Building of Trail Finder 2 - Zax13's TF2
![]() by Zax13 Tue 18 Dec 2012 - 20:13
by Zax13 Tue 18 Dec 2012 - 20:13
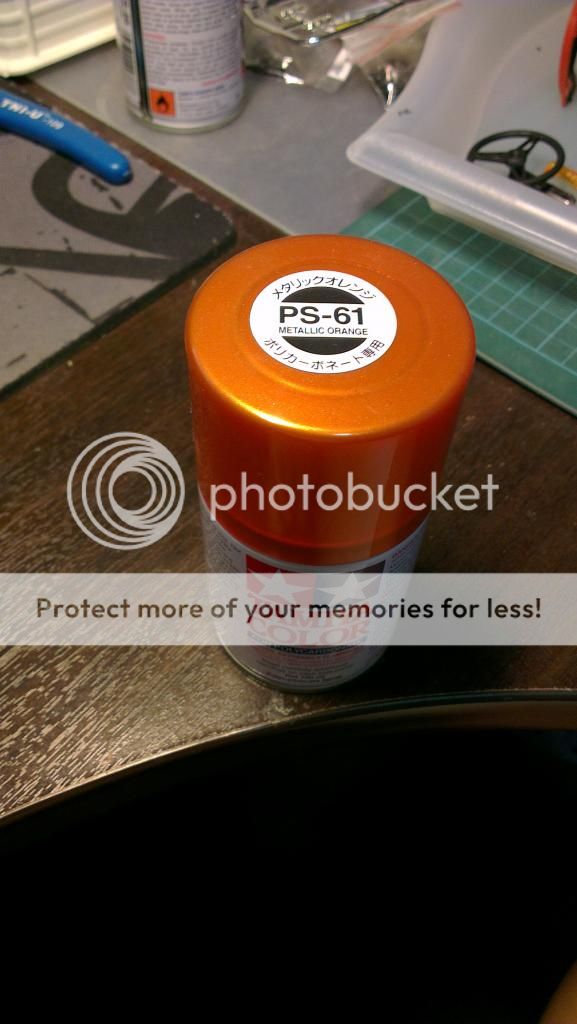
Before painting it is very important to give it a good bath with soap. This will get rid of the lubricant layer when its being molded.
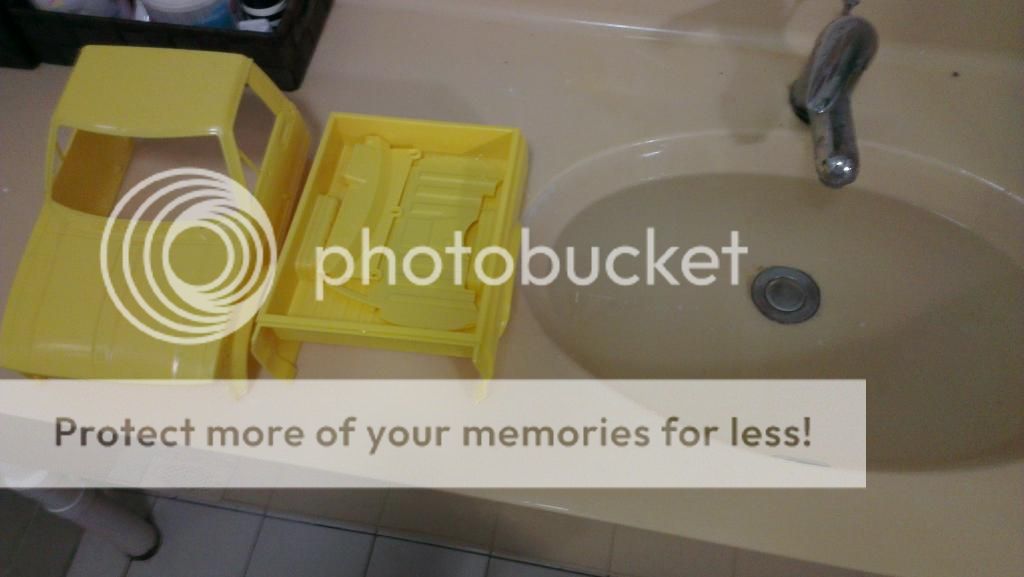
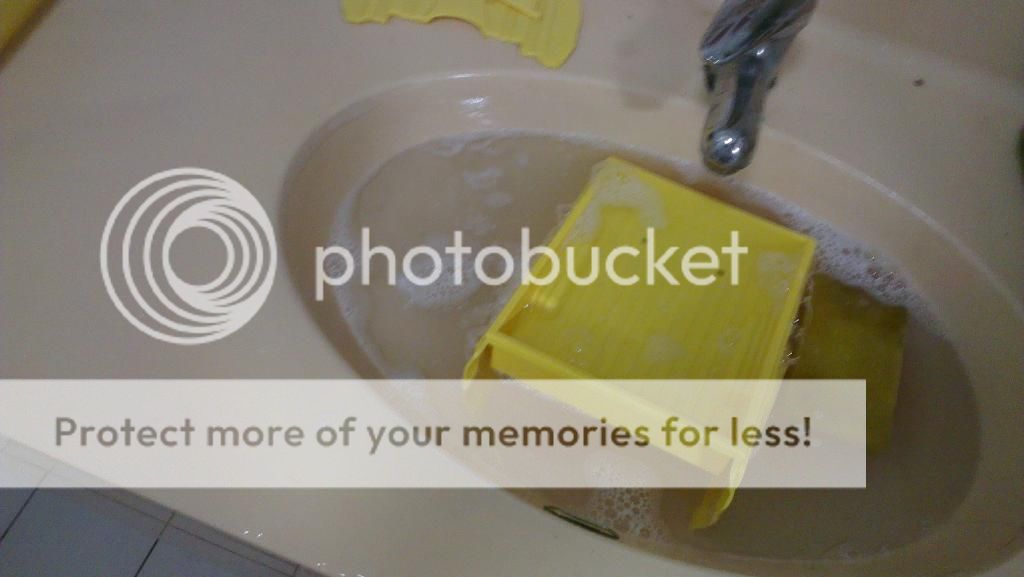
Next drying it out prior to painting. Make sure to give it a good few hours before proceeding to apply primer.
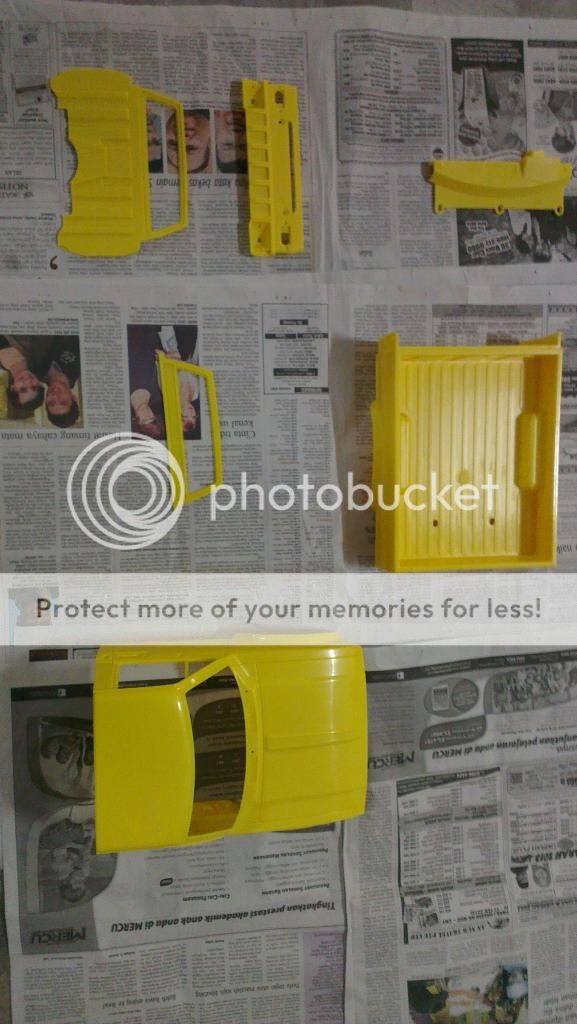
Primer or paint is very toxic. Always do painting in a well ventilated room or in a spray booth.

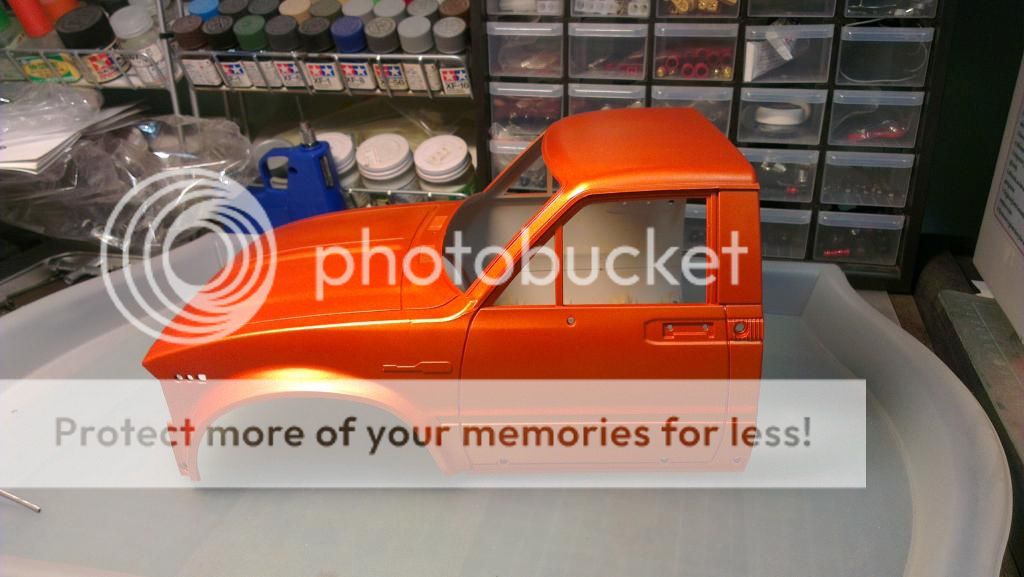
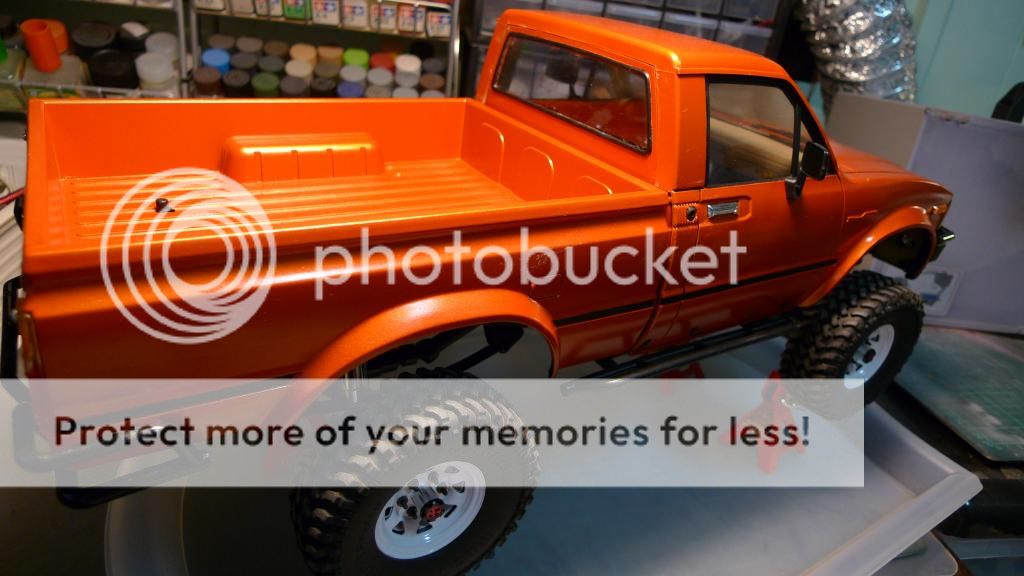
Starting to take shape with first coat of paint.
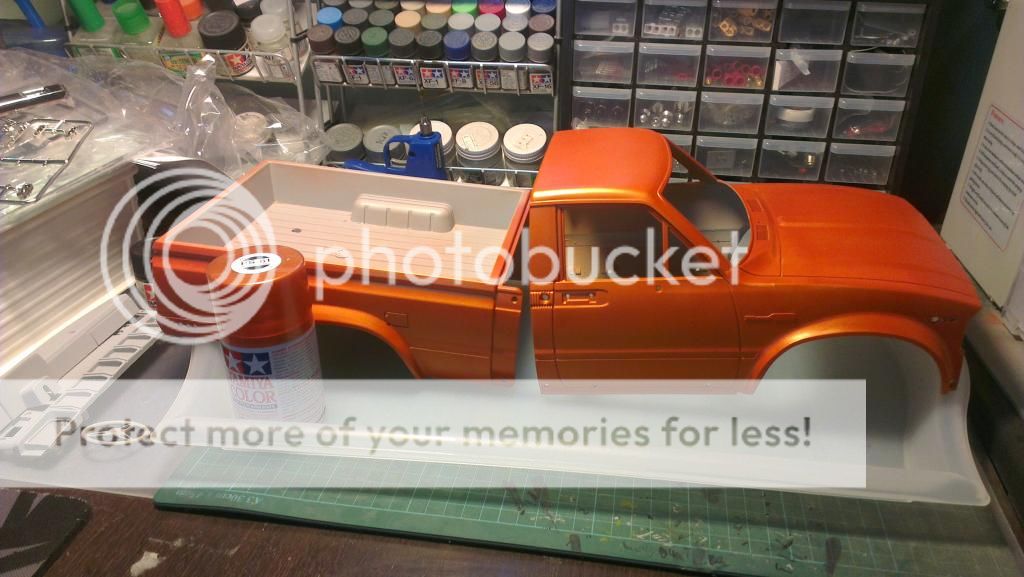
After leaving the paint to steam off for 1hr. Applied the second coat.
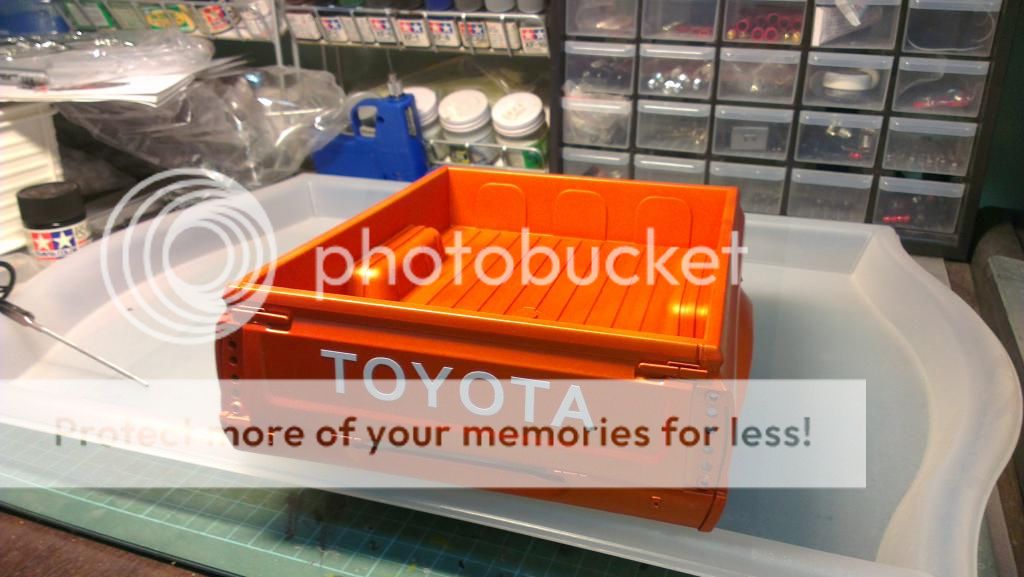
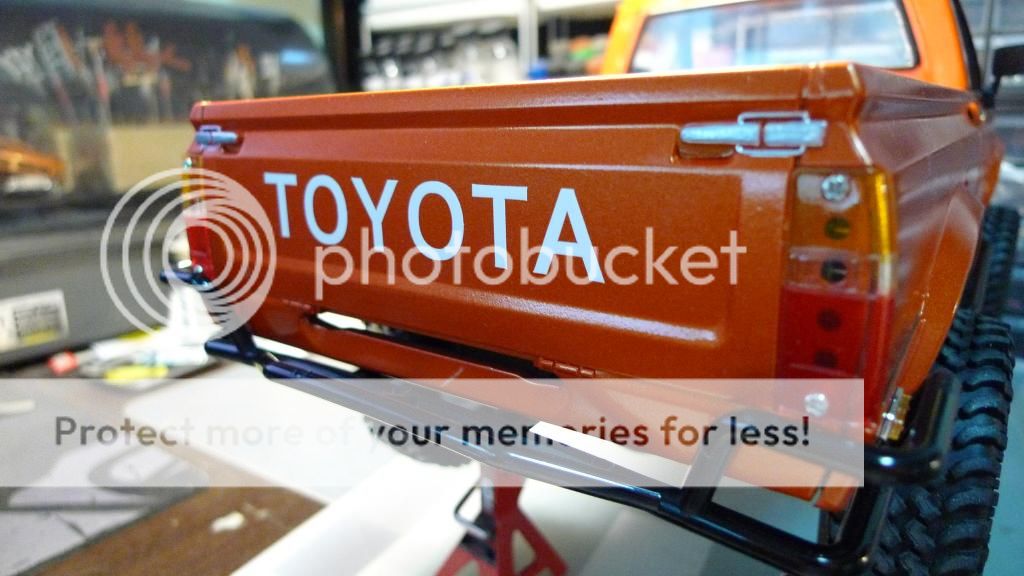
Paste the toyota decal on the back of the pickup.
While waiting for the paint on the body to steam off I went ahead to paint the other items.
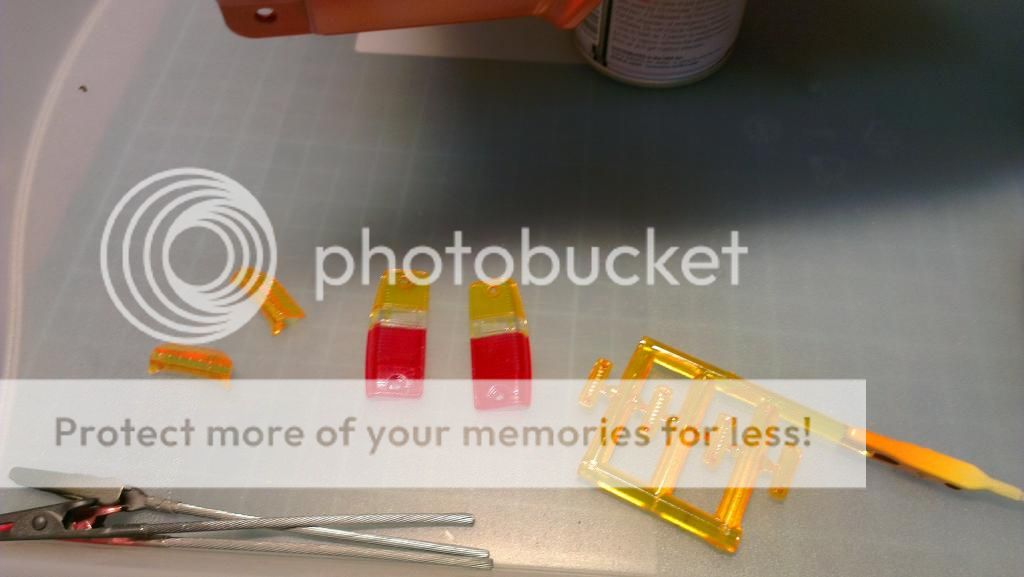
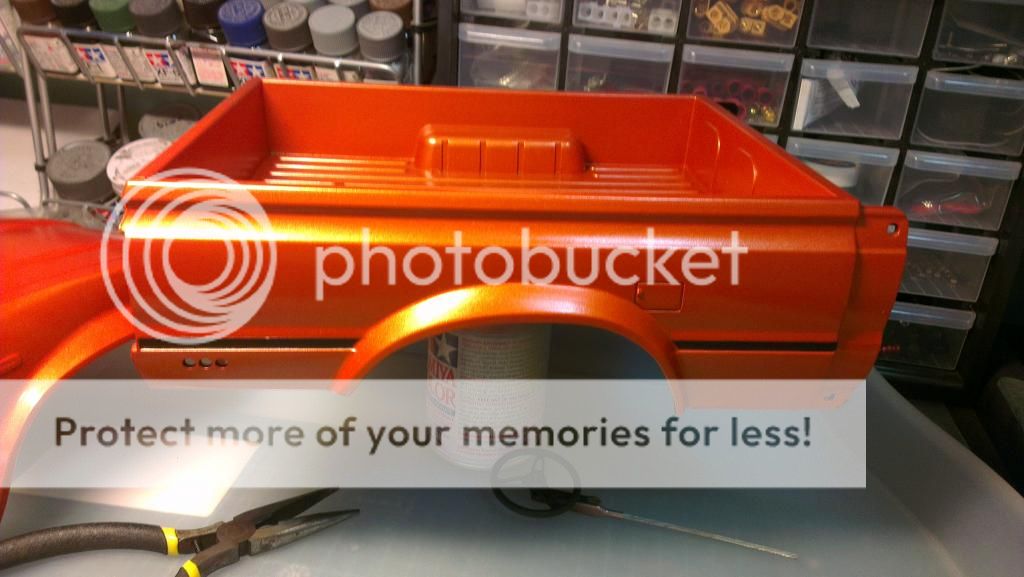
After a few layer of gloss coat makes the truck look like just came out from a factory....
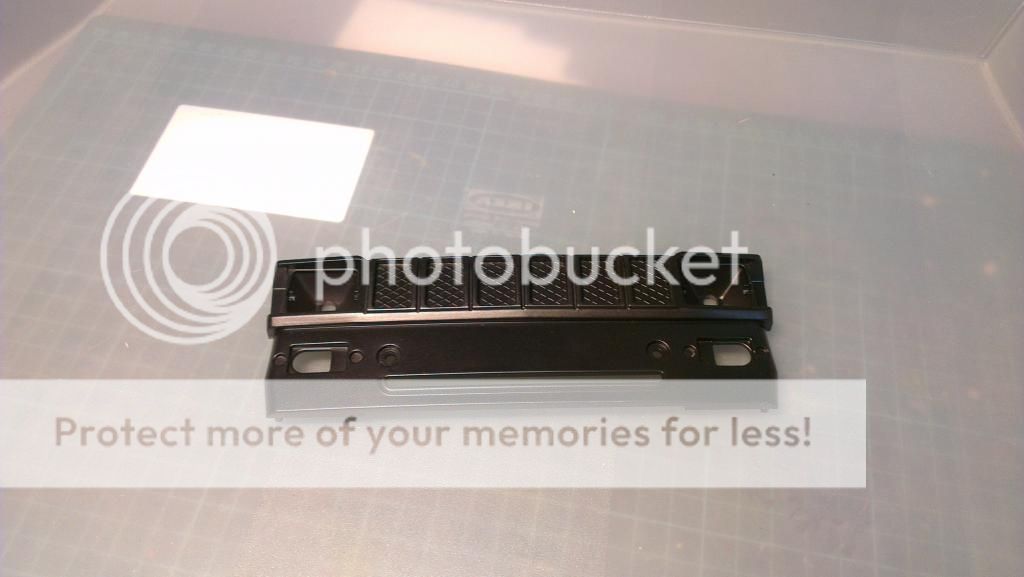
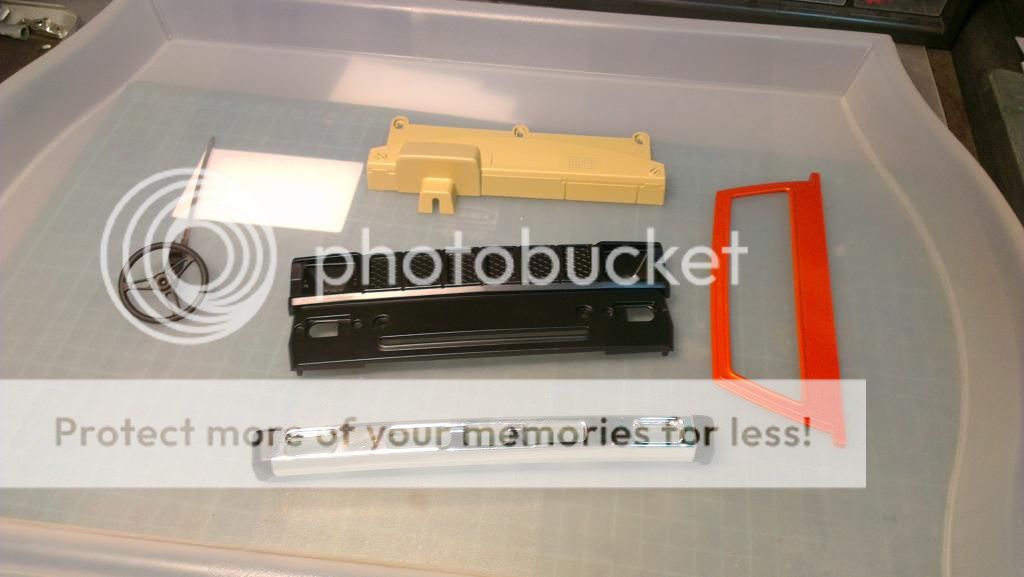
All the items painted and ready to be assembled.
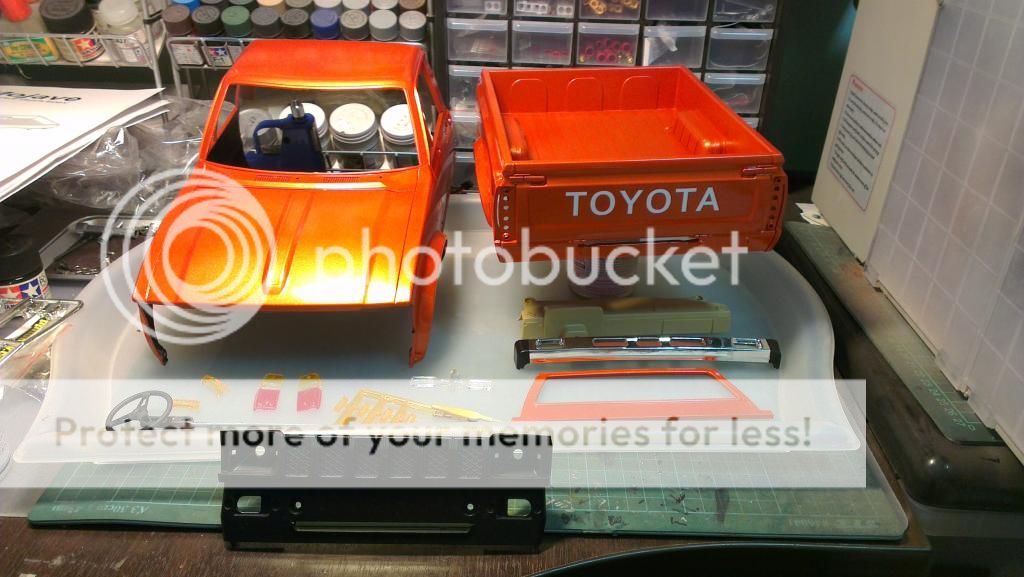
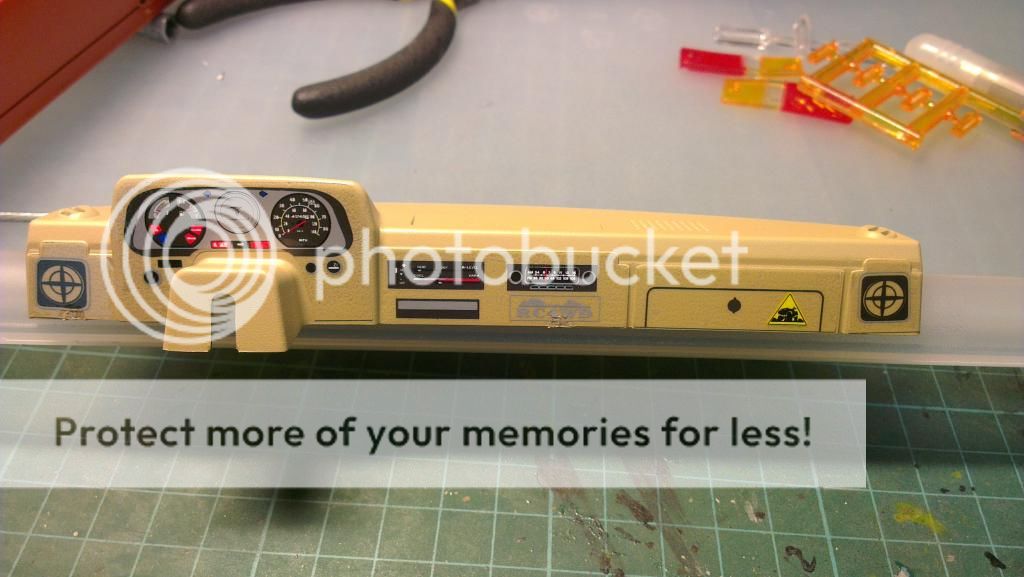
There is another booklet included when assembling the hard body cover. The instructions are clear and should be no problem for any level builder to follow the step by step diagrams.
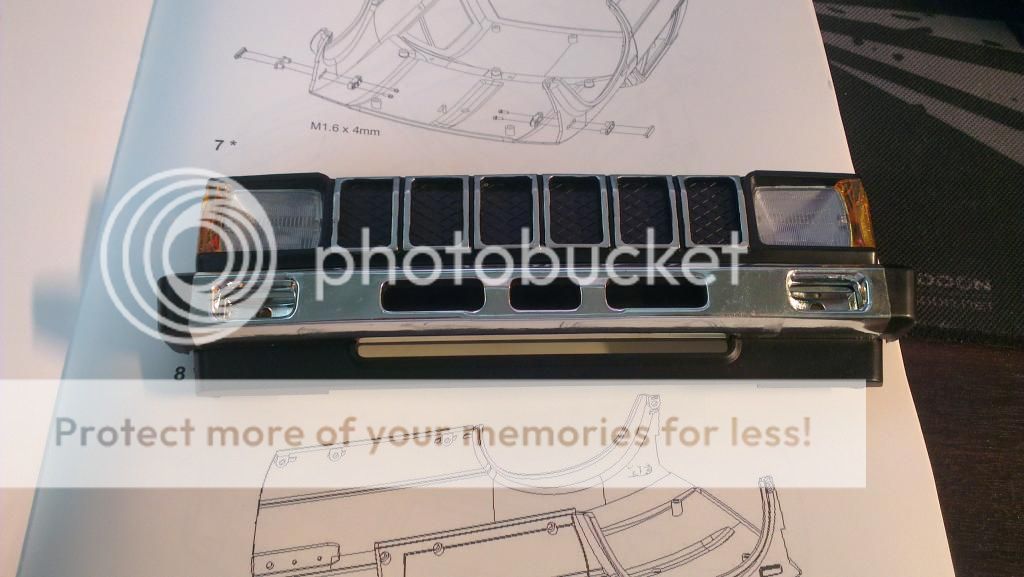
I assembled all the parts except those required further detailing just to see how the truck turned out with this colour scheme.
Last edited by Zax13 on Fri 11 Apr 2014 - 23:25; edited 4 times in total
Zax13- Crawler
- Posts : 345
Join date : 2011-12-22
Location : Sengkang
Re: The Building of Trail Finder 2 - Zax13's TF2
![]() by laneboysrc Tue 18 Dec 2012 - 20:31
by laneboysrc Tue 18 Dec 2012 - 20:31

laneboysrc- Crawler
- Posts : 877
Join date : 2012-05-21 -

Re: The Building of Trail Finder 2 - Zax13's TF2
![]() by Zax13 Tue 18 Dec 2012 - 20:41
by Zax13 Tue 18 Dec 2012 - 20:41
Updates coming soon.... Stay tuned....laneboysrc wrote:Wow, fantastic! Looking very much forward to the filled-in "reserved" spots!
Zax13- Crawler
- Posts : 345
Join date : 2011-12-22
Location : Sengkang
Re: The Building of Trail Finder 2 - Zax13's TF2
![]() by Wrigleys Wed 19 Dec 2012 - 8:59
by Wrigleys Wed 19 Dec 2012 - 8:59

Wrigleys- Moderator
- Posts : 396
Join date : 2011-09-09
Location : Outback
Re: The Building of Trail Finder 2 - Zax13's TF2
![]() by boolean21 Wed 19 Dec 2012 - 9:05
by boolean21 Wed 19 Dec 2012 - 9:05
Looking forward to the updates!

boolean21- Crawler
- Posts : 5035
Join date : 2011-08-18
Location : Deep inside the Jungle -
Re: The Building of Trail Finder 2 - Zax13's TF2
![]() by laneboysrc Wed 19 Dec 2012 - 12:10
by laneboysrc Wed 19 Dec 2012 - 12:10
Someone ought to make a transparent cover to see it in action.
laneboysrc- Crawler
- Posts : 877
Join date : 2012-05-21 -
Re: The Building of Trail Finder 2 - Zax13's TF2
![]() by Zax13 Wed 19 Dec 2012 - 13:27
by Zax13 Wed 19 Dec 2012 - 13:27
Guess you have to wait for part 4 of the update to c what color i paint... Anyway just a humble workshop for my scale model addictions.... Hehehe!Wrigleys wrote:Bro, very meticulous job there. Any sneak peak of the paint scheme? Btw nice workshop.
Zax13- Crawler
- Posts : 345
Join date : 2011-12-22
Location : Sengkang
Zax13- Crawler
- Posts : 345
Join date : 2011-12-22
Location : Sengkang
Re: The Building of Trail Finder 2 - Zax13's TF2
![]() by boolean21 Wed 26 Dec 2012 - 15:59
by boolean21 Wed 26 Dec 2012 - 15:59
I love your paint store! I know who to look for!
boolean21- Crawler
- Posts : 5035
Join date : 2011-08-18
Location : Deep inside the Jungle -
Re: The Building of Trail Finder 2 - Zax13's TF2
![]() by Zax13 Wed 26 Dec 2012 - 16:05
by Zax13 Wed 26 Dec 2012 - 16:05
boolean21 wrote:Nice updates!
I love your paint store! I know who to look for!
TQ,
Zax13- Crawler
- Posts : 345
Join date : 2011-12-22
Location : Sengkang

DWJL511- Crawler
- Posts : 187
Join date : 2012-09-20
Location : Singapore
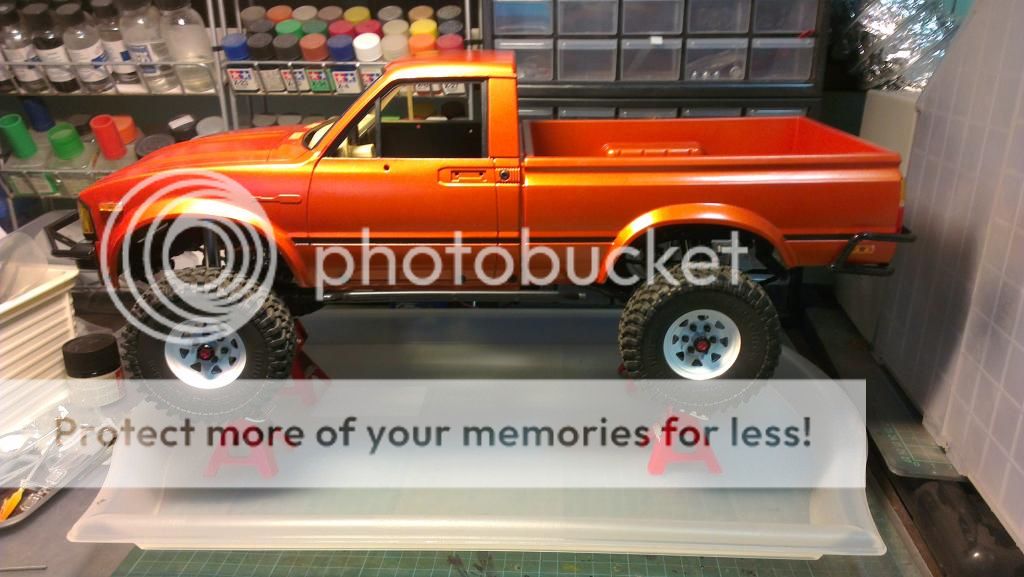
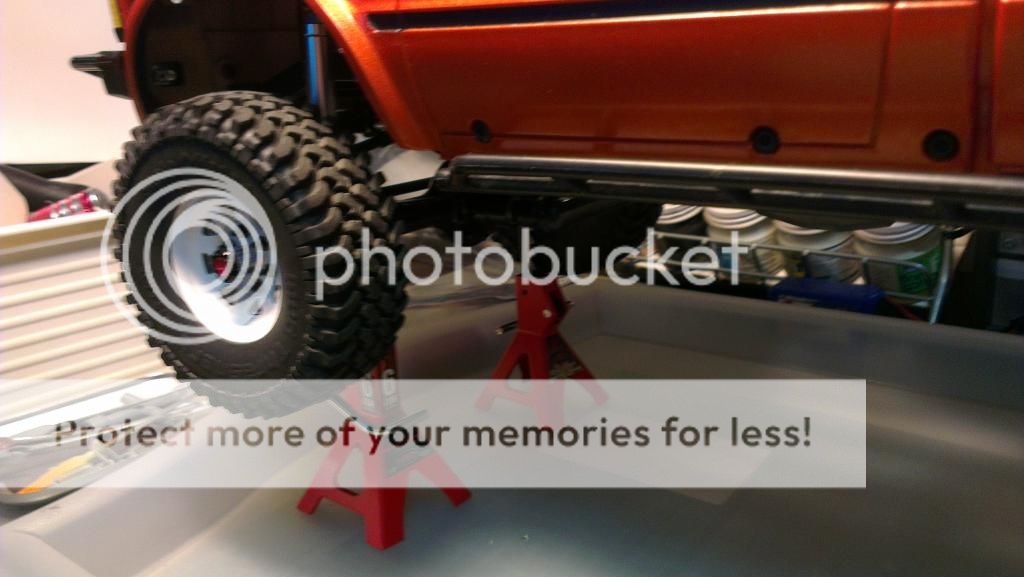
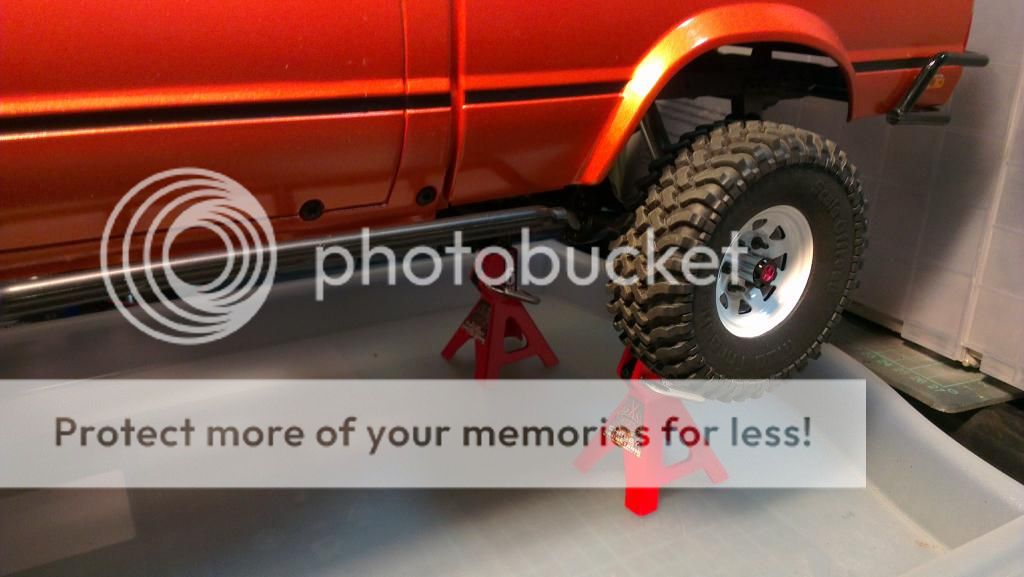
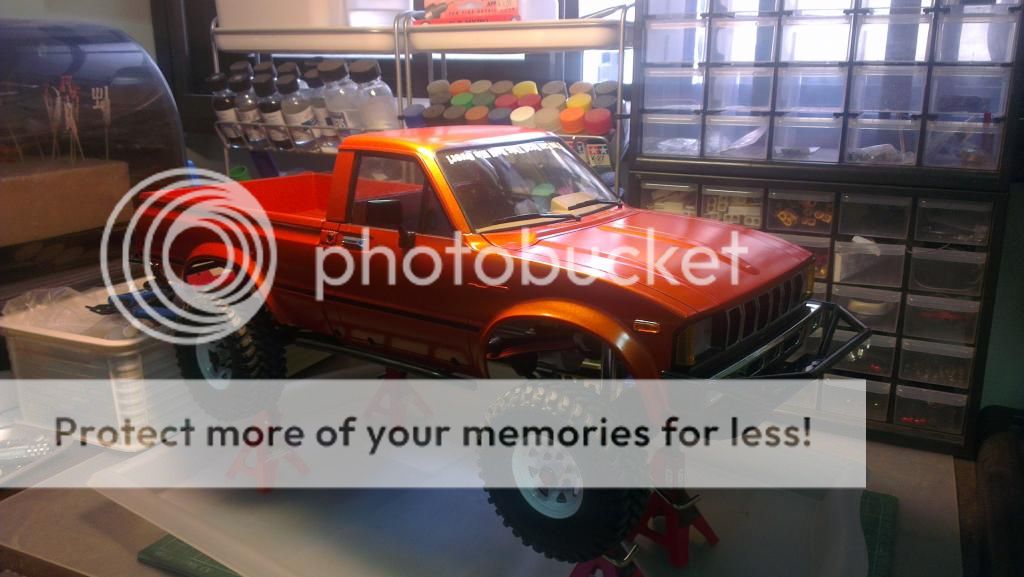
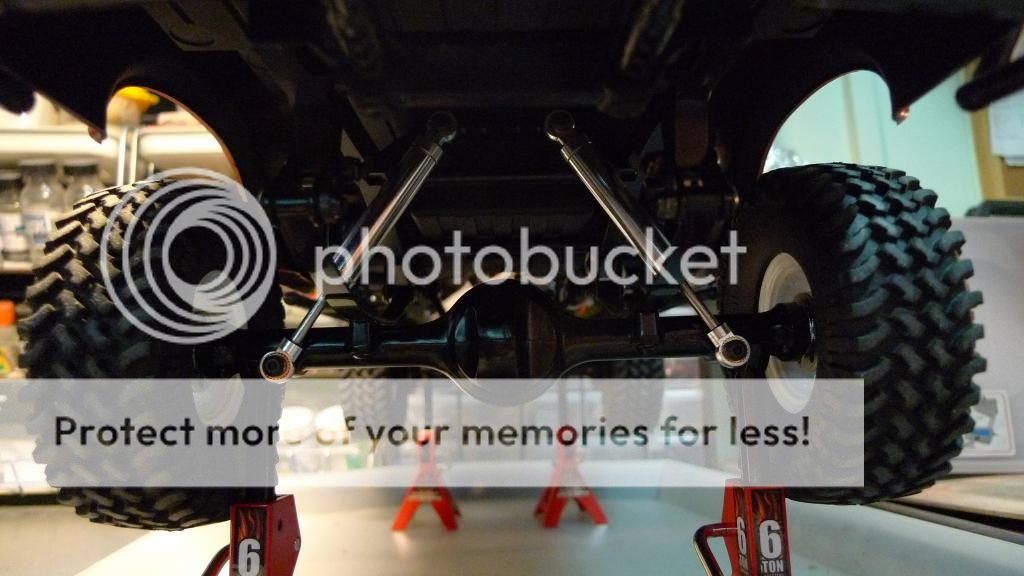
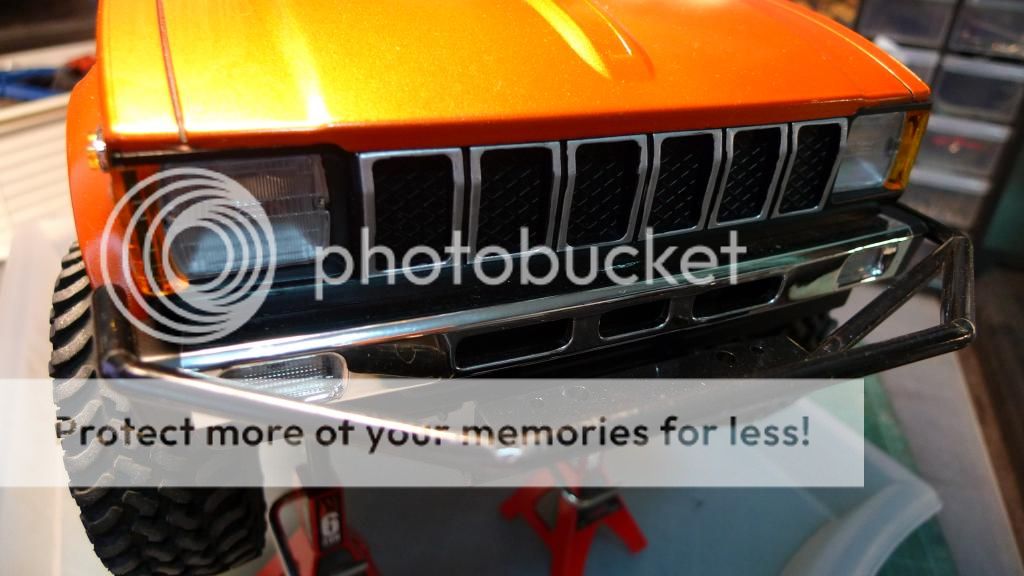
Final product outcome.... Trail Ready!
![]() by Zax13 Wed 2 Jan 2013 - 20:59
by Zax13 Wed 2 Jan 2013 - 20:59
The final outcome is reveal and this is how the truck look like stock with no modification except for the wheel nut and the fwd/rear junfac shaft. ENJOY!


Last edited by Zax13 on Sat 4 Apr 2015 - 22:19; edited 1 time in total
Zax13- Crawler
- Posts : 345
Join date : 2011-12-22
Location : Sengkang

oceanic- Moderator
- Posts : 1212
Join date : 2012-03-21
Location : N1°24.229' E103°48.094 -
Re: The Building of Trail Finder 2 - Zax13's TF2
![]() by boolean21 Wed 2 Jan 2013 - 21:48
by boolean21 Wed 2 Jan 2013 - 21:48
Nice!!
boolean21- Crawler
- Posts : 5035
Join date : 2011-08-18
Location : Deep inside the Jungle -
Re: The Building of Trail Finder 2 - Zax13's TF2
![]() by slow Wed 2 Jan 2013 - 22:01
by slow Wed 2 Jan 2013 - 22:01

slow- Crawler
- Posts : 1007
Join date : 2011-08-24
Location : West Mountain

Harakiri- Boss
- Posts : 305
Join date : 2011-08-22
Location : Deep Muddy Jungle
Re: The Building of Trail Finder 2 - Zax13's TF2
![]() by Zax13 Wed 2 Jan 2013 - 22:48
by Zax13 Wed 2 Jan 2013 - 22:48
Zax13- Crawler
- Posts : 345
Join date : 2011-12-22
Location : Sengkang
Re: The Building of Trail Finder 2 - Zax13's TF2
![]() by Wrigleys Wed 2 Jan 2013 - 23:28
by Wrigleys Wed 2 Jan 2013 - 23:28
Wrigleys- Moderator
- Posts : 396
Join date : 2011-09-09
Location : Outback
Re: The Building of Trail Finder 2 - Zax13's TF2
![]() by Zax13 Thu 3 Jan 2013 - 0:12
by Zax13 Thu 3 Jan 2013 - 0:12
Zax13- Crawler
- Posts : 345
Join date : 2011-12-22
Location : Sengkang
Re: The Building of Trail Finder 2 - Zax13's TF2
![]() by laneboysrc Thu 3 Jan 2013 - 8:39
by laneboysrc Thu 3 Jan 2013 - 8:39

Excellent paint job, I wonder how it will mix with mud color
laneboysrc- Crawler
- Posts : 877
Join date : 2012-05-21 -

RTECH- Crawler
- Posts : 2376
Join date : 2011-08-22
Age : 52
Location : Hougang
Re: The Building of Trail Finder 2 - Zax13's TF2
![]() by Zax13 Fri 26 Jul 2013 - 5:29
by Zax13 Fri 26 Jul 2013 - 5:29
Zax13- Crawler
- Posts : 345
Join date : 2011-12-22
Location : Sengkang
Re: The Building of Trail Finder 2 - Zax13's TF2
![]() by Wrigleys Fri 26 Jul 2013 - 5:36
by Wrigleys Fri 26 Jul 2013 - 5:36
Wrigleys- Moderator
- Posts : 396
Join date : 2011-09-09
Location : Outback
Re: The Building of Trail Finder 2 - Zax13's TF2
![]() by boolean21 Fri 26 Jul 2013 - 8:02
by boolean21 Fri 26 Jul 2013 - 8:02
boolean21- Crawler
- Posts : 5035
Join date : 2011-08-18
Location : Deep inside the Jungle -
Re: The Building of Trail Finder 2 - Zax13's TF2
![]() by laneboysrc Fri 26 Jul 2013 - 8:22
by laneboysrc Fri 26 Jul 2013 - 8:22
laneboysrc- Crawler
- Posts : 877
Join date : 2012-05-21 -

Marpek- Crawler
- Posts : 1675
Join date : 2011-08-22
Re: The Building of Trail Finder 2 - Zax13's TF2
![]() by Zax13 Sun 1 Sep 2013 - 18:37
by Zax13 Sun 1 Sep 2013 - 18:37

Thinking of getting this as replacement if only them RC4WD allows me to purchase from their website directly.... sigh...

Zax13- Crawler
- Posts : 345
Join date : 2011-12-22
Location : Sengkang
Page 1 of 2 • 1, 2 ![]()
» evidence trail buster 1 9 on the scale of RC4WD Trail Finder 2
» [VIDEO] 13 Trucks mudding at Wallace Trail - Trail finder 2 tundra honcho dingo hummer LCC Unimog Dodge Ram
» [VIDEO] Some climbing RC4WD Trail finder Defender Jeep Brute Honcho enjoying Butterfly Trail! RC offroad
» [VIDEO] Axial Wraith RC4WD Trail finder 2 SCX10 Honcho Rusty Bug hill climb at Durian Loop Trail
SG Crawlers Forum :: RC Talk - Trail Trucks and Crawlers :: RC Trail Rigs and Rock Crawlers Discussion
|
|
|