
Search

Who is online?
In total there are 6 users online :: 0 Registered, 0 Hidden and 6 Guests None
Most users ever online was 301 on Thu 21 Oct 2021 - 11:24
Latest topics
» RC Submarine: Russian Akula Class by redboat219 Tue 27 Sep 2022 - 11:43
» Land Rover Defender D90 photos and details only (picture intensive!)
by babyboy Fri 25 Jun 2021 - 16:39
» [Offroad Bashing and Rally] Offroad Bashing and Rally at Tampines Track 12 Jan 2020 - 0900hrs
by boolean21 Sat 11 Jan 2020 - 10:15
» [Scale Trail] Woodgrove Ave - Sunday 20 Oct 2019 0900hrs
by boolean21 Sat 19 Oct 2019 - 16:31
» vHOBBY RC videos
by CraftRC Fri 21 Jun 2019 - 21:32
» Suzuki Samurai 3D Printted project
by CraftRC Sat 4 May 2019 - 18:39
» WTS : Redcat Gen 7 Pro
by staypuft Mon 7 Jan 2019 - 11:31
» Hello all! Dan here
by csd8888 Fri 5 Oct 2018 - 8:27
» [Offroad Trails] Offroading at Tampines Quarry 16 Sep 2018 - 0900hrs
by boolean21 Sat 15 Sep 2018 - 18:41
» [Scale Trail] Woodgrove Ave - Sunday 12 Aug 2018 0900hrs
by boolean21 Sat 11 Aug 2018 - 22:51
» [Trail and Bash!] Woodgrove Ave - Sunday 22 Jul 2018 0900hrs
by boolean21 Sat 21 Jul 2018 - 19:39
» [Scale Trail] Woodgrove Ave - Sunday 01 Jul 2018 0900hrs
by boolean21 Sat 30 Jun 2018 - 20:39
» wts hobbywing esc + motor
by kelvintan_hc Thu 28 Jun 2018 - 15:36
» Axial roll cage crash
by CraftRC Fri 1 Jun 2018 - 20:16
» Jeep cherokee XJ crawling
by CraftRC Sat 26 May 2018 - 21:54
» Jeep cherokee XJ crawling
by CraftRC Sat 26 May 2018 - 21:54
» Extreme Rock Crawler Axial Wraith
by CraftRC Tue 8 May 2018 - 17:35
» [Scale Trail] Woodgrove Ave - Sunday 06 May 2018 0900hrs
by boolean21 Sat 5 May 2018 - 17:14
» Cab Land Rover Defender
by CraftRC Fri 4 May 2018 - 17:41
» Cab Land Rover Defender
by CraftRC Fri 4 May 2018 - 17:41
Most active topic starters
| boolean21 | ||||
| RTECH | ||||
| gionata78 | ||||
| laneboysrc | ||||
| oceanic | ||||
| Marpek | ||||
| babyboy | ||||
| Wrigleys | ||||
| ShaiAX55 | ||||
| Holdencars |
2.4 GHz receiver antenna repair
3 posters
 2.4 GHz receiver antenna repair
Currently the LANE Boys residence is hosting a vehicle of a distinguished SGCrawler for fixing up some lights. When I took out the electronics the following image presented itself:
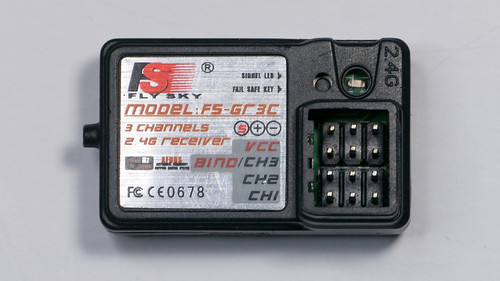
Notice something missing?
Yes, the antenna has been cleanly ripped out of this poor receiver. Time to get out the soldering iron...
The antenna connects to the round soldering pad and the vertical strip on the left side of the receiver, shown in the following picture:
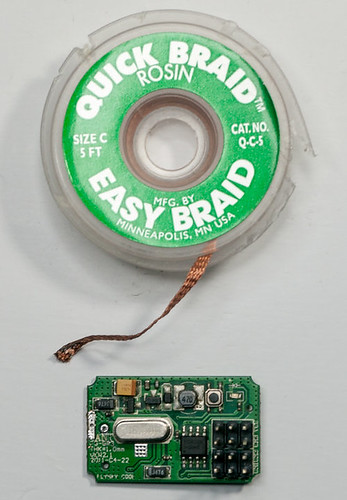
First clean off the soldering pads, removing any left-overs from the original antenna. De-soldering braid is very useful for this job.
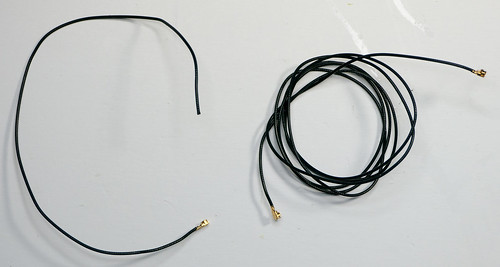
The antenna is simply a 19 cm long piece of 1.2 mm thin COAX wire. I found some spare wire in an old Wi-Fi equipment that was no longer in use.
On one side carefully strip off 2 mm of insulation using a sharp hobby knife. This exposes the shielding braid.
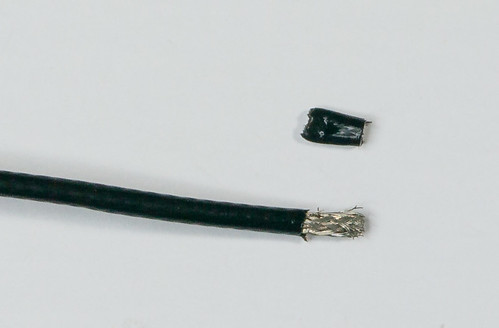
Unravel the braided wires and form two neat bundles on opposite sides.
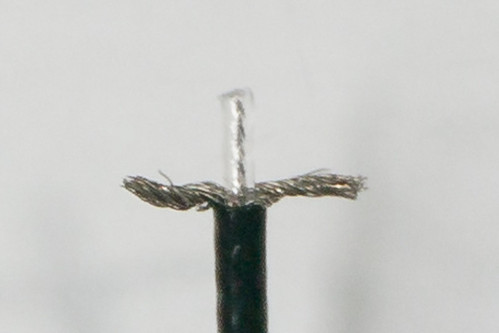
The following picture shows how the wire will be mounted on the receiver.
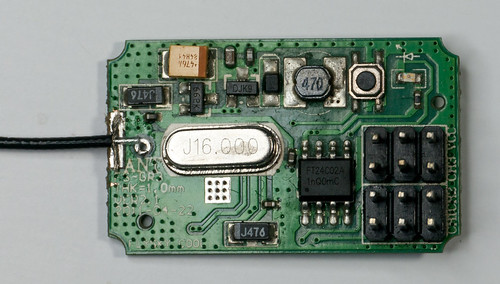
Now strip of approximately 0.5 mm of the insulation of the centre wire.
Then pre-tin the centre wire as well as the shielding lobes.
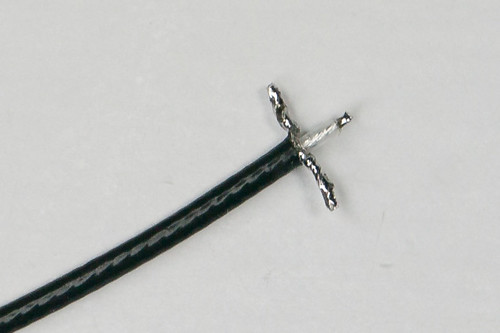
Solder on the centre wire, then each side of the shielding wires.
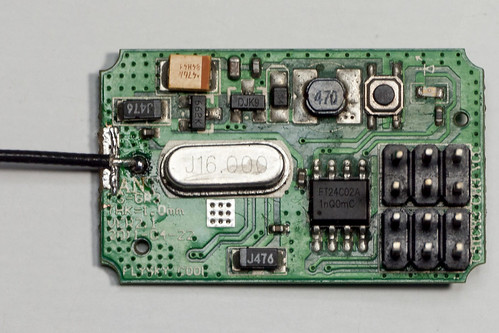
This completes work on the receiver, but we still need to form the actual antenna.
Strip off exactly 26 mm of the outer insulation. You need to be very precise as this affects the quality of the antenna.
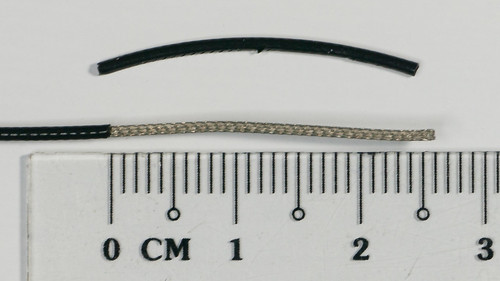
Unravel the braid and cut it off exactly at the remaining insulation. This completes the antenna.
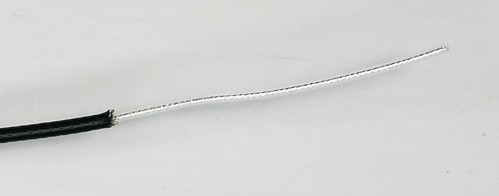
Do perform a range check to ensure it is working fine!

Notice something missing?
Yes, the antenna has been cleanly ripped out of this poor receiver. Time to get out the soldering iron...
The antenna connects to the round soldering pad and the vertical strip on the left side of the receiver, shown in the following picture:

First clean off the soldering pads, removing any left-overs from the original antenna. De-soldering braid is very useful for this job.
The antenna is simply a 19 cm long piece of 1.2 mm thin COAX wire. I found some spare wire in an old Wi-Fi equipment that was no longer in use.

On one side carefully strip off 2 mm of insulation using a sharp hobby knife. This exposes the shielding braid.

Unravel the braided wires and form two neat bundles on opposite sides.

The following picture shows how the wire will be mounted on the receiver.

Now strip of approximately 0.5 mm of the insulation of the centre wire.
Then pre-tin the centre wire as well as the shielding lobes.

Solder on the centre wire, then each side of the shielding wires.

This completes work on the receiver, but we still need to form the actual antenna.
Strip off exactly 26 mm of the outer insulation. You need to be very precise as this affects the quality of the antenna.

Unravel the braid and cut it off exactly at the remaining insulation. This completes the antenna.

Do perform a range check to ensure it is working fine!
 Re: 2.4 GHz receiver antenna repair
Brilliant work as usual!!!

wyetuck88- Crawler
- Posts : 311
Join date : 2012-05-26
 Similar topics
» [VIDEO] 2.4 GHz RC receiver repair
» Laneboysrc - DIY Light controller system
» WTB Fly sky gt3b receiver
» Build your own RC car receiver
» AM Receiver or Upgrade to New RC System ?
» Laneboysrc - DIY Light controller system
» WTB Fly sky gt3b receiver
» Build your own RC car receiver
» AM Receiver or Upgrade to New RC System ?
Permissions in this forum:
You cannot reply to topics in this forum

