
Search

Who is online?
In total there are 7 users online :: 0 Registered, 0 Hidden and 7 Guests None
Most users ever online was 301 on Thu 21 Oct 2021 - 11:24
Latest topics
» RC Submarine: Russian Akula Class by redboat219 Tue 27 Sep 2022 - 11:43
» Land Rover Defender D90 photos and details only (picture intensive!)
by babyboy Fri 25 Jun 2021 - 16:39
» [Offroad Bashing and Rally] Offroad Bashing and Rally at Tampines Track 12 Jan 2020 - 0900hrs
by boolean21 Sat 11 Jan 2020 - 10:15
» [Scale Trail] Woodgrove Ave - Sunday 20 Oct 2019 0900hrs
by boolean21 Sat 19 Oct 2019 - 16:31
» vHOBBY RC videos
by CraftRC Fri 21 Jun 2019 - 21:32
» Suzuki Samurai 3D Printted project
by CraftRC Sat 4 May 2019 - 18:39
» WTS : Redcat Gen 7 Pro
by staypuft Mon 7 Jan 2019 - 11:31
» Hello all! Dan here
by csd8888 Fri 5 Oct 2018 - 8:27
» [Offroad Trails] Offroading at Tampines Quarry 16 Sep 2018 - 0900hrs
by boolean21 Sat 15 Sep 2018 - 18:41
» [Scale Trail] Woodgrove Ave - Sunday 12 Aug 2018 0900hrs
by boolean21 Sat 11 Aug 2018 - 22:51
» [Trail and Bash!] Woodgrove Ave - Sunday 22 Jul 2018 0900hrs
by boolean21 Sat 21 Jul 2018 - 19:39
» [Scale Trail] Woodgrove Ave - Sunday 01 Jul 2018 0900hrs
by boolean21 Sat 30 Jun 2018 - 20:39
» wts hobbywing esc + motor
by kelvintan_hc Thu 28 Jun 2018 - 15:36
» Axial roll cage crash
by CraftRC Fri 1 Jun 2018 - 20:16
» Jeep cherokee XJ crawling
by CraftRC Sat 26 May 2018 - 21:54
» Jeep cherokee XJ crawling
by CraftRC Sat 26 May 2018 - 21:54
» Extreme Rock Crawler Axial Wraith
by CraftRC Tue 8 May 2018 - 17:35
» [Scale Trail] Woodgrove Ave - Sunday 06 May 2018 0900hrs
by boolean21 Sat 5 May 2018 - 17:14
» Cab Land Rover Defender
by CraftRC Fri 4 May 2018 - 17:41
» Cab Land Rover Defender
by CraftRC Fri 4 May 2018 - 17:41
Most active topic starters
| boolean21 | ||||
| RTECH | ||||
| gionata78 | ||||
| laneboysrc | ||||
| oceanic | ||||
| Marpek | ||||
| babyboy | ||||
| Wrigleys | ||||
| ShaiAX55 | ||||
| Holdencars |
Zax's unboxing and project skunkworks of the HL German Tiger I...
+6
Harakiri
RTECH
Marpek
babyboy
laneboysrc
Zax13
10 posters
Page 2 of 3
Page 2 of 3 •  1, 2, 3
 Re: Zax's unboxing and project skunkworks of the HL German Tiger I...
Wash will be done later after I clearcoat it...Marpek wrote:Nice works with the sponge thingy! Are you doing a wash on the yellow paint?

Zax13- Crawler
- Posts : 345
Join date : 2011-12-22
Location : Sengkang
 Re: Zax's unboxing and project skunkworks of the HL German Tiger I...
Oic...cant wait to see the finished tiger!Zax13 wrote:Wash will be done later after I clearcoat it...Marpek wrote:Nice works with the sponge thingy! Are you doing a wash on the yellow paint?

Marpek- Crawler
- Posts : 1675
Join date : 2011-08-22
 Re: Zax's unboxing and project skunkworks of the HL German Tiger I...
 Professional scale modeler !
RTECH- Crawler
- Posts : 2376
Join date : 2011-08-22
Age : 52
Location : Hougang
 Re: Zax's unboxing and project skunkworks of the HL German Tiger I...
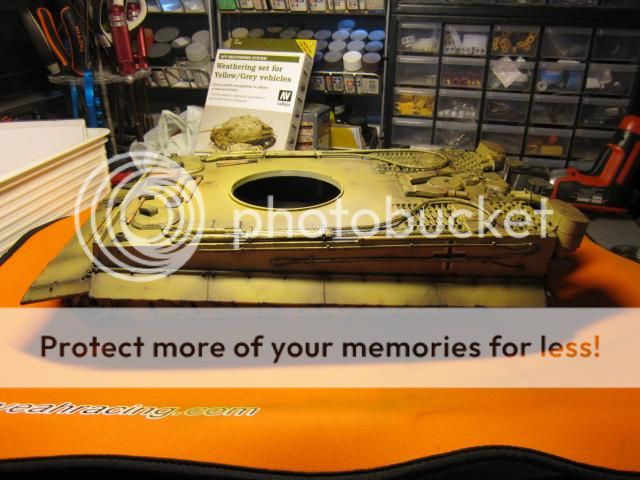
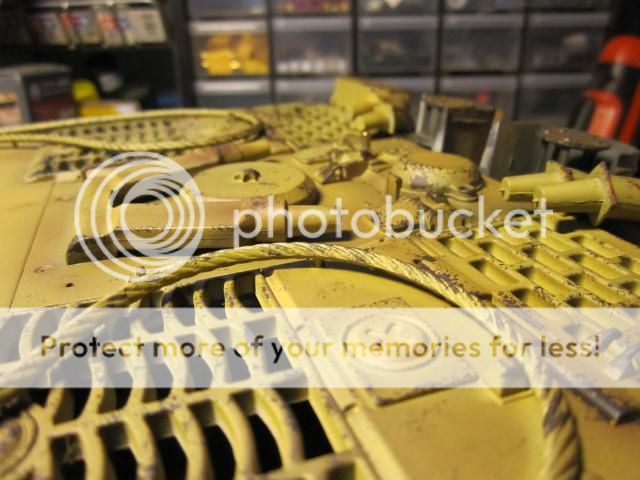
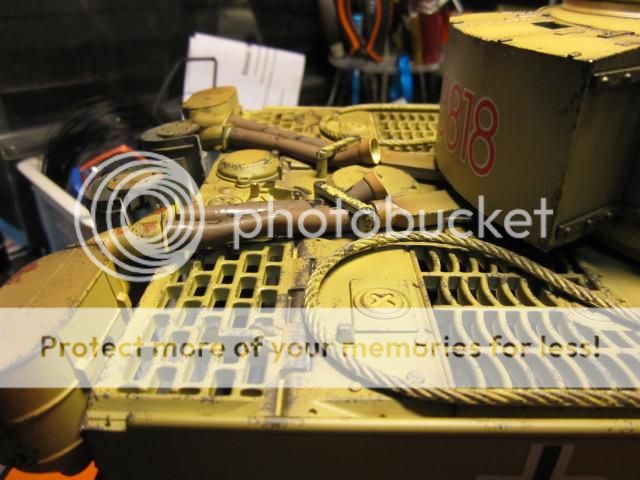
Carried out washing using tamiya panel line accent colour (dark brown) to give it a dirty and used look. I did not really weathered the tank to be rusty as I don't think most of the German Tigers lived that long to see rust... 

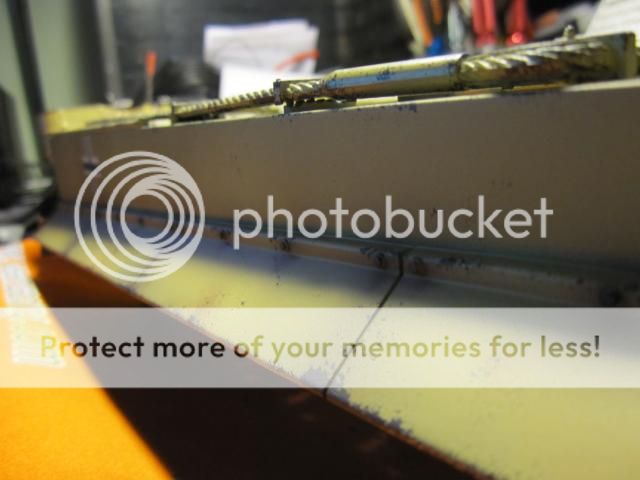
The back mud flap was given a bit more stained weathering.


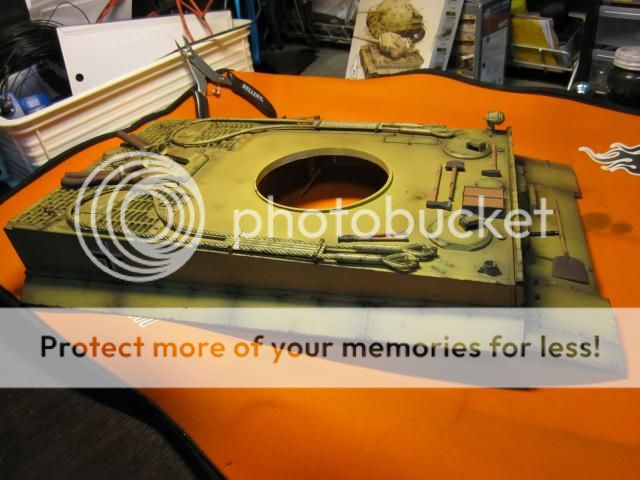
Next step is to wire back all the pieces and assemble the tank...
I did not modify any of the wiring yet... Just put back everything the same I took it apart...
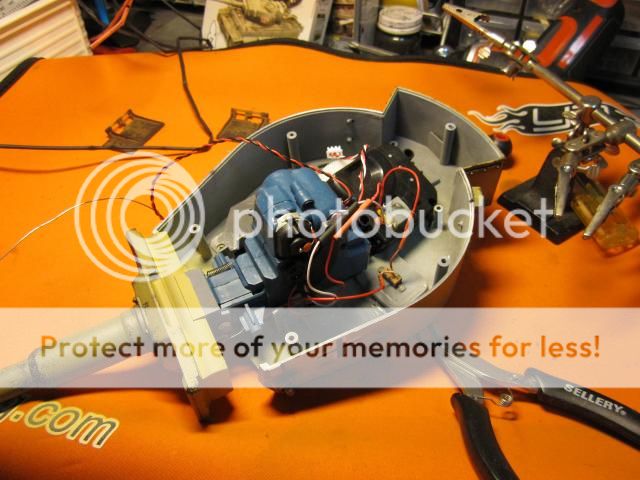

Tedious and boring part of the assembly... Fixing all the 16 wheels for the track...
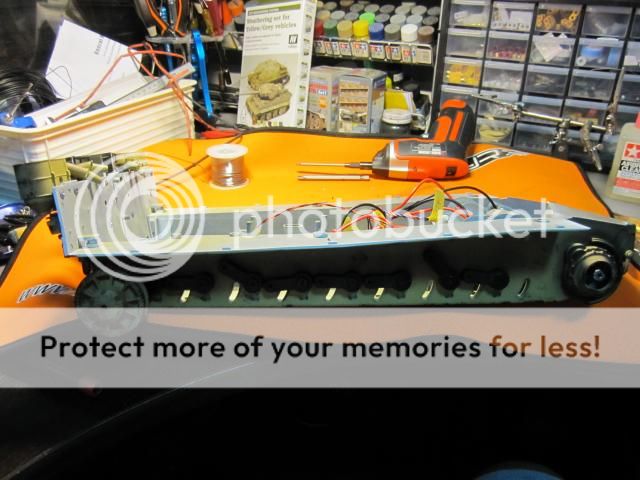
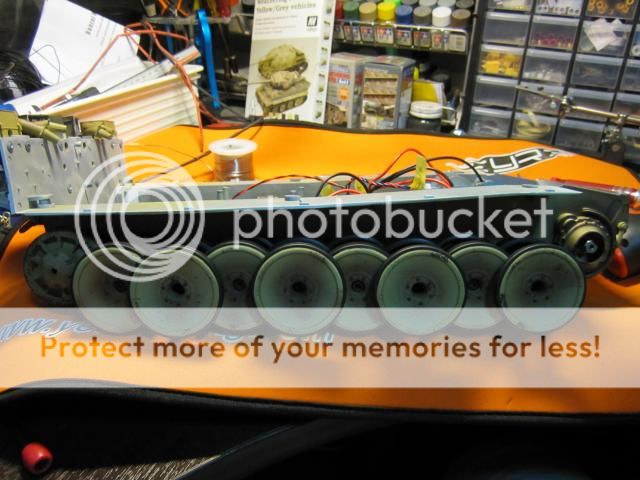
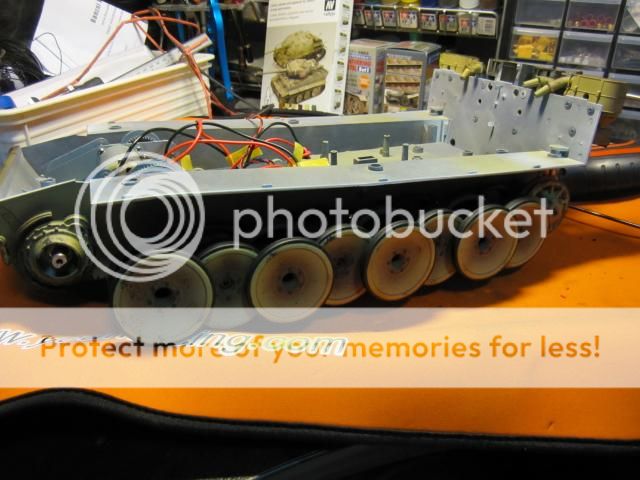
Surprisingly the assembly is much more faster than taking it apart...
So here is the end product of my Tiger 1 tank...








The barrel which had a factory defect ... (fixed)


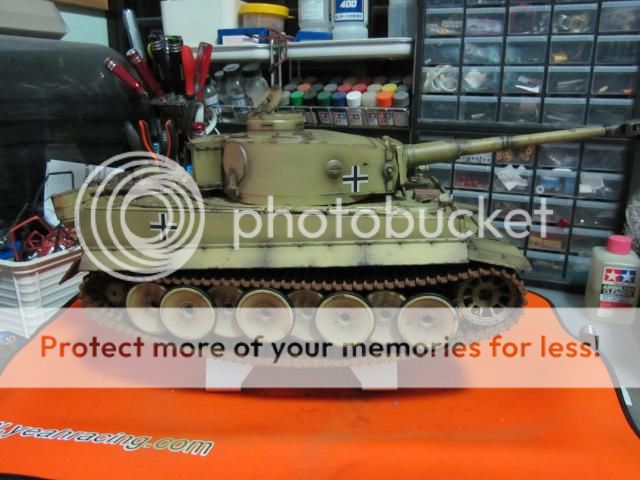

Hope you guys enjoy the transformation and pictures... Peace!!!


The back mud flap was given a bit more stained weathering.


Next step is to wire back all the pieces and assemble the tank...
I did not modify any of the wiring yet... Just put back everything the same I took it apart...


Tedious and boring part of the assembly... Fixing all the 16 wheels for the track...


Surprisingly the assembly is much more faster than taking it apart...
So here is the end product of my Tiger 1 tank...


The barrel which had a factory defect ... (fixed)


Hope you guys enjoy the transformation and pictures... Peace!!!

Zax13- Crawler
- Posts : 345
Join date : 2011-12-22
Location : Sengkang
 Re: Zax's unboxing and project skunkworks of the HL German Tiger I...
Wow! Great weathering.
babyboy- Crawler
- Posts : 721
Join date : 2011-09-28
 Re: Zax's unboxing and project skunkworks of the HL German Tiger I...
Nice work bro!
Love the weathering!!!
Love the weathering!!!
 Re: Zax's unboxing and project skunkworks of the HL German Tiger I...
Really, really nice! Awesome work!
 Re: Zax's unboxing and project skunkworks of the HL German Tiger I...

RTECH- Crawler
- Posts : 2376
Join date : 2011-08-22
Age : 52
Location : Hougang
 Re: Zax's unboxing and project skunkworks of the HL German Tiger I...
Outstanding painting and weathering job bro!

Marpek- Crawler
- Posts : 1675
Join date : 2011-08-22
 Re: Zax's unboxing and project skunkworks of the HL German Tiger I...
Some updates since my last post....
Have been a tiring week for me at work and this is what I did to relax myself....
Did some modification to my Tiger I.
First of all I manage to get hold of Clark TK22 board... If you love tanks and you dont have one of this, go get one... Trust me its worth every penny... thumbs up.
But once you get this board you need to couple it with a good Speakers. Decided to go for the Visaton FRS7.
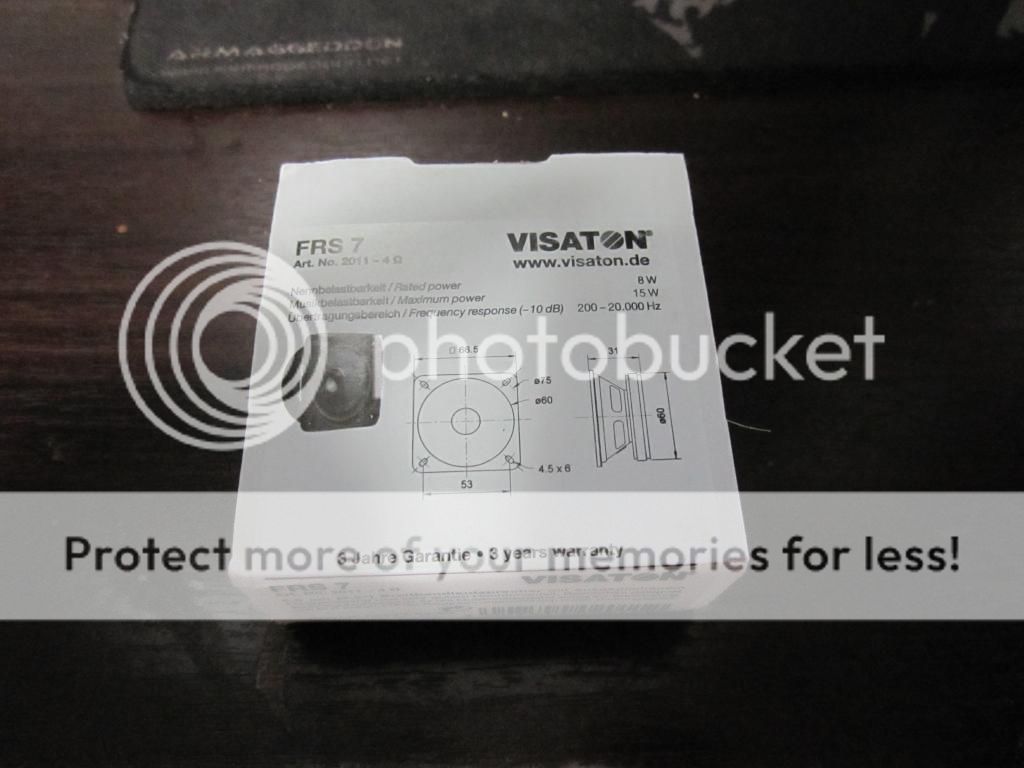
Becoz the TK22 does not come together with a receiver, you will need a good 2.4ghz radio that suits you...
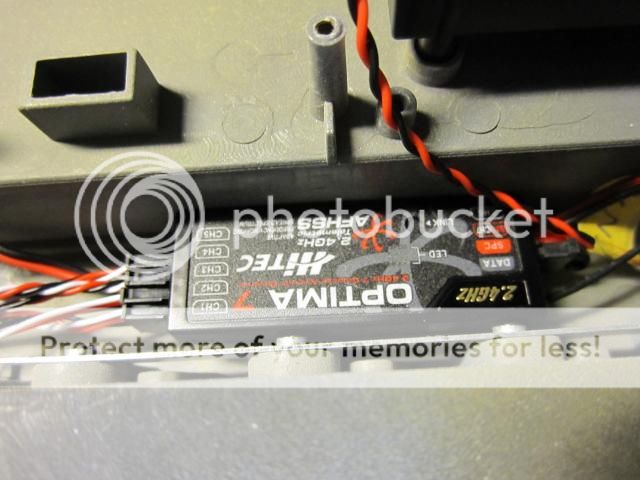
Installed everything and abit of calibration with the controller and Im ready to demonstrate how it sounds....
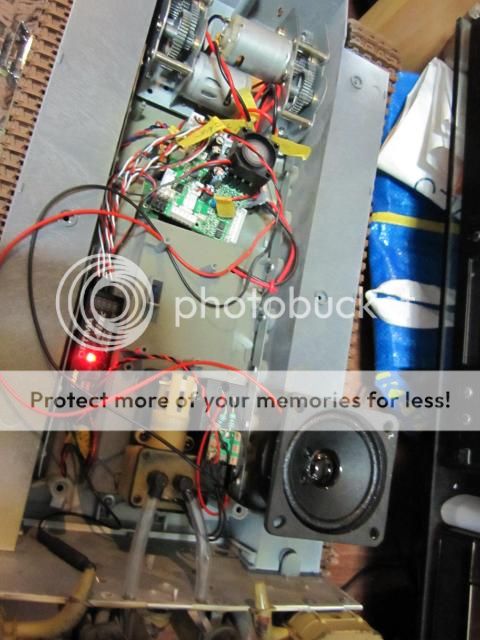
Turn up your volume to witness the sound... (BEWARE OF POISON)
Have been a tiring week for me at work and this is what I did to relax myself....
Did some modification to my Tiger I.
First of all I manage to get hold of Clark TK22 board... If you love tanks and you dont have one of this, go get one... Trust me its worth every penny... thumbs up.
But once you get this board you need to couple it with a good Speakers. Decided to go for the Visaton FRS7.

Becoz the TK22 does not come together with a receiver, you will need a good 2.4ghz radio that suits you...

Installed everything and abit of calibration with the controller and Im ready to demonstrate how it sounds....

Turn up your volume to witness the sound... (BEWARE OF POISON)

Zax13- Crawler
- Posts : 345
Join date : 2011-12-22
Location : Sengkang
 Re: Zax's unboxing and project skunkworks of the HL German Tiger I...
Stay tuned for further modifications....

Zax13- Crawler
- Posts : 345
Join date : 2011-12-22
Location : Sengkang
 Re: Zax's unboxing and project skunkworks of the HL German Tiger I...
Sweet! Need the TK22 board. The chassis recoil is very scale! More please?

babyboy- Crawler
- Posts : 721
Join date : 2011-09-28
 Re: Zax's unboxing and project skunkworks of the HL German Tiger I...
Recoil Barrel Mod.
I didnt want to start from scratch to mod this so I decided to mod Heng Long simple cheapo recoil unit. Bought from Taobao for SG$5. Trim the lower portion of the recoil unit and throw away. Retain the upper half portion if you still wanna use stock barrel elevations. Clark TK22 do have servo elevation function but that requires you to built your own brackets.
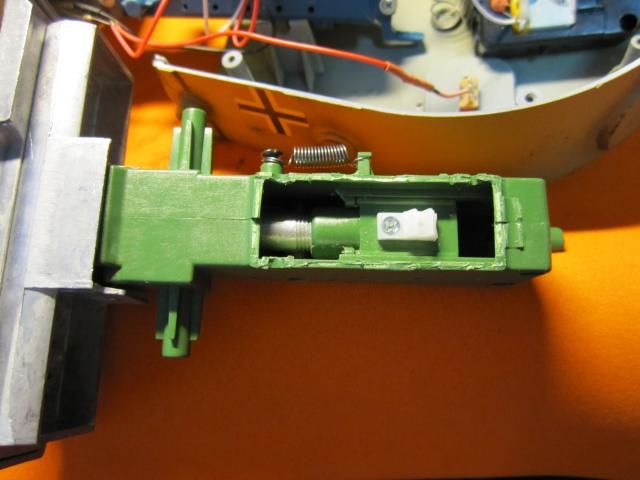
Took out the above white tab in picture and replace with a servo horn as seen below.
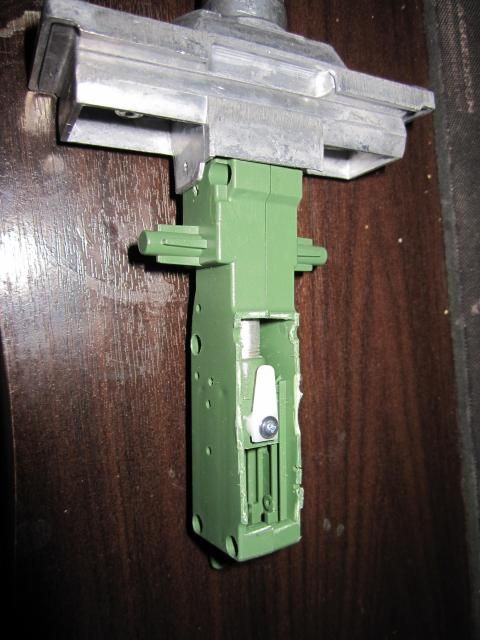
Did a home made l bracket to support a micro servo. You can actually bond the servo directly to the side but that will result in difficulty in removing if the servo kaput...
This design will guarantee easy replacement in case the servo for any reason need to be replaced.
Next is to link the servo horn to the sliding barrel. With the aid of some heli spare I manage to find just the appropriate linkage.
The size or length of the servo horn will depend on how much recoil you want. As Im using the modded Heng Long recoil so Im actually limited to stock travel which is just nice to me actually.
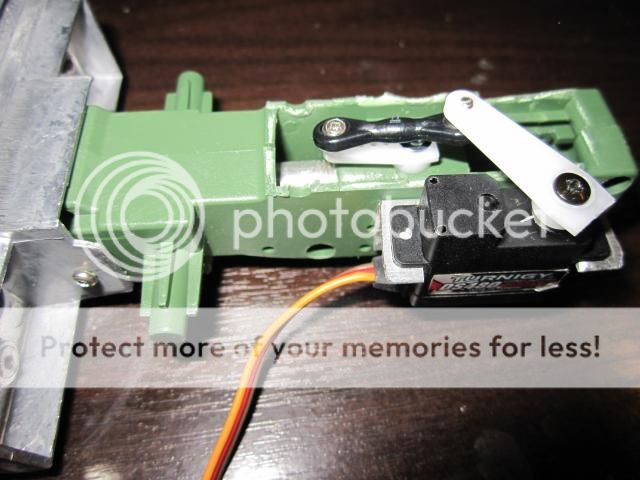
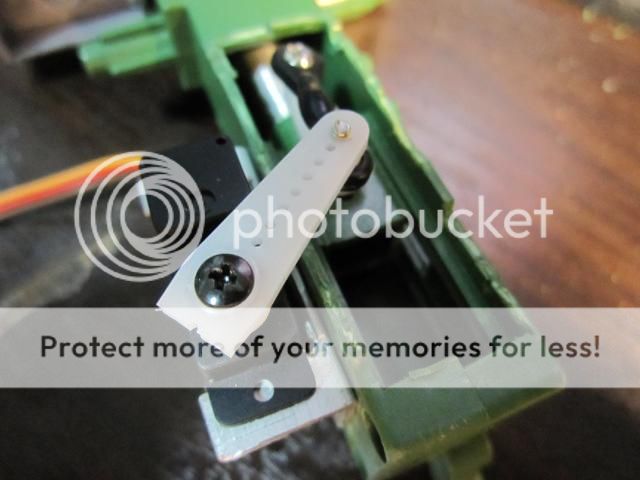
Here is the side by side comparison of the airsoft barrel with my new aluminium barrel with the recoil unit. The aluminium barrel also bought from Taobao at SG$50 one set.
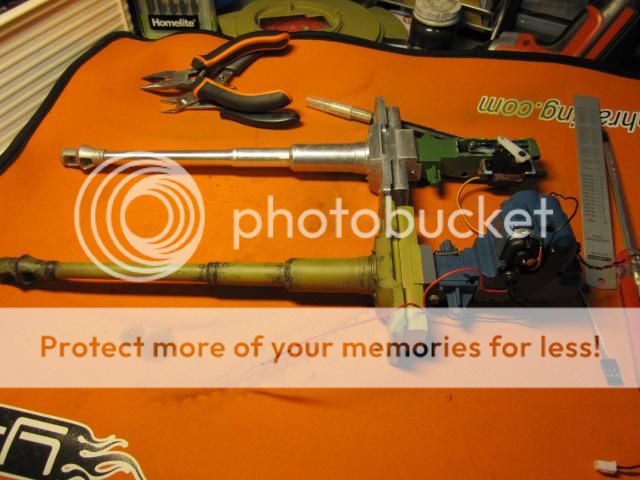
There is alot of trial and error that I did to get the function and recoil to sync and not bind. A little bit of filling with the needle file is needed to get the aluminium barrel to function smoothly.
I filed slightly more than required so as to compensate the paint thickness when start painting. Here is the functioning recoil barrel assembled minus the paint.
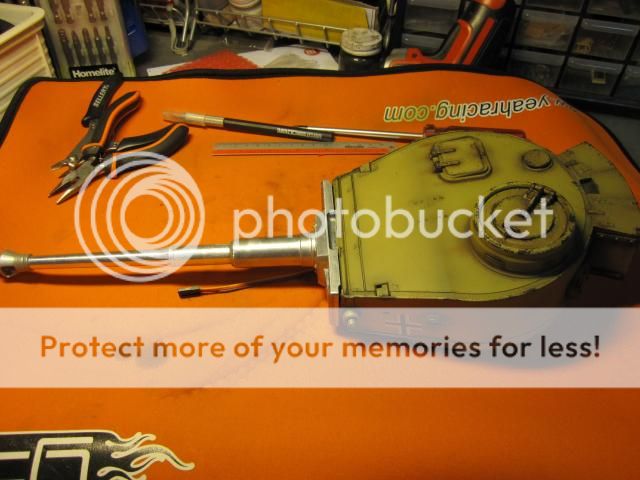
I didnt want to start from scratch to mod this so I decided to mod Heng Long simple cheapo recoil unit. Bought from Taobao for SG$5. Trim the lower portion of the recoil unit and throw away. Retain the upper half portion if you still wanna use stock barrel elevations. Clark TK22 do have servo elevation function but that requires you to built your own brackets.

Took out the above white tab in picture and replace with a servo horn as seen below.

Did a home made l bracket to support a micro servo. You can actually bond the servo directly to the side but that will result in difficulty in removing if the servo kaput...
This design will guarantee easy replacement in case the servo for any reason need to be replaced.
Next is to link the servo horn to the sliding barrel. With the aid of some heli spare I manage to find just the appropriate linkage.
The size or length of the servo horn will depend on how much recoil you want. As Im using the modded Heng Long recoil so Im actually limited to stock travel which is just nice to me actually.


Here is the side by side comparison of the airsoft barrel with my new aluminium barrel with the recoil unit. The aluminium barrel also bought from Taobao at SG$50 one set.

There is alot of trial and error that I did to get the function and recoil to sync and not bind. A little bit of filling with the needle file is needed to get the aluminium barrel to function smoothly.
I filed slightly more than required so as to compensate the paint thickness when start painting. Here is the functioning recoil barrel assembled minus the paint.


Zax13- Crawler
- Posts : 345
Join date : 2011-12-22
Location : Sengkang
 Re: Zax's unboxing and project skunkworks of the HL German Tiger I...
Fierce la... vid pls...
now you taobao expert liao...I even dunno how to order from there man...
now you taobao expert liao...I even dunno how to order from there man...

Marpek- Crawler
- Posts : 1675
Join date : 2011-08-22
 Re: Zax's unboxing and project skunkworks of the HL German Tiger I...
Interesting that your tank can be mod until like this. Can't wait to see your fully mod. tank.

RTECH- Crawler
- Posts : 2376
Join date : 2011-08-22
Age : 52
Location : Hougang
 Re: Zax's unboxing and project skunkworks of the HL German Tiger I...
Magnificent! You are putting some serious effort in this thing 


 Re: Zax's unboxing and project skunkworks of the HL German Tiger I...
Kena poison by Boo...Marpek wrote:Fierce la... vid pls...
now you taobao expert liao...I even dunno how to order from there man...
Now become master of Taobao liow... But I must say that the items there really dirt cheap.
Take for instant the smoke unit... rotor selling $20 and there selling $5
The High tension flasher also $5
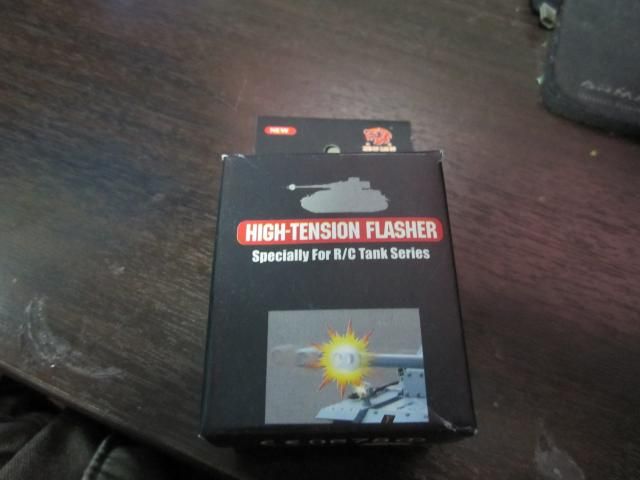
My Clark TK22 cost me $110 about the same price as the one in Clark webby.

Zax13- Crawler
- Posts : 345
Join date : 2011-12-22
Location : Sengkang
 Re: Zax's unboxing and project skunkworks of the HL German Tiger I...
Final positioning of all the things in the turret.
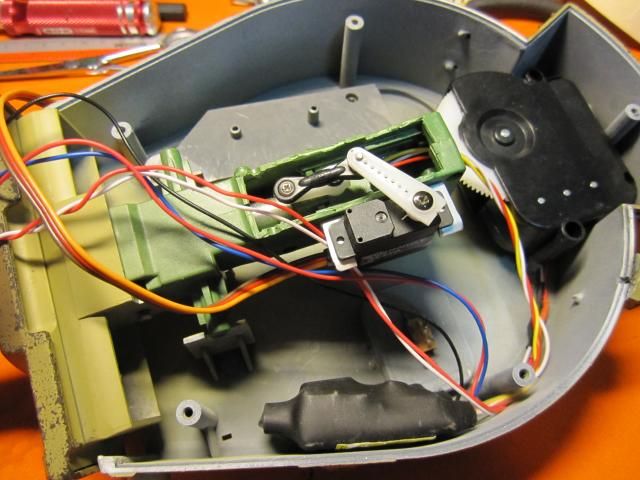
Feed the high tension flash thru the barrel
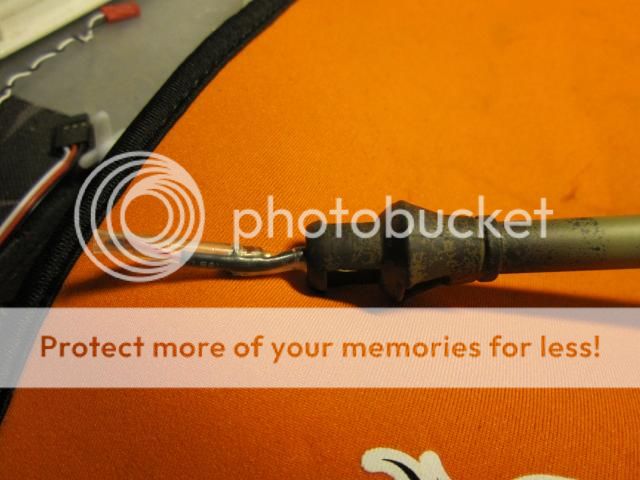
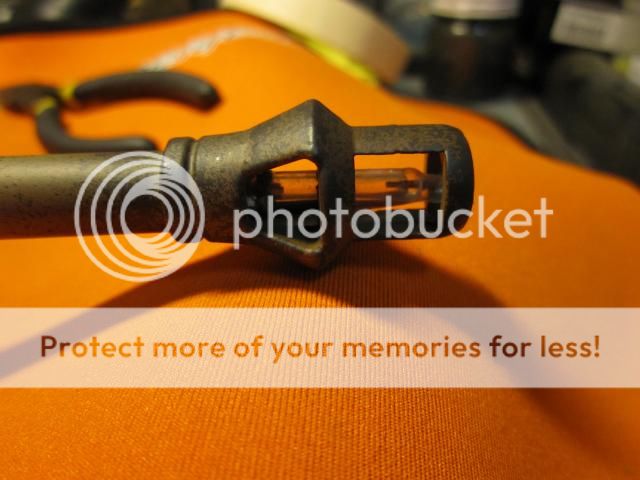
Done the Barrel painting to match the turret.
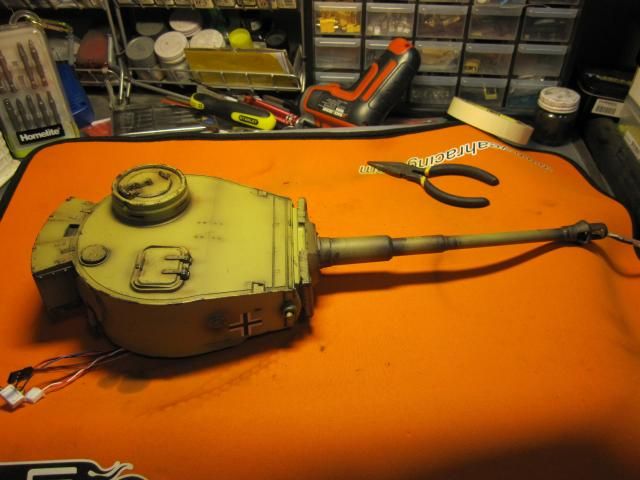
Another View of the finish turret.
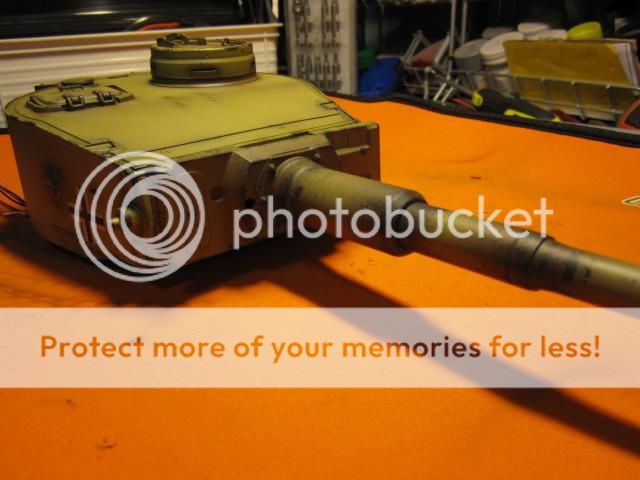
I did do any house keeping inside as I know Im gonna open the hull again.
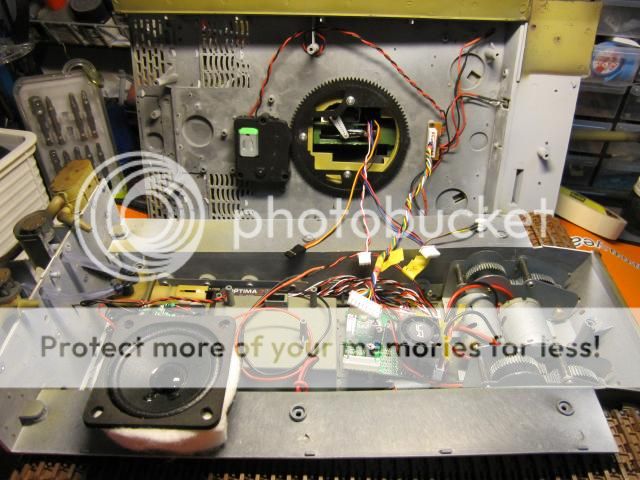
Here is the end product again.

Video of full testing of the fully installed Tiger I.
The barrel recoil looks abit not smooth as I think its due to the servo. Might need to change to a better servo.

Feed the high tension flash thru the barrel


Done the Barrel painting to match the turret.

Another View of the finish turret.

I did do any house keeping inside as I know Im gonna open the hull again.

Here is the end product again.

Video of full testing of the fully installed Tiger I.
The barrel recoil looks abit not smooth as I think its due to the servo. Might need to change to a better servo.

Zax13- Crawler
- Posts : 345
Join date : 2011-12-22
Location : Sengkang
 Re: Zax's unboxing and project skunkworks of the HL German Tiger I...
Think u got the poison into many bros' blood stream!!!


 Re: Zax's unboxing and project skunkworks of the HL German Tiger I...
The flash thing is cool !

RTECH- Crawler
- Posts : 2376
Join date : 2011-08-22
Age : 52
Location : Hougang
 Re: Zax's unboxing and project skunkworks of the HL German Tiger I...
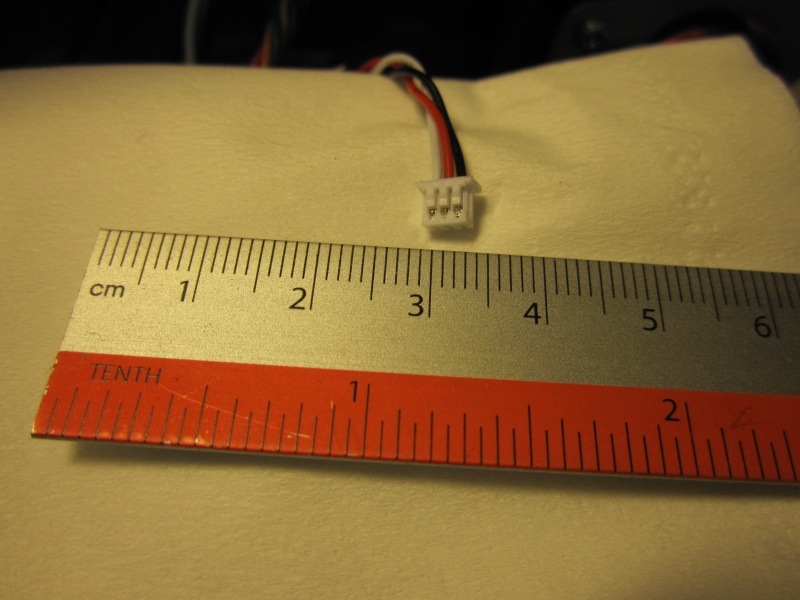
Anybody knows what type of connector is this? Need to get a 2 pin type.


Zax13- Crawler
- Posts : 345
Join date : 2011-12-22
Location : Sengkang
 Re: Zax's unboxing and project skunkworks of the HL German Tiger I...
Hmmm... The pin pitch seems to be 1mm precisely. Could be a JST SHR series:Zax13 wrote:Anybody knows what type of connector is this? Need to get a 2 pin type.
http://sg.element14.com/jst-japan-solderless-terminals/shr-03v-s-b/housing-crimp-receptacle-1mm-3way/dp/1679109
Have a look at the PDF on that page, it has exact measurements of the connector housings.
Or spend a lunch hour at Sim Lim Tower, they are likely to have it there.
If you can, get one already pre-crimped with wire. Those tiny connectors are extremely hard to crimp. I have done JST 2mm pitch, and that is already extremely difficult.
 Re: Zax's unboxing and project skunkworks of the HL German Tiger I...
Thanks Laneboysrc... I think i have manage to find the connector type. Its a molex 1.25mm 2 pin.laneboysrc wrote:Hmmm... The pin pitch seems to be 1mm precisely. Could be a JST SHR series:Zax13 wrote:Anybody knows what type of connector is this? Need to get a 2 pin type.
http://sg.element14.com/jst-japan-solderless-terminals/shr-03v-s-b/housing-crimp-receptacle-1mm-3way/dp/1679109
Have a look at the PDF on that page, it has exact measurements of the connector housings.
Or spend a lunch hour at Sim Lim Tower, they are likely to have it there.
If you can, get one already pre-crimped with wire. Those tiny connectors are extremely hard to crimp. I have done JST 2mm pitch, and that is already extremely difficult.

for those who intending to upgrade to TK22 you might need to have this connector to connect your IR Led. If not you are a sitting duck...

Zax13- Crawler
- Posts : 345
Join date : 2011-12-22
Location : Sengkang
 Re: Zax's unboxing and project skunkworks of the HL German Tiger I...
thanks bro Zax13 and bro LaneBoysRC for saving us a few steps in future during the upgrade!!
 Re: Zax's unboxing and project skunkworks of the HL German Tiger I...
Testing my Heng Long IR receiver with the recommended Sony tv remote.

Zax13- Crawler
- Posts : 345
Join date : 2011-12-22
Location : Sengkang
Page 2 of 3 •  1, 2, 3
 Similar topics
» Boolean21's Heng Long German Tiger 1 - 1/16 scale
» [HOW-TO VIDEO] How to convert Heng Long German Tiger 1 pro airsoft RC tank for Infrared battle: IR Conversion
» [VIDEO] Heng Long German Tiger Leopard 2A6 Panzer Bulldog ZTZ Sherman RC Tank adventures Segar Track Part 1
» [RC TANK VIDEO] Heng Long 3818-1 German Tiger 1 Tank with Clark Model TK 22 sound unit
» [TANK TRAIL VIDEO] Heng Long German Tiger Leopard 2A6 Panzer Bulldog ZTZ Sherman RC Tank adventures Segar Track Part 1
Page 2 of 3
Permissions in this forum:
You cannot reply to topics in this forum

