
Search
Who is online?
In total there are 5 users online :: 0 Registered, 0 Hidden and 5 Guests None
Most users ever online was 301 on Thu 21 Oct 2021 - 11:24
Latest topics
» RC Submarine: Russian Akula Class by redboat219 Tue 27 Sep 2022 - 11:43
» Land Rover Defender D90 photos and details only (picture intensive!)
by babyboy Fri 25 Jun 2021 - 16:39
» [Offroad Bashing and Rally] Offroad Bashing and Rally at Tampines Track 12 Jan 2020 - 0900hrs
by boolean21 Sat 11 Jan 2020 - 10:15
» [Scale Trail] Woodgrove Ave - Sunday 20 Oct 2019 0900hrs
by boolean21 Sat 19 Oct 2019 - 16:31
» vHOBBY RC videos
by CraftRC Fri 21 Jun 2019 - 21:32
» Suzuki Samurai 3D Printted project
by CraftRC Sat 4 May 2019 - 18:39
» WTS : Redcat Gen 7 Pro
by staypuft Mon 7 Jan 2019 - 11:31
» Hello all! Dan here
by csd8888 Fri 5 Oct 2018 - 8:27
» [Offroad Trails] Offroading at Tampines Quarry 16 Sep 2018 - 0900hrs
by boolean21 Sat 15 Sep 2018 - 18:41
» [Scale Trail] Woodgrove Ave - Sunday 12 Aug 2018 0900hrs
by boolean21 Sat 11 Aug 2018 - 22:51
» [Trail and Bash!] Woodgrove Ave - Sunday 22 Jul 2018 0900hrs
by boolean21 Sat 21 Jul 2018 - 19:39
» [Scale Trail] Woodgrove Ave - Sunday 01 Jul 2018 0900hrs
by boolean21 Sat 30 Jun 2018 - 20:39
» wts hobbywing esc + motor
by kelvintan_hc Thu 28 Jun 2018 - 15:36
» Axial roll cage crash
by CraftRC Fri 1 Jun 2018 - 20:16
» Jeep cherokee XJ crawling
by CraftRC Sat 26 May 2018 - 21:54
» Jeep cherokee XJ crawling
by CraftRC Sat 26 May 2018 - 21:54
» Extreme Rock Crawler Axial Wraith
by CraftRC Tue 8 May 2018 - 17:35
» [Scale Trail] Woodgrove Ave - Sunday 06 May 2018 0900hrs
by boolean21 Sat 5 May 2018 - 17:14
» Cab Land Rover Defender
by CraftRC Fri 4 May 2018 - 17:41
» Cab Land Rover Defender
by CraftRC Fri 4 May 2018 - 17:41
Most active topic starters
| boolean21 | ||||
| RTECH | ||||
| gionata78 | ||||
| laneboysrc | ||||
| oceanic | ||||
| Marpek | ||||
| babyboy | ||||
| Wrigleys | ||||
| ShaiAX55 | ||||
| Holdencars |
LANE Boys RC's Robbe FLF 1618 Airport Firetruck
+3
boolean21
Liew
laneboysrc
7 posters
Page 1 of 1
 LANE Boys RC's Robbe FLF 1618 Airport Firetruck
One day we were looking at the offers on eBay and found an old kit from the German manufacturer Robbe. A week later the auction ended and we had the pleasure to win it. Another two weeks went by until we could hold our latest wheeled toy in our hands:
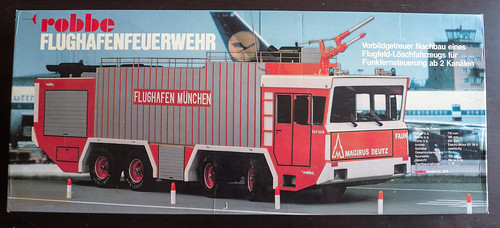
This is a Robbe Flughafenfeuerwehr (airport firetruck), kit no. 3625. It is modeled after a Faun FLF 1618, which uses the fire extinguishing technology of Magirus Deutz. The original truck was stationed in Munich, Germany. Only two of the original vehicles were ever made.
So far we have not been able to find out how old this kit actually is. Apparently it is from the mid to late 80ies, so roughly 30 years old. The documentation does not contain any date unfortunately, and the Robbe website does not list the truck at all, not even in their archive section.
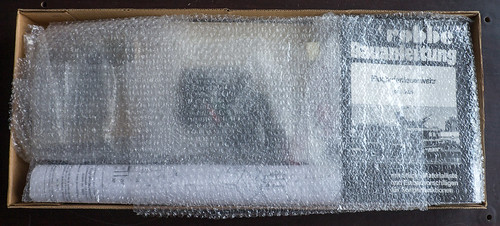
The kit box has the dimensions of a small flat-pack furniture. The final model will be 71cm long, 18.5cm wide and 25cm tall. It is 1:15 scale -- the original truck was a massive 10.8m long!
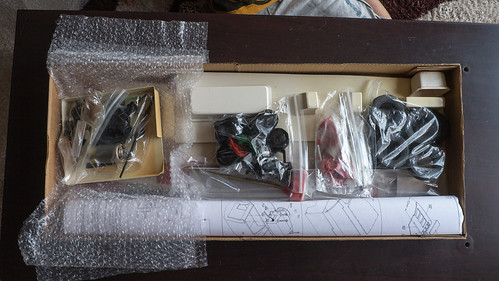
On the top where all the hardware pieces, wheels, water cannon parts, etc.
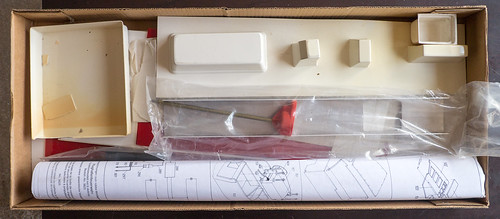
The kit has a few vacuum-formed parts; the tub on the left is the roof of the cabin, and the long piece contains a battery box, a box for the exhaust on the roof, a console for the cabin, and the mount for the blue light in the rear of the truck. The separate piece on the top left is for the receiver.
The main chassis is a simple piece of U-shaped aluminum. A hole for the motor and gearbox is already cut out, and holes for the suspension are already drilled.
The orange piece with the brass rod is the drive shaft and gearbox. It is actually from a boat -- Robbe was quite well known for their highly detailed model boats.
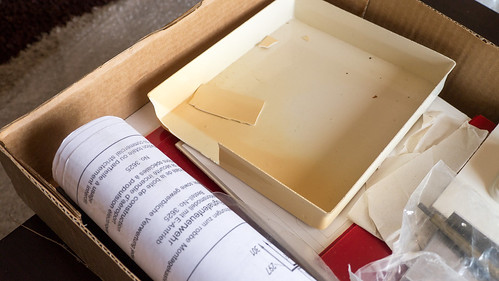
Even though the kit was exceptionally well packaged by the seller, the roof got damaged in transport. But it looks like it can be fixed.

The kit is very old-school. The parts are flat ABS sheets, and you get a bunch of tubes that you have to cut to length for support and joints. Now where did we put that miter saw ...
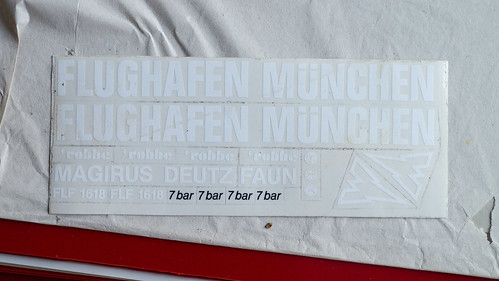
The decals were unprotected and got a bit dirty through the years. But they are very simple and easy to replicate. Notice the fine details on the dials for the dashboard.
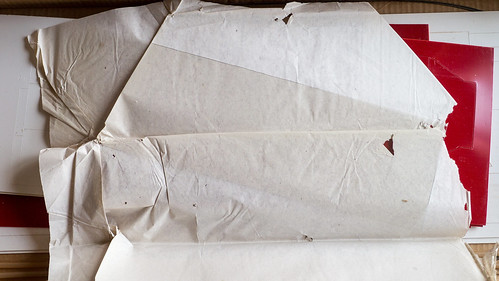
This large sheet of thin, flexible plastic will be used to cut windows and light covers.
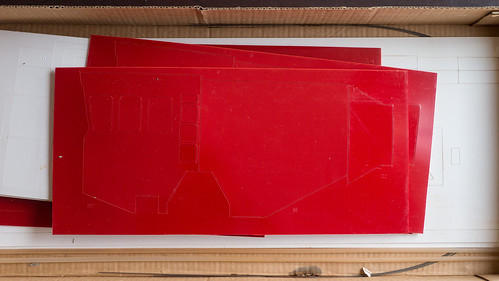
The pieces of the truck are ABS sheets, about 2mm thick, that are pre-cut. The sheets have warped over time and may need some support and straightening.

Close-up view of a stamped part
Most pieces have numbers stamped on them so that they can be easily identified in the manual and plans.
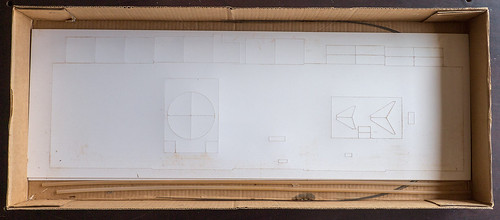
This is the base plate of the truck. The cut-out on the left is for the water tank. The one on the right for the motor and gearbox.
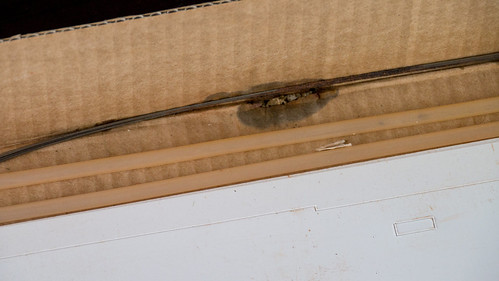
At some point in time a bit of fluid got into the box and corroded the steel rods. No big deal, easy to replace. Notice also all the dirt that collected on the ABS sheets. Unfortunately it is not possible to share the awesome vintage smell of this kit!
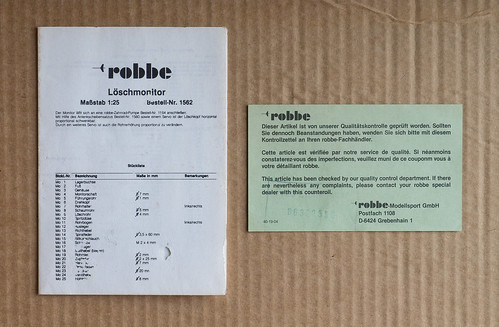
On the bottom of the box was a quality control sheet and instructions for the water cannon.
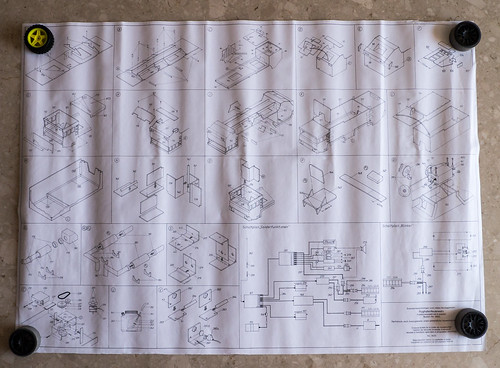
The kit contained two large sheets of plans. This first one shows the steps of assembly.
Very interesting are the schematics at the bottom-right. The larger one is for the overall wiring of the vehicle, including diesel sound unit. The smaller one is for working indicators. Two micro-switches are operated by cams that are directly mounted onto the servo horn. Very simple!
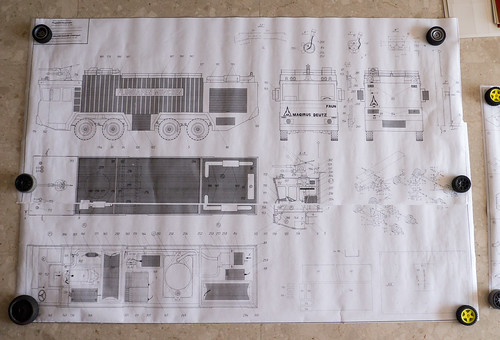
The large plan is replicated onto two overlapping sheets of paper. It shows the truck in 1:1 scale, as well as cut-through diagrams. There is also a small section devoted to the drive train and chassis.
Lets have a closer look at all plastic bags containing the various hardware:

The motor looks like a standard size silver-can. It has the pinion pressed on, which will make it a challenge should the motor need replacement. The motor has "Made in Hong Kong" stamped on it!
There are eight leaf springs, which are quite stiff. The rear ones are different than the other six. The axle housing is prepared to accept both input and output shafts and gears to drive multiple axles. The gears are plastic and are known to break, especially when old.
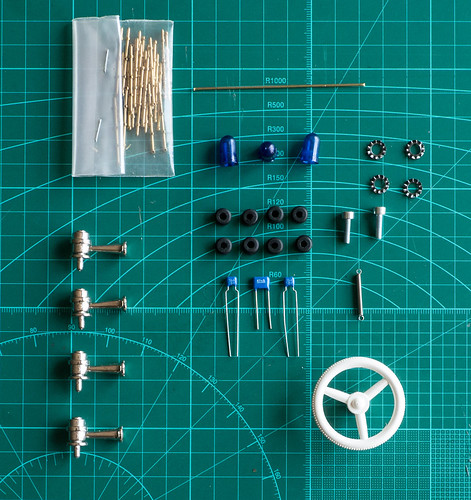
This bag contained the four horns, three blue warning lights, the steering wheel, and the vertical bars that will be used to make the handrail on the roof of the truck. These handrail pieces originate from a boat and need to be trimmed for using on the firetruck.
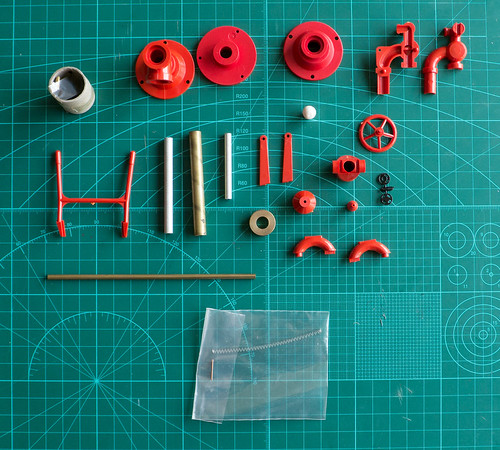
Here are the pieces of the water cannon. The small carton tube on the left top is sealed with sticky tape and holds small screws and other hardware. The water cannon can be turned as well as raised and lowered remotely.
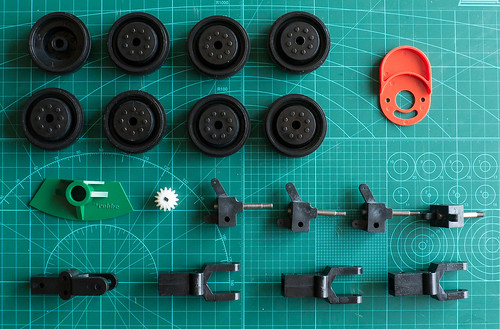
The rims are very simple, but they have simulated bolt detailing. The green piece will hold the gearbox. The front axles are already molded into the plastic. The white gear goes into the differential.
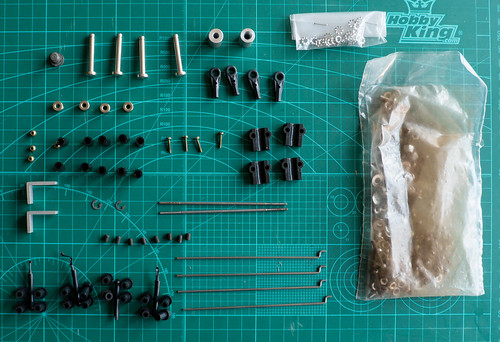
The plastic bag on the right contains a lot of screws, washers and nuts. We are not sure whether the brown haze is due to rust or dried grease, but we suspect the later.
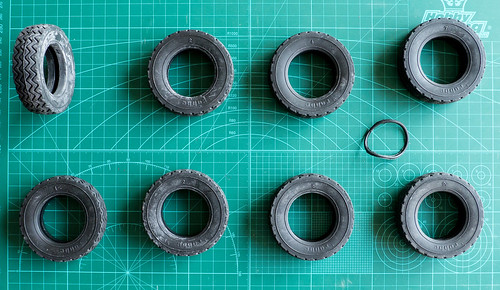
The rubber still seems to be in good condition. It is very hard; I would say even harder than the stock Tamiya CC01 tires.
Notice that they have numbers stamped into them. We have two "1", two "2", and one each "4, "5, "7", "9". I assume those numbers indicate which part of a particular mold they came out.

The main chassis is a U-shaped piece of aluminum. The cut-out is where the motor and gearbox will sit in. There are holes in the side where the leaf springs will mount to.
The gearbox and drive shaft on the bottom originate from a boat. The shaft is running very smoothly in some kind of bearings.
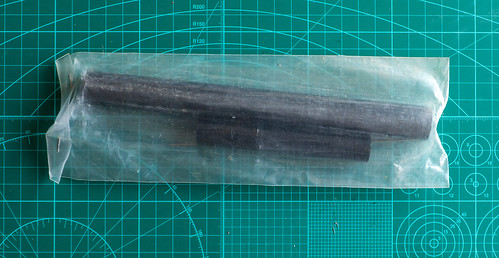
These tubes made from ABS will be used to make the exhausts.
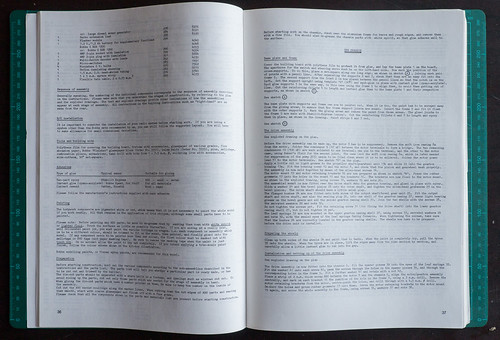
The instructions are in a nice A4 sized book that contains German, French, English, Dutch, Italian and Spanish. This photo shows the English section, which was clearly typed on a typewriter! No computers back then. The instructions do not contain any drawings, they always refer to the plans.
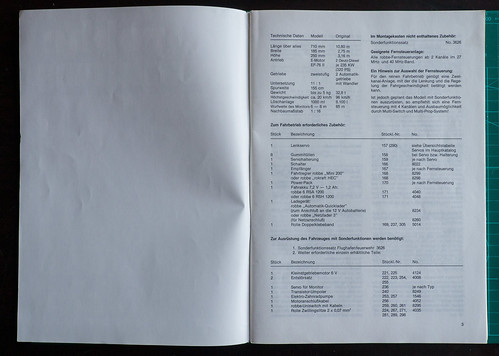
The German section seems like it was laid out on a computer already back them, or at least a professional typesetting. The first paragraph has comparison of the model and the original.
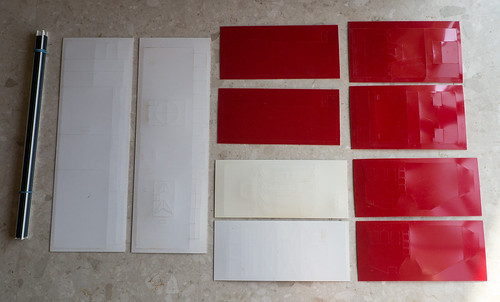
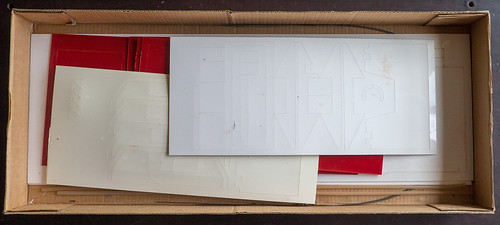
Here is an overview of all the plastic sheets that come in the kit. Quite a bunch of ABS planks!
Stay tuned, we will post updates throughout this challenging build!

This is a Robbe Flughafenfeuerwehr (airport firetruck), kit no. 3625. It is modeled after a Faun FLF 1618, which uses the fire extinguishing technology of Magirus Deutz. The original truck was stationed in Munich, Germany. Only two of the original vehicles were ever made.
So far we have not been able to find out how old this kit actually is. Apparently it is from the mid to late 80ies, so roughly 30 years old. The documentation does not contain any date unfortunately, and the Robbe website does not list the truck at all, not even in their archive section.

The kit box has the dimensions of a small flat-pack furniture. The final model will be 71cm long, 18.5cm wide and 25cm tall. It is 1:15 scale -- the original truck was a massive 10.8m long!

On the top where all the hardware pieces, wheels, water cannon parts, etc.

The kit has a few vacuum-formed parts; the tub on the left is the roof of the cabin, and the long piece contains a battery box, a box for the exhaust on the roof, a console for the cabin, and the mount for the blue light in the rear of the truck. The separate piece on the top left is for the receiver.
The main chassis is a simple piece of U-shaped aluminum. A hole for the motor and gearbox is already cut out, and holes for the suspension are already drilled.
The orange piece with the brass rod is the drive shaft and gearbox. It is actually from a boat -- Robbe was quite well known for their highly detailed model boats.

Even though the kit was exceptionally well packaged by the seller, the roof got damaged in transport. But it looks like it can be fixed.

The kit is very old-school. The parts are flat ABS sheets, and you get a bunch of tubes that you have to cut to length for support and joints. Now where did we put that miter saw ...

The decals were unprotected and got a bit dirty through the years. But they are very simple and easy to replicate. Notice the fine details on the dials for the dashboard.

This large sheet of thin, flexible plastic will be used to cut windows and light covers.

The pieces of the truck are ABS sheets, about 2mm thick, that are pre-cut. The sheets have warped over time and may need some support and straightening.

Close-up view of a stamped part

Most pieces have numbers stamped on them so that they can be easily identified in the manual and plans.

This is the base plate of the truck. The cut-out on the left is for the water tank. The one on the right for the motor and gearbox.

At some point in time a bit of fluid got into the box and corroded the steel rods. No big deal, easy to replace. Notice also all the dirt that collected on the ABS sheets. Unfortunately it is not possible to share the awesome vintage smell of this kit!

On the bottom of the box was a quality control sheet and instructions for the water cannon.

The kit contained two large sheets of plans. This first one shows the steps of assembly.
Very interesting are the schematics at the bottom-right. The larger one is for the overall wiring of the vehicle, including diesel sound unit. The smaller one is for working indicators. Two micro-switches are operated by cams that are directly mounted onto the servo horn. Very simple!

The large plan is replicated onto two overlapping sheets of paper. It shows the truck in 1:1 scale, as well as cut-through diagrams. There is also a small section devoted to the drive train and chassis.
Lets have a closer look at all plastic bags containing the various hardware:

The motor looks like a standard size silver-can. It has the pinion pressed on, which will make it a challenge should the motor need replacement. The motor has "Made in Hong Kong" stamped on it!
There are eight leaf springs, which are quite stiff. The rear ones are different than the other six. The axle housing is prepared to accept both input and output shafts and gears to drive multiple axles. The gears are plastic and are known to break, especially when old.

This bag contained the four horns, three blue warning lights, the steering wheel, and the vertical bars that will be used to make the handrail on the roof of the truck. These handrail pieces originate from a boat and need to be trimmed for using on the firetruck.

Here are the pieces of the water cannon. The small carton tube on the left top is sealed with sticky tape and holds small screws and other hardware. The water cannon can be turned as well as raised and lowered remotely.

The rims are very simple, but they have simulated bolt detailing. The green piece will hold the gearbox. The front axles are already molded into the plastic. The white gear goes into the differential.

The plastic bag on the right contains a lot of screws, washers and nuts. We are not sure whether the brown haze is due to rust or dried grease, but we suspect the later.

The rubber still seems to be in good condition. It is very hard; I would say even harder than the stock Tamiya CC01 tires.
Notice that they have numbers stamped into them. We have two "1", two "2", and one each "4, "5, "7", "9". I assume those numbers indicate which part of a particular mold they came out.

The main chassis is a U-shaped piece of aluminum. The cut-out is where the motor and gearbox will sit in. There are holes in the side where the leaf springs will mount to.
The gearbox and drive shaft on the bottom originate from a boat. The shaft is running very smoothly in some kind of bearings.

These tubes made from ABS will be used to make the exhausts.

The instructions are in a nice A4 sized book that contains German, French, English, Dutch, Italian and Spanish. This photo shows the English section, which was clearly typed on a typewriter! No computers back then. The instructions do not contain any drawings, they always refer to the plans.

The German section seems like it was laid out on a computer already back them, or at least a professional typesetting. The first paragraph has comparison of the model and the original.

Here is an overview of all the plastic sheets that come in the kit. Quite a bunch of ABS planks!
Stay tuned, we will post updates throughout this challenging build!
 Re: LANE Boys RC's Robbe FLF 1618 Airport Firetruck
Forgot... The look on the young man's face when he saw the plans is priceless:


Liew- Crawler
- Posts : 580
Join date : 2011-08-23
 Re: LANE Boys RC's Robbe FLF 1618 Airport Firetruck
What a vintage and it is not even built.
dragonl- Crawler
- Posts : 12
Join date : 2014-02-15
 Re: LANE Boys RC's Robbe FLF 1618 Airport Firetruck
Unbelievable!!! its the kind of kit and scale that every kid dreams of!!! Cant wait to see the end results!!!
wyetuck88- Crawler
- Posts : 311
Join date : 2012-05-26
 Re: LANE Boys RC's Robbe FLF 1618 Airport Firetruck
Nice Kit you have there... I always love nostalgic kits. 
Is that the built manual or a story book...
Is that the built manual or a story book...

Zax13- Crawler
- Posts : 345
Join date : 2011-12-22
Location : Sengkang
 Re: LANE Boys RC's Robbe FLF 1618 Airport Firetruck
Awesome! Can't wait to see the finished kit.
babyboy- Crawler
- Posts : 721
Join date : 2011-09-28
 Similar topics
» My secondM - LANE Boys RC M06
» LANE Boys RC's first 1:1 scale build: the CC-01 Cat
» My thirdM - LANE Boys RC HPI Cup Racer
» [PHOTOS] LANE Boys RC's Sawback
» LANE Boys RC's Tamiya XR311 build
» LANE Boys RC's first 1:1 scale build: the CC-01 Cat
» My thirdM - LANE Boys RC HPI Cup Racer
» [PHOTOS] LANE Boys RC's Sawback
» LANE Boys RC's Tamiya XR311 build
Page 1 of 1
Permissions in this forum:
You cannot reply to topics in this forum

